Azure AI Foundry
Azure AI Foundry agents are supported by Zenity AI Detection & Response. Below are the technical steps required to set up permissions and network access for Zenity into your organization AI Foundry resources.
Prerequisites
- An existing Microsoft tenant (initially Power Platform)<>Zenity integration based on one of the following (click and follow in case no integration exists):
- Service Principal
- Managed App Consent
Step-by-step guide
Step 1: Create Azure custom IAM role
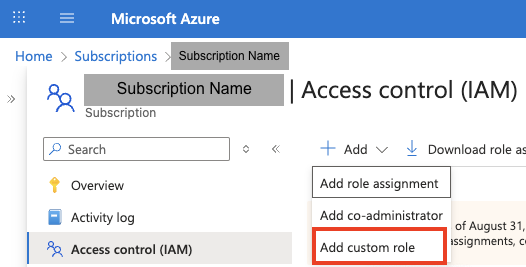
- In case you wish to grant permissions by subscription, go to the subscriptions page in Azure portal. Otherwise (permissions by management group), go to the management groups page.
- Click “Access control (IAM)” -> Add -> Add custom role.
- Name your role and click Next.
- In the Permissions tab, click “add permissions” and add the following:
| Permission | Purpose |
|---|---|
| Microsoft.CognitiveServices/accounts/read | Discover new AI Foundry resources automatically |
| Microsoft.CognitiveServices/accounts/AIServices/agents/read | Fetch runtime interaction data from AI Foundry agents such as threads, runs, messages etc. |
| Microsoft.CognitiveServices/accounts/AIServices/connections/read | Fetch AI Foundry connections which agents use to authenticate |
- Select the “Assignable scopes” tab and confirm the scope of the role’s permissions: subscription(s) and/or management group(s).
- Click the “Review + create” tab, Review and click “Create”.
Step 2: connect the newly created role with the Zenity principal
This step grants the service principal or multi-tenant application principal used by Zenity the permissions into AI Foundry as defined in the role.
- In case you wish to grant permissions by subscription, go to the subscriptions page in Azure portal. Otherwise (permissions by management group), go to the management groups page.
- Click “Access control (IAM)” -> Add -> Add role assignment.
- Insert the newly created custom role name, and select it.
- Select the “Members” tab:
- Set “Assignment access to” select “User, group or service principal” option.
- Click “+ Select members” and add the name of the principal used in the Microsoft\<>Zenity integration. (this can be found in the Entra Admin Center.
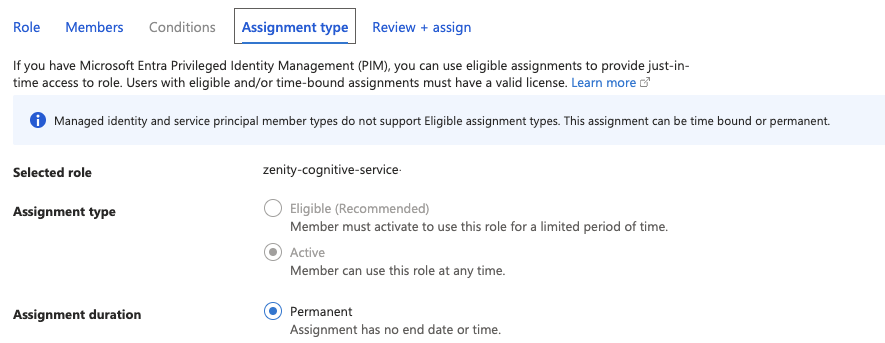
- Select the “Assignment type” tab, choose the options as shown below:
- “Selected role” \=> your choice of custom role
- "Assignment type” \=> on “Active”
- “Assignment duration” \=> on “Permanent”
- Select the “Review + assign” tab, review your changes and click “Review + assign”.
Note: if permissions are granted by subscription, make sure to repeat these steps for each one.
Step 3: Set Network Access
In addition to permissions, network access must be allowed, in order for Zenity to reach your AI Foundry resources. Networking can be managed as granularly as by the individual foundry resource, so make sure to allow access for Zentity into all foundry resources.
Note: by default ingress networking is allowed from all networks, however in most cases it is then manually restricted, therefore make sure access is allowed for Zenity.
Option 1: manual setting
- Go to the AI foundries page under AI Foundry portal.
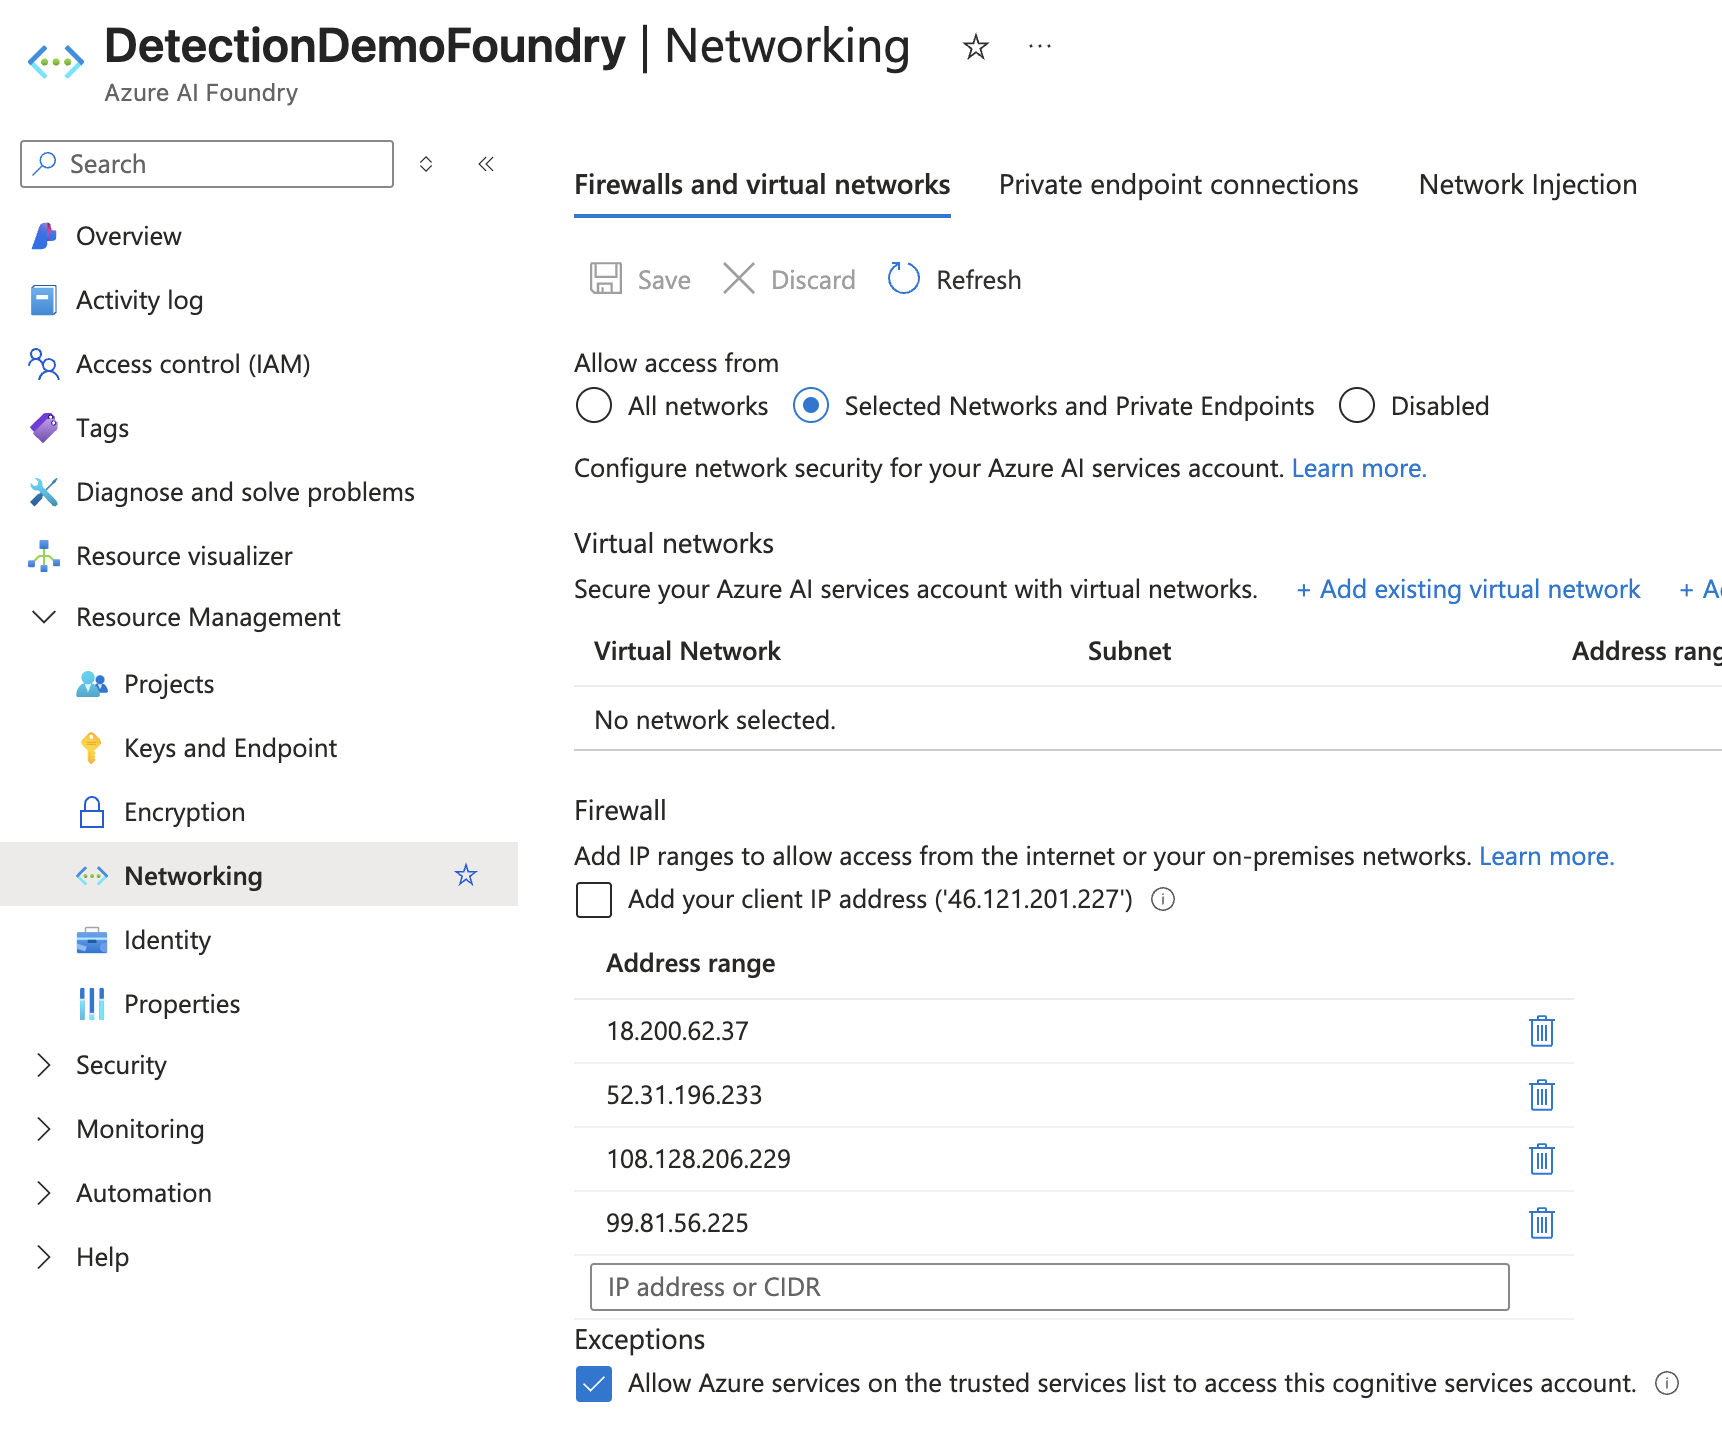
- Click on each foundry, then click Networking, then click the “Firewalls and virtual networks” tab.
- If “All networks” is selected, Zenity has access and you can move to the next resource.
- If the setting is Disabled or Selected networks and private endpoints, update as follows:
- Set “Firewall” to “Selected networks and private endpoints”.
- Under “Address range”, add the following Zenity IP ranges:
- 18.200.62.37
- 52.31.196.233
- 108.128.206.229
- 99.81.56.225
- Ensure “Allow Azure services on the trusted services list to access this account” is checked.