Zenity Integration Guide for OpenAI ChatGPT Enterprise
This guide walks you through integrating Zenity with OpenAI’s ChatGPT Enterprise using the Compliance API.
Overview
Zenity leverages the Compliance API to analyze activity within your ChatGPT Enterprise workspace..
Prerequisites
Before starting the integration please complete the following prerequisites.
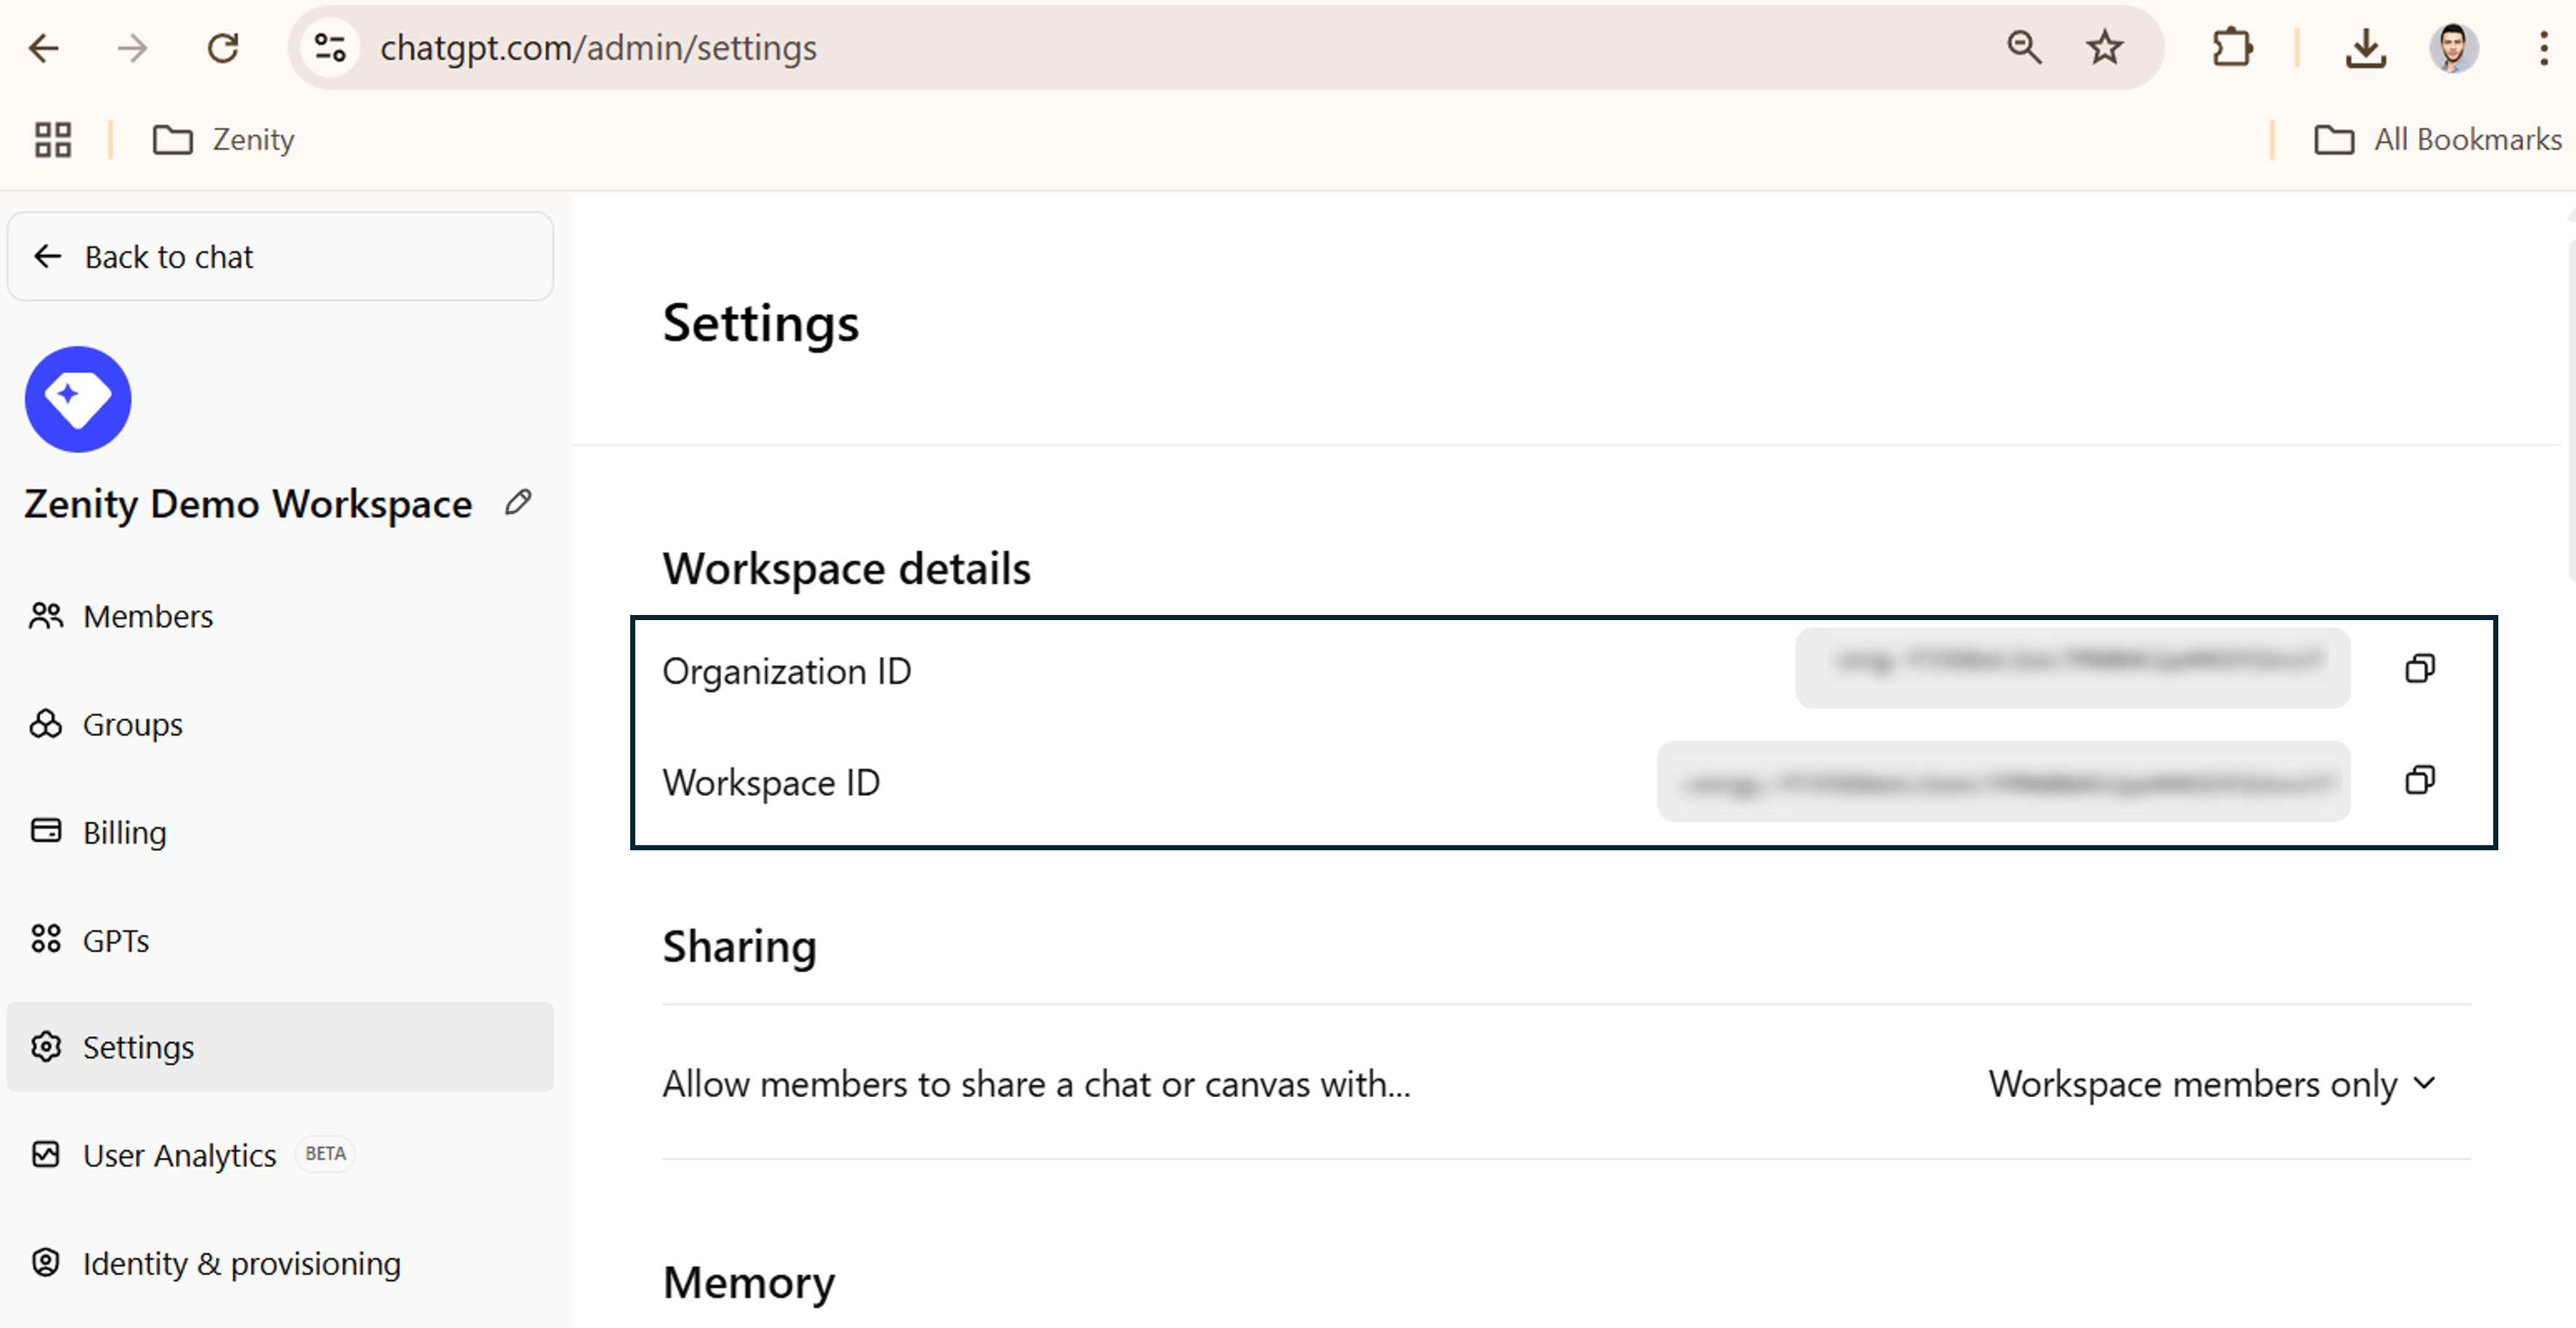
1. Copy the Workspace ID and Organization ID
1. In order to find both ‘Organization ID’ and ‘Workspace ID’ follow the below steps
- As a Workspace Owner go to the Workspace settings section, here. (ChatGPT Settings → Manage Workspace → Settings) and copy both of them to be used later on.
Step 1: Set Up Access to OpenAI Compliance API
To allow Zenity to securely access your workspace data, follow the steps below to generate and provision a valid API key with the required scopes.
1. Generate a New API Key
Note: Zenity supports both user API keys and service account API keys for authenticating with the OpenAI Compliance API.
1. Navigate to the OpenAI API Platform Portal to create the API key (https://platform.openai.com/api-keys).
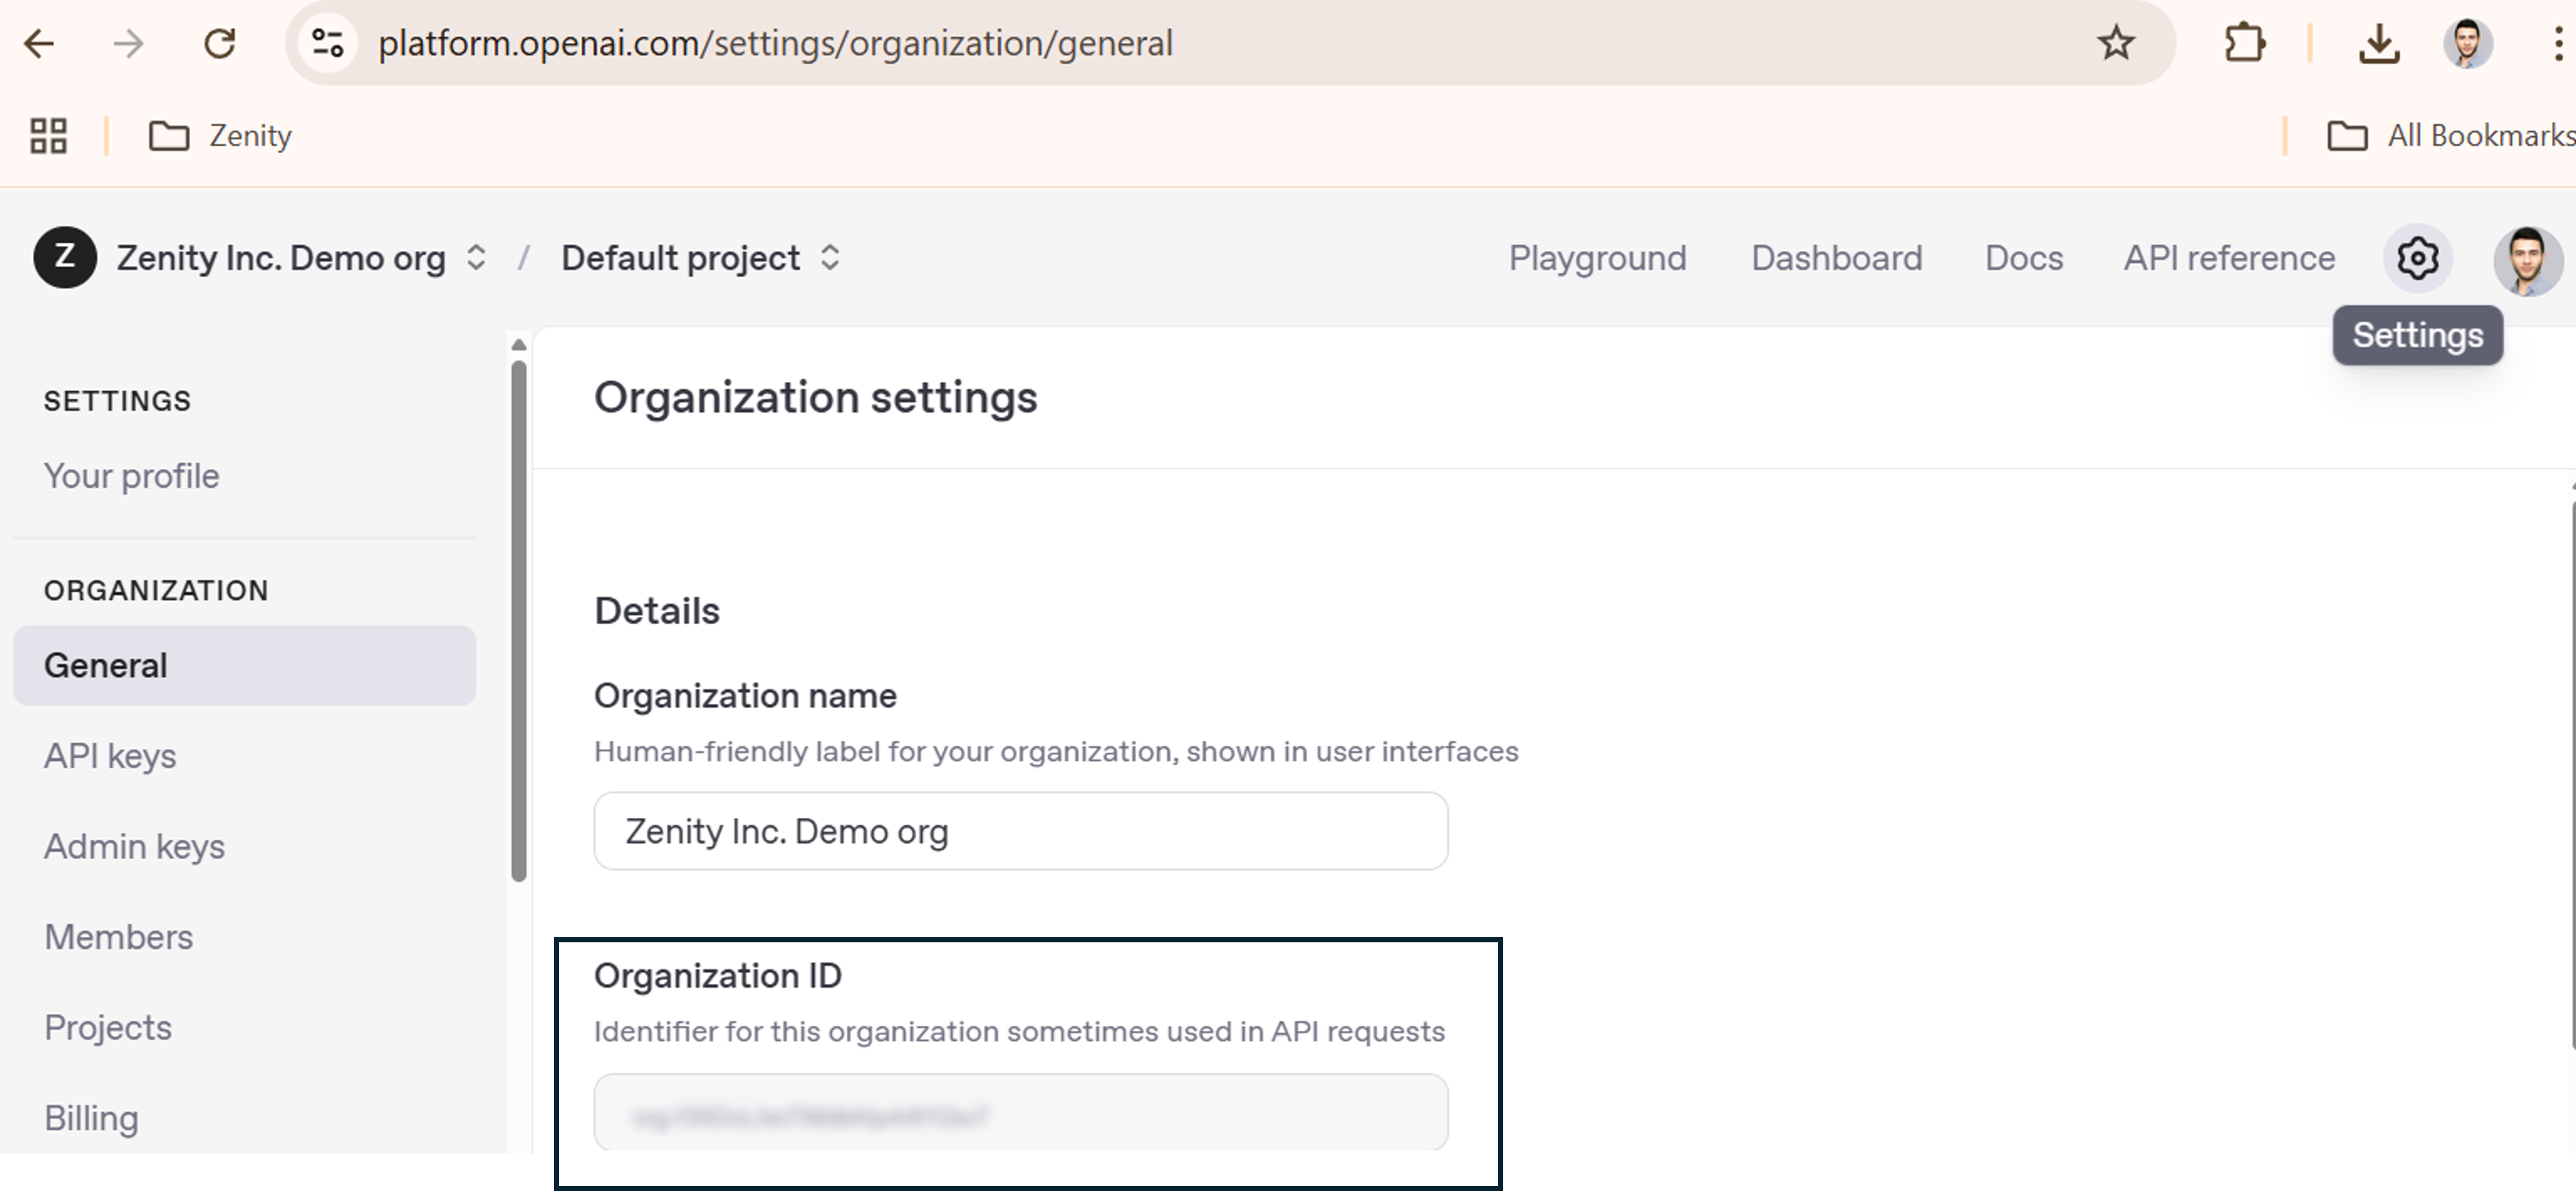
2. Ensure the correct Organization (associated with your Enterprise workspace) is selected using the drop-down on the top-left side.
In case, the organization is not presented in the drop-down reach out to OpenAI support to enable it at support@openai.com.

3. Create a new secret key by clicking on ‘Create new secret key’
- Project: ‘Default Project’
- Permissions: ‘All’ (OpenAI will revoke it in the subsequent steps)
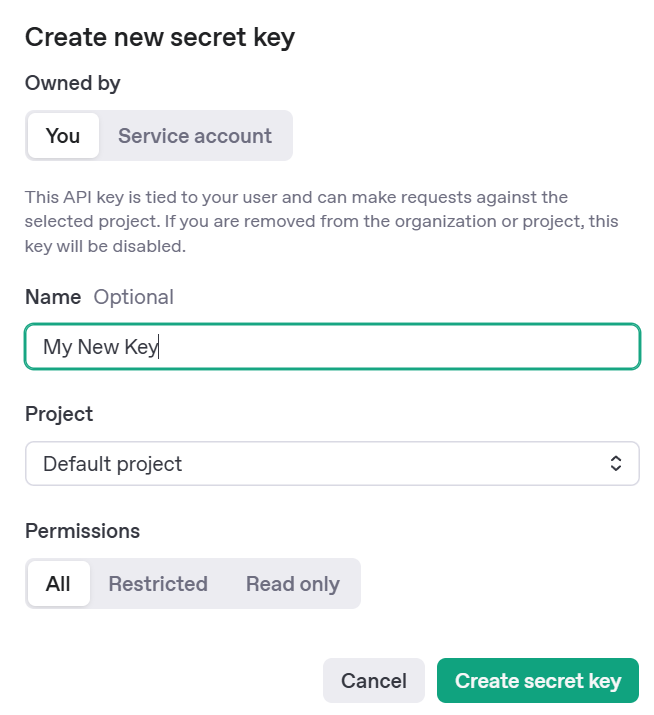
- The key must be created in the same Organization as your ChatGPT tenant.
In order to validate this in the OpenAI Portal https://platform.openai.com Click on ‘Settings’ and compare the Organization ID to the Organization ID copied in the ‘Prerequisites’ section.
- The key must be newly generated.
- Store the ‘Secret key’ securely, it can only be viewed once as it will be used later in this guide.
2. Enable the Compliance API key
-
In order to enable the newly generated key Email OpenAI support team at support@openai.com with the following details:
-
Last 4 digits of the API key
- Key Name
- Created By Name
- Requested scope: Both (Read & Delete)
- Organization ID
Important to note: do not share the entire key, it should be treated as a password. Once OpenAI enables the requested scopes, the API key can be used in the Zenity integration.
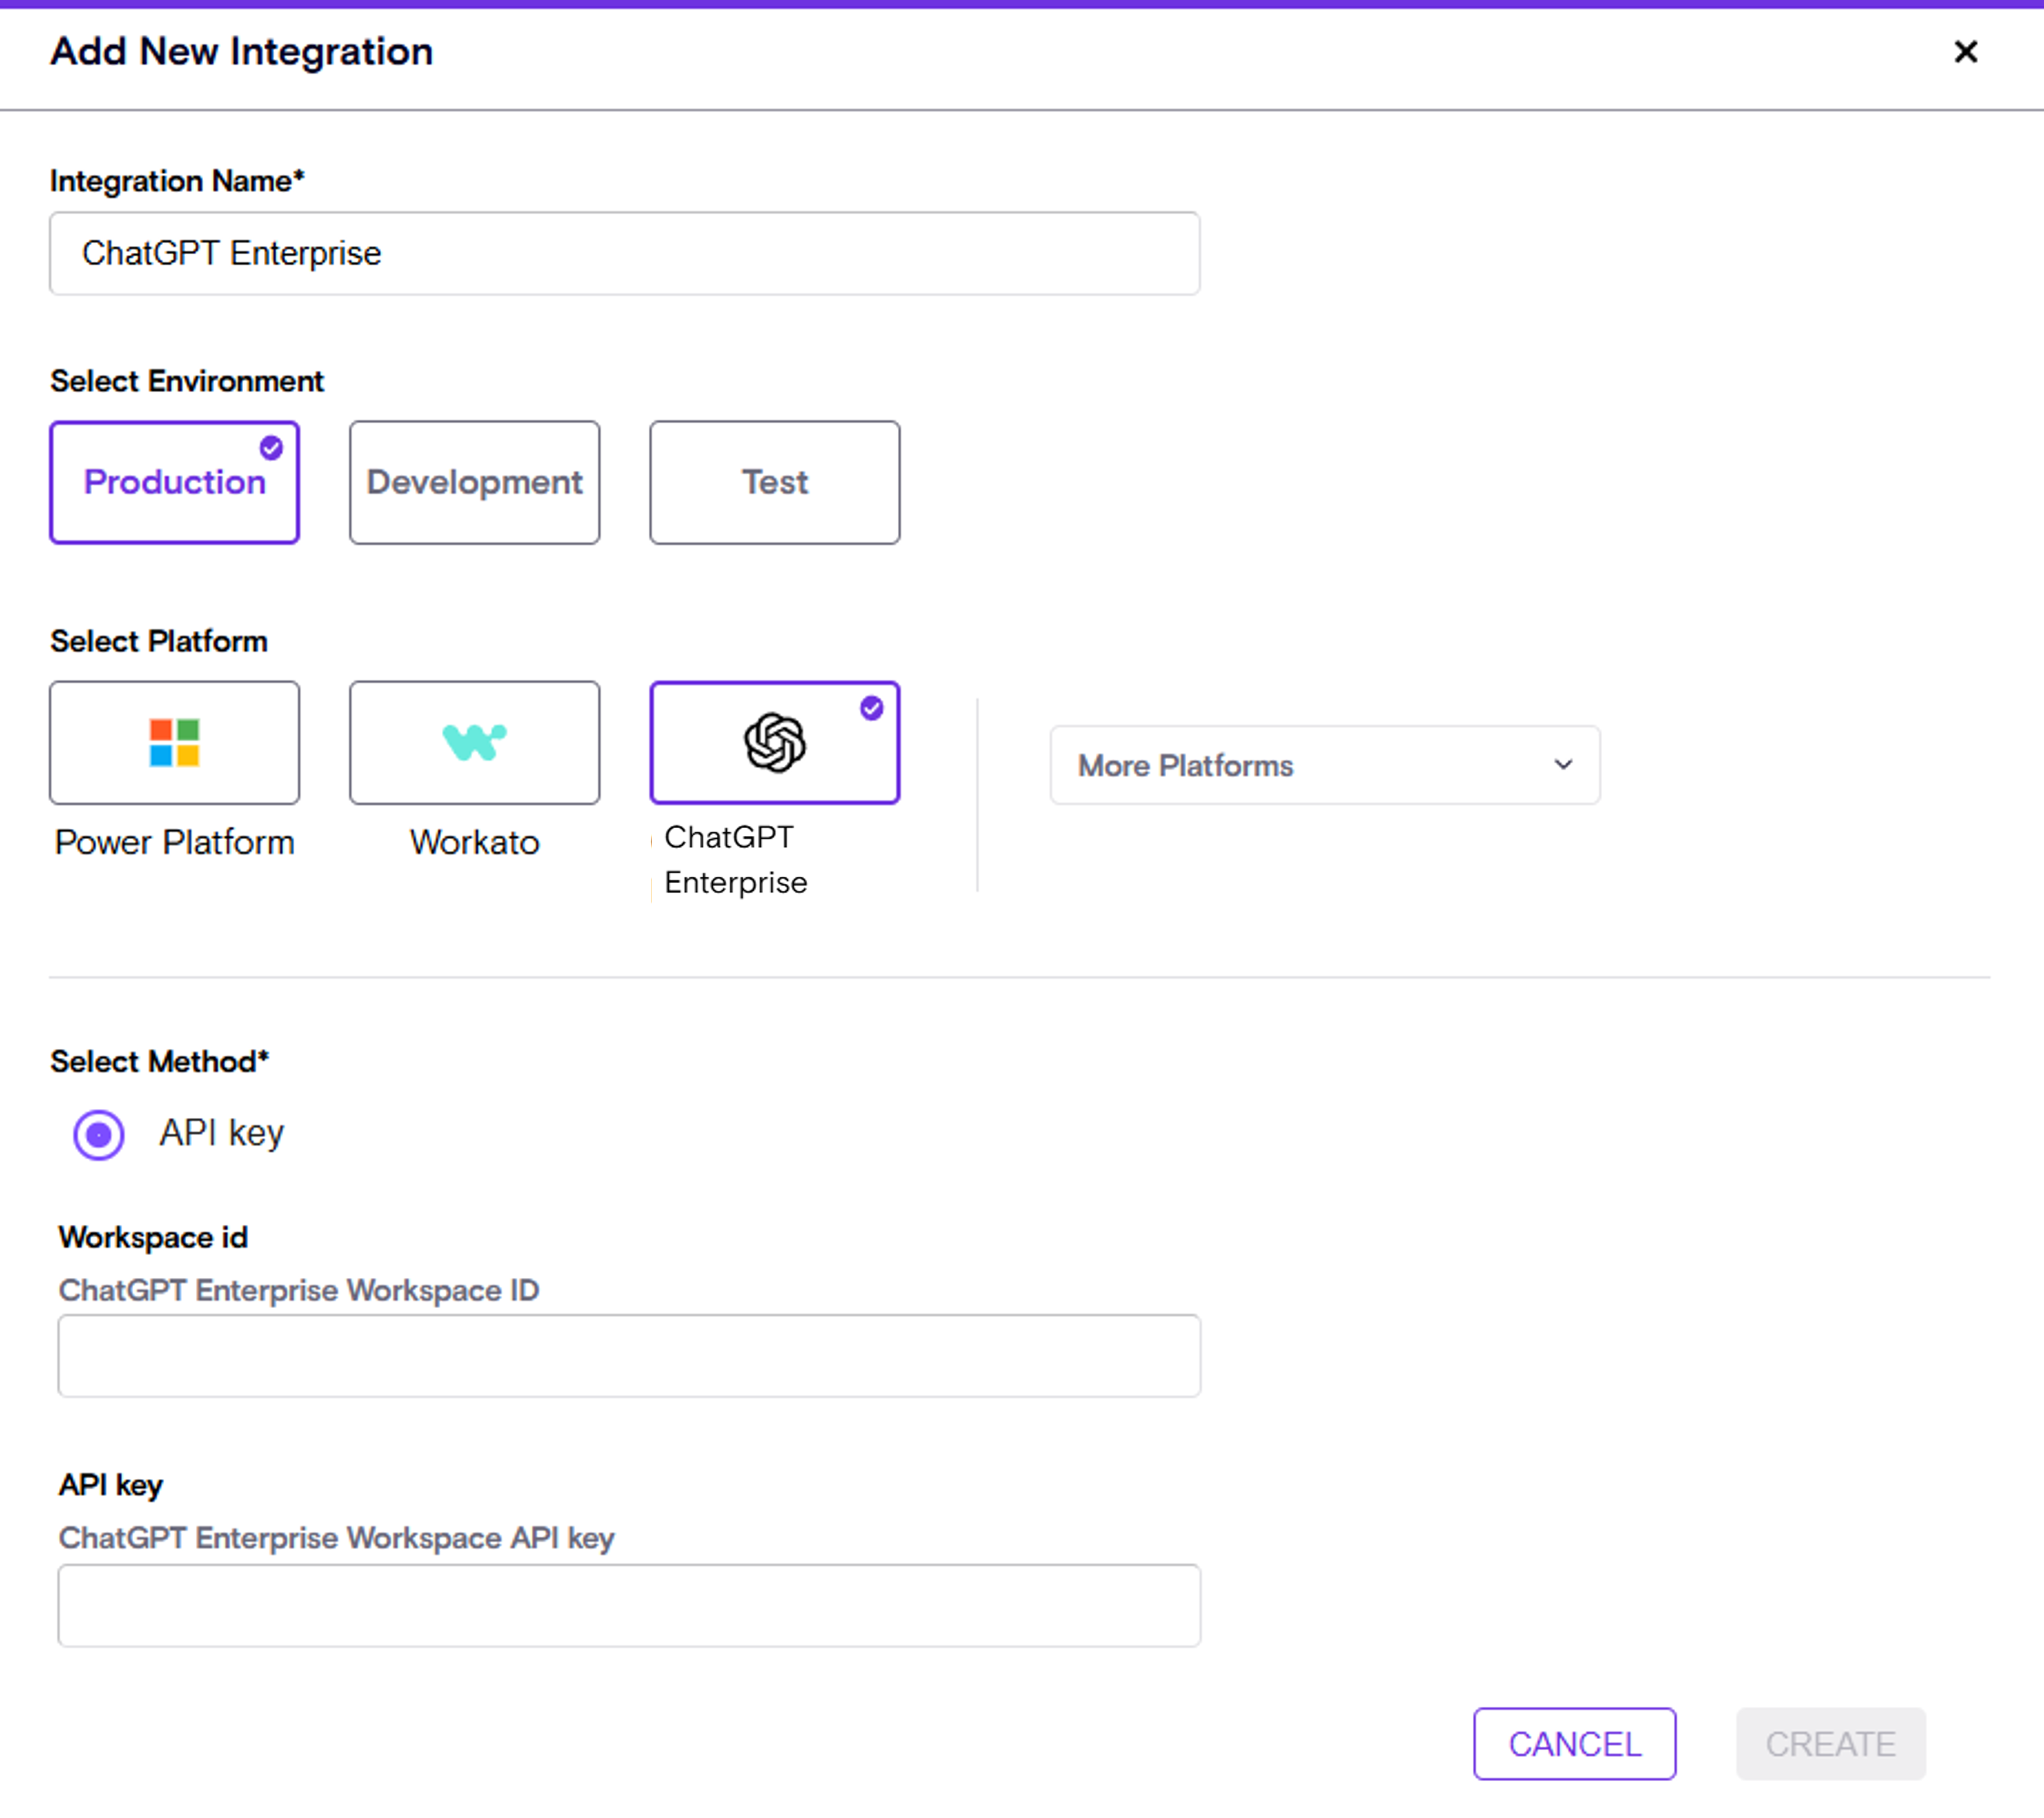
Step 2: Setup the Integration in Zenity
1. Create the ChatGPT Enterprise Integration in Zenity
1. In order to create the new integration follow the below steps
- As a Zenity Administrator go to the Zenity Integrations Page, here and click on ‘New Integration’ → Select ‘ChatGPT Enterprise’ and provide the below details:
- Workspace ID
- Copied from the Prerequisites section
-
API Key
- The copied ‘Secret Key’ taken from Step 1.
-
Click ‘Create’
- A successful setup will result in an ‘Active’ integration status.