Zenity Workato Integration via API token
This guide explains how to create and configure an integration between Zenity and Workato using a new API token.
After reading this document, you'll be able to:
- Create a new Client role in Workato.
- Create an API client with specific permissions in Workato.
- Use the API client token created to connect your Workato account to Zenity.
For additional assistance with your configuration and set up, please sign into your Zenity account and open a support ticket
Create Client Role
Note: Admin privileges are required to create the API role and client.
To create the client role:
- Sign in to your Workato account.
-
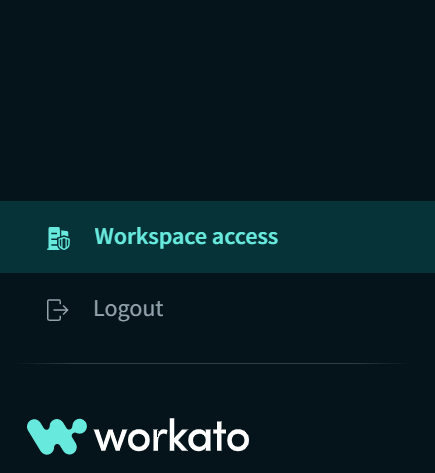
From the left menu, select Workspace access.
-
Select Client roles from the API clients tab.

-
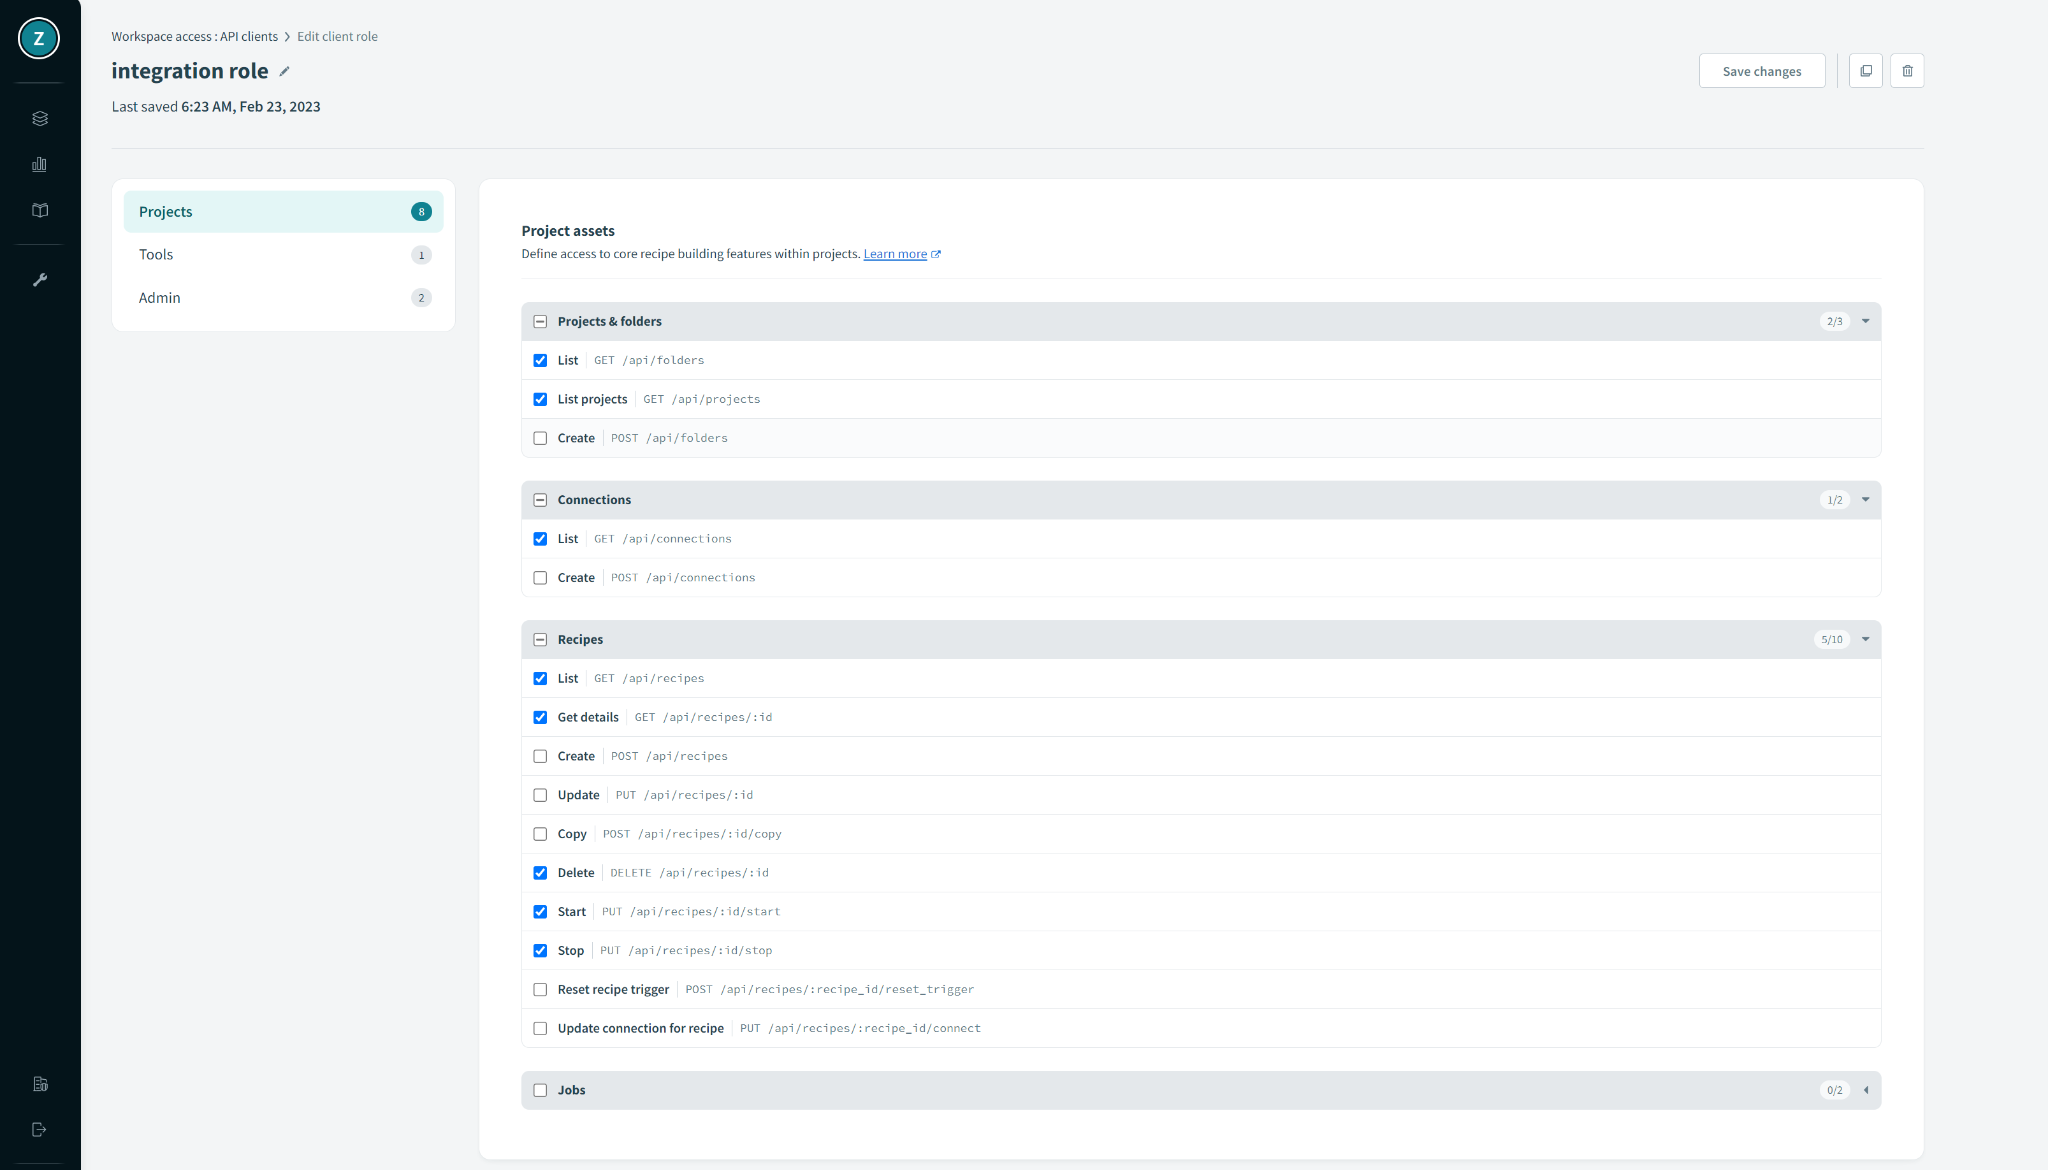
Create the new role by clicking on Add client role. Make sure to create the role with the following permissions selected
Projects tab
| Projects & Folders |
|
Connections |
|
Recipes |
|
Recipes (For Zenity actions and playbooks) |
|
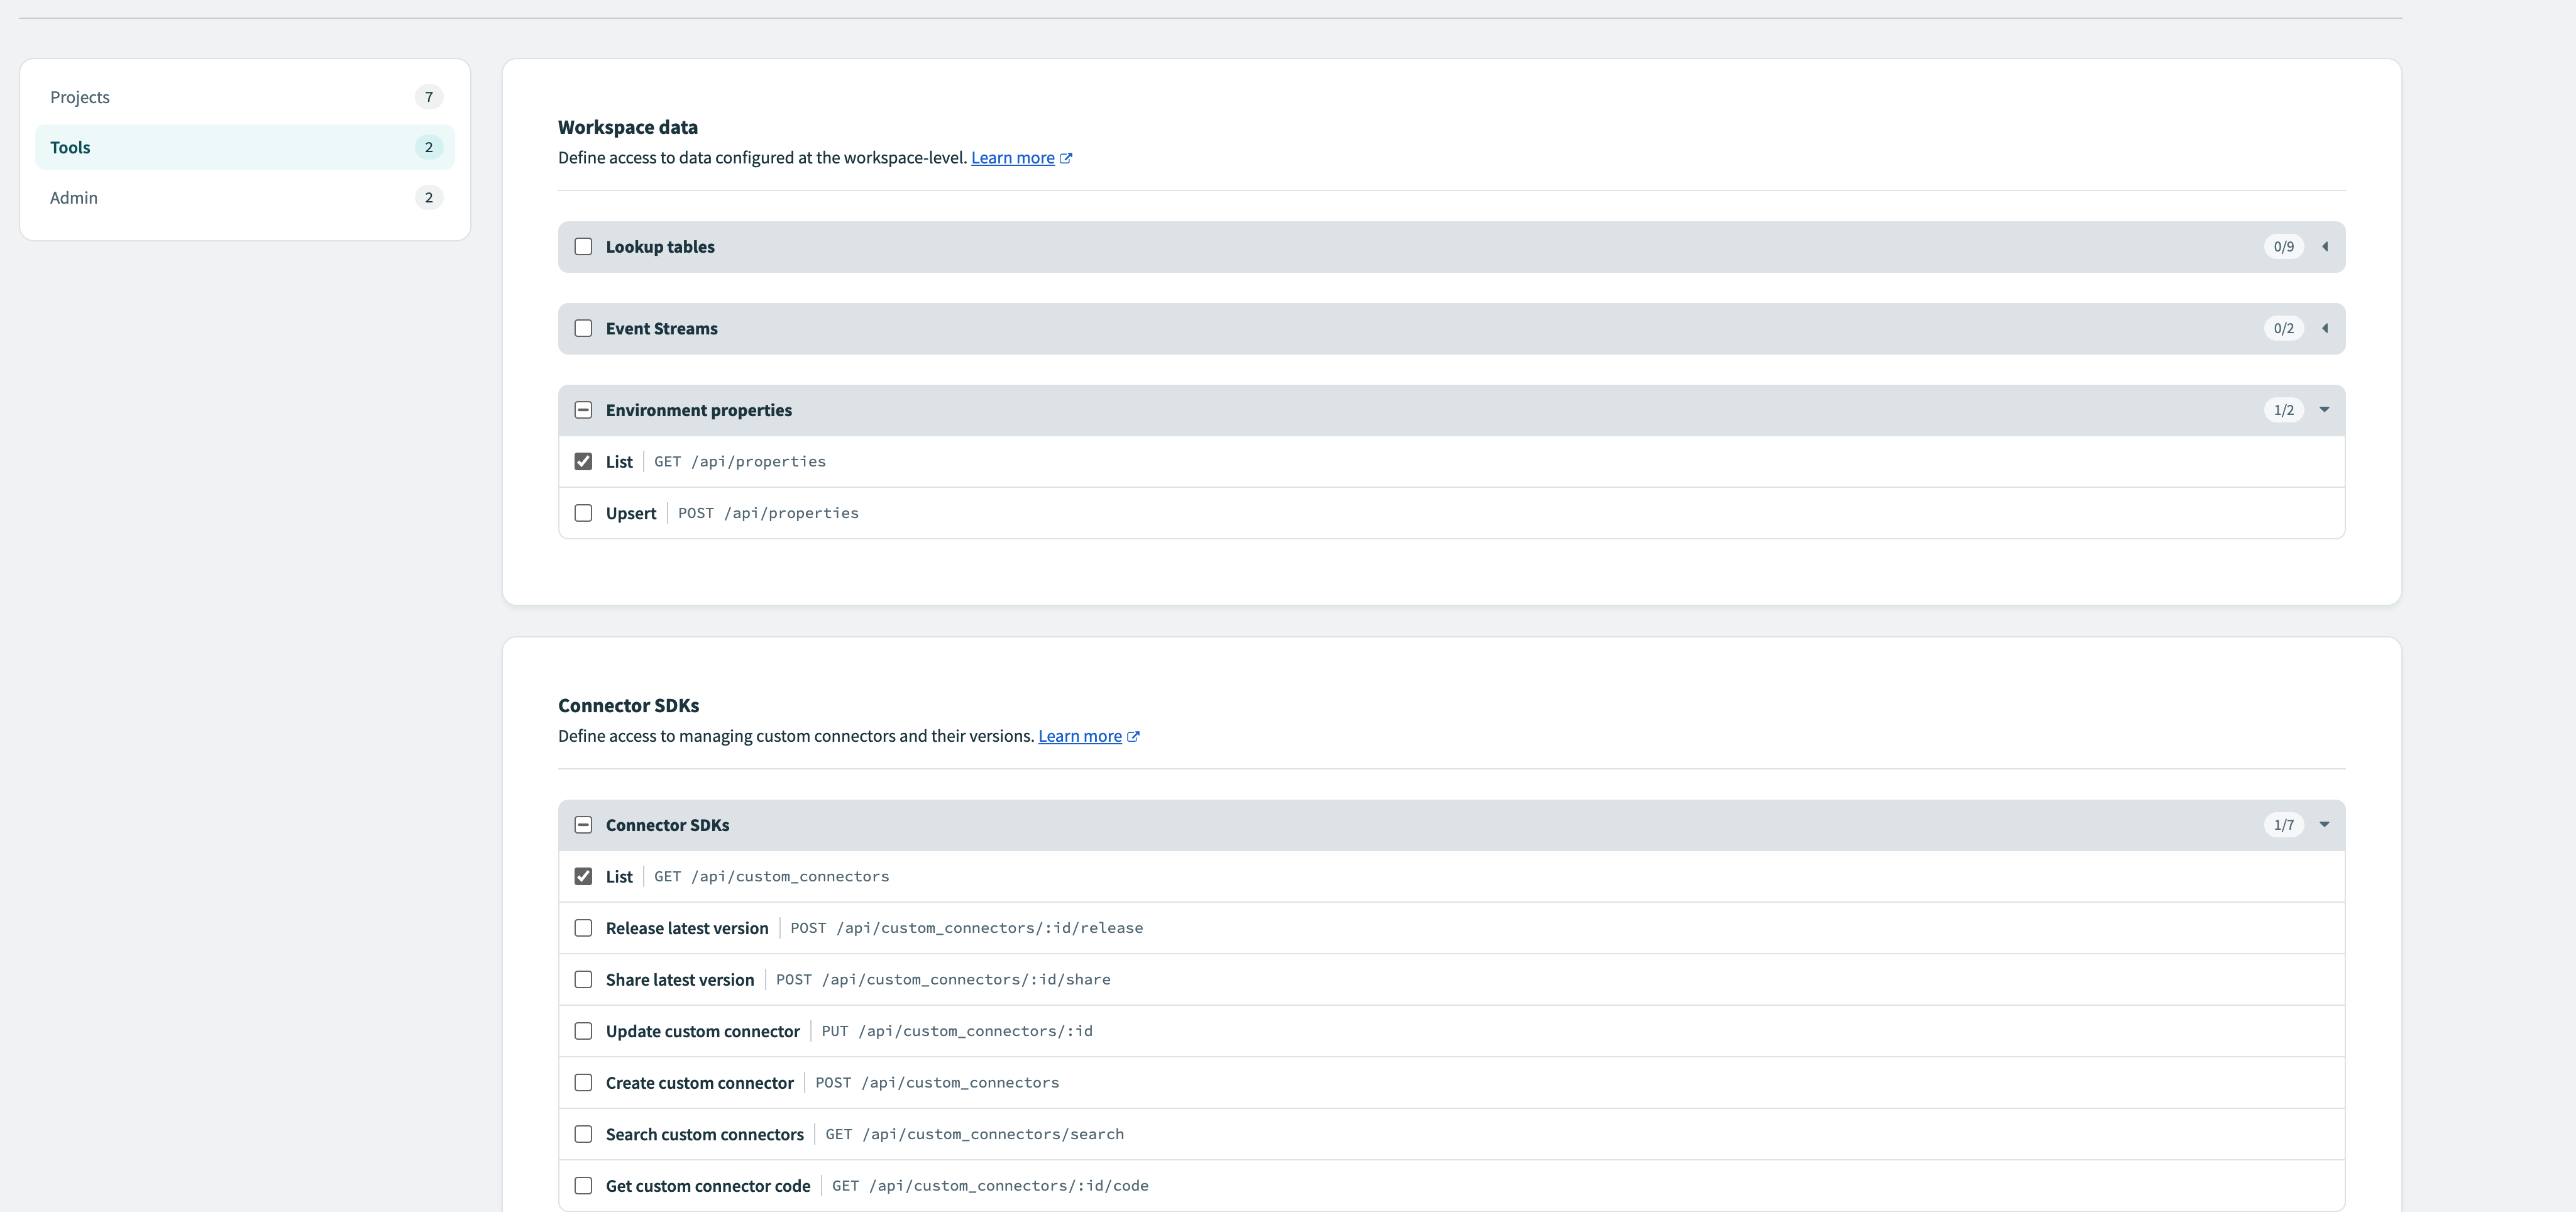
Tools tab
| Environment Properties |
|
| Connector SDKs |
|
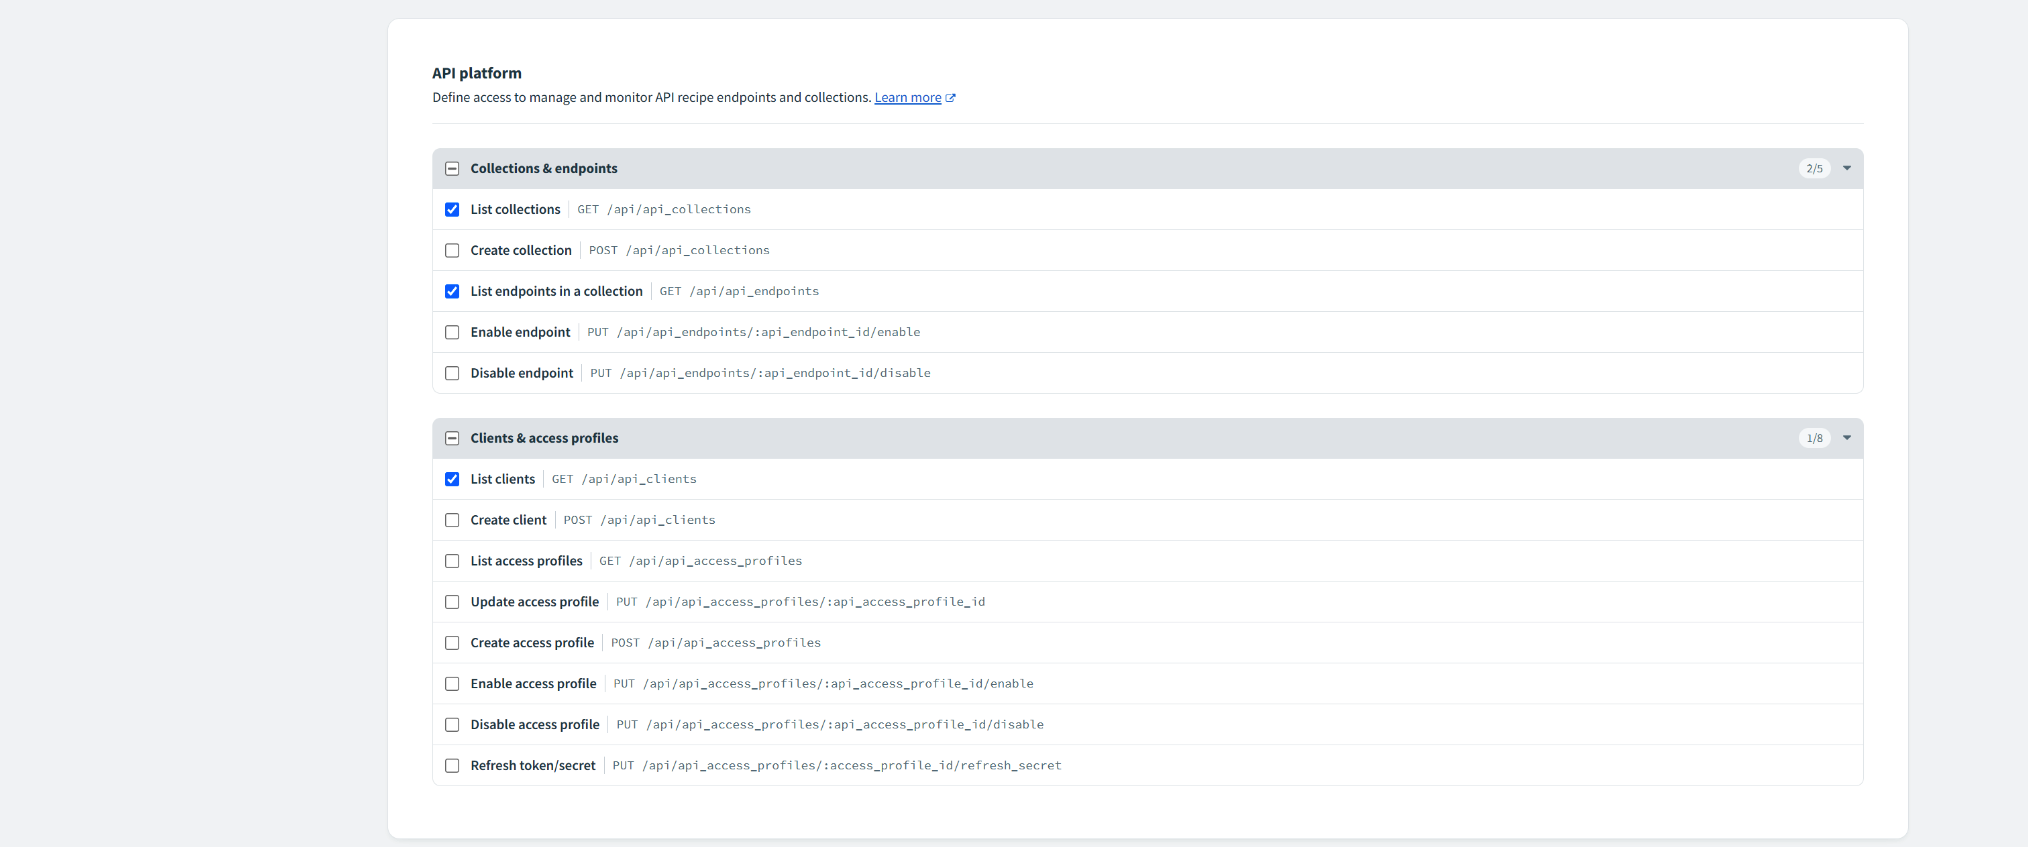
Collections & endpoints |
If API platform addon is enabled:
|
Clients & Access Profiles |
If API platform addon is enabled:
|
Admin tab
| Collaborator roles |
|
Workspace details |
|
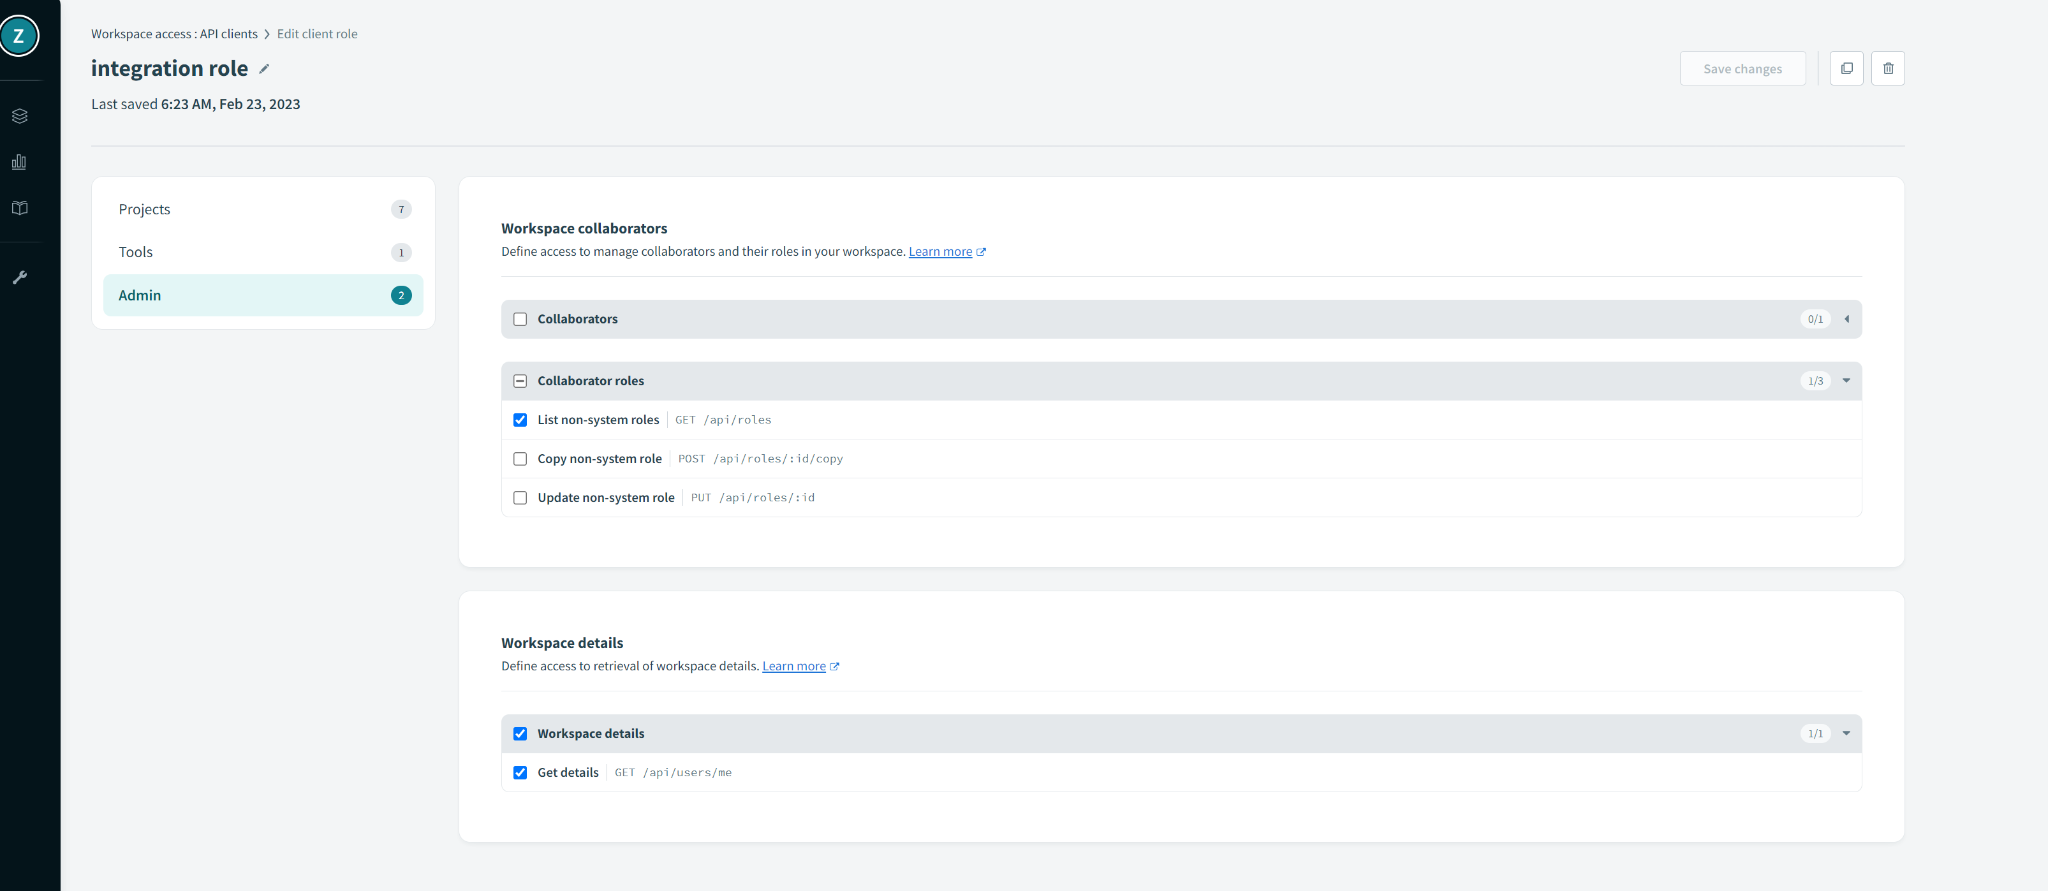
Make sure to verify all of your settings and click “save changes” to confirm creation of the specified role. After creating the role, the next step is to create the API Client.
Create Client Role
- Sign in to Workato, or access the main menu if you are already signed in.
- From the left menu, Select Workspace access.

- From the API clients section, select the API clients tab.
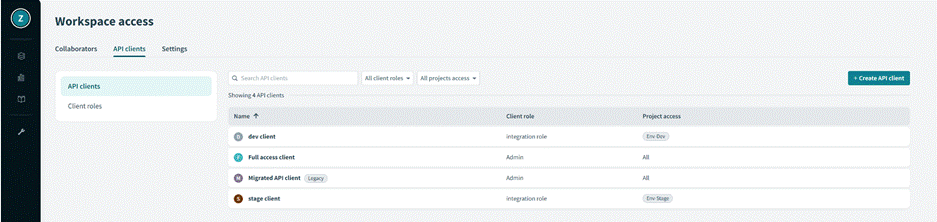
- Select Create API client to create the new API.
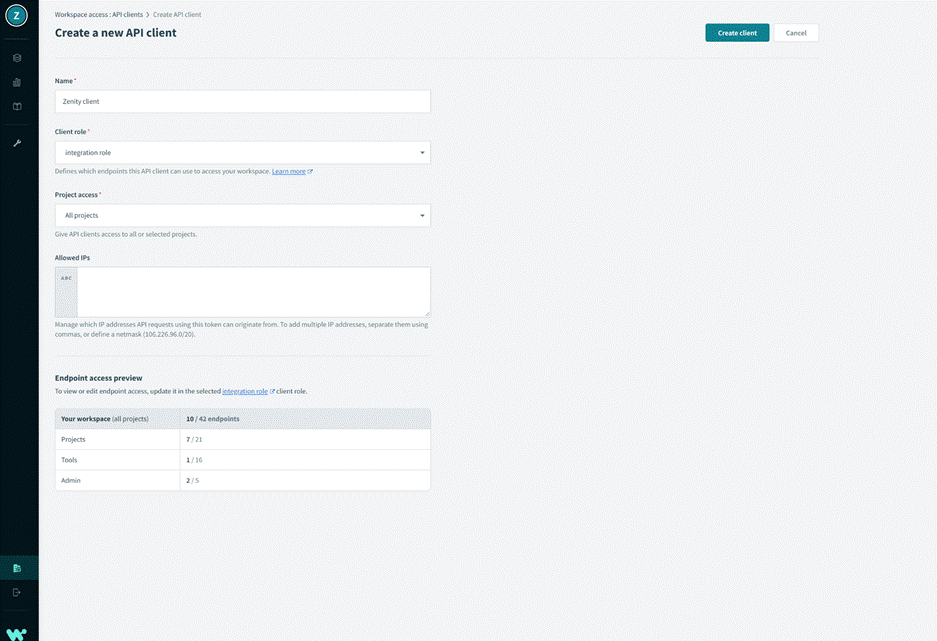
- Assign the role you created during the Create Client Role procedure to the API.
- Assign the specific projects that should be included in integration or choose all projects to include all of the projects in your Workato account to the integration.
- In case you need to restrict this client to Zenity’s IPs only, add 18.200.62.37 and 52.31.196.233, 108.128.206.229 , 99.81.56.225 used by Zenity services to the Allowed IPs section.
-
When finished, click Create client.
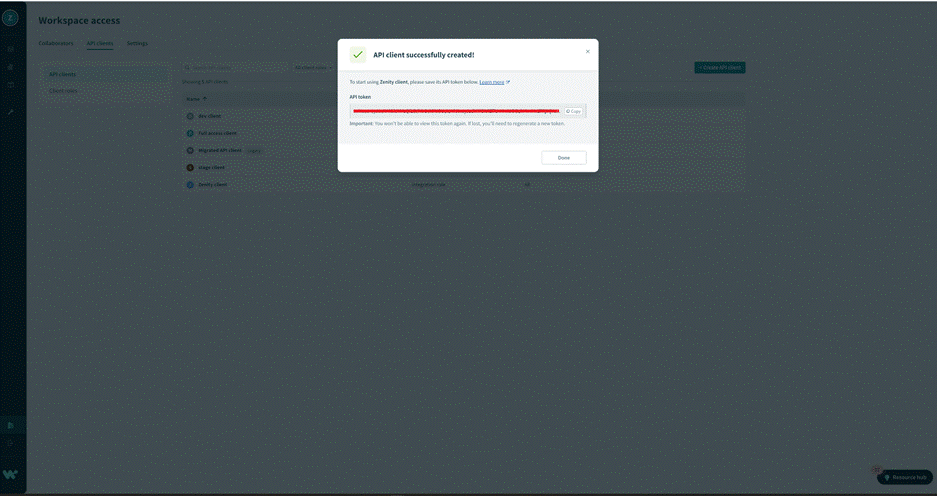
-
Copy the newly generated API token and save it in a secure location.
Congratulations. You’ve successfully created the new role required, and created the API client. Now, let’s integrate with Zenity.
Create Zenity Integration
Note: Zenity Admin permissions are required to create the integration.
- Sign in into your Zenity account.
- From the left menu, select Integrations, then select Create new, and complete the following steps.
- Enter a unique name for the integration.
- Select the environment the new integration will be connected to Production, Development or Test.
- Select Workato as the platform.
- Select API token as the authentication method.
- Paste the new API token you created and saved during the Create API Client procedure into the API token field.
- Click Create

Congratulations. You’ve successfully completed the Workato API integration with Zenity! For additional support or help with Zenity integrations, open a support ticket