Zenity Salesforce Integration via OAuth Client Credentials Flow
This guide articulates the technical prerequisites to set up an integration between Zenity and Salesforce using a OAuth Client Credentials flow for authentication. Follow this link to see the official Salesforce documentation about this OAuth flow.
All the Salesforce authentication types are based on user-delegated access, which requires creating connected application, and a dedicated user assigned with dedicated permissions.
Goals:
- Create a dedicated user account assigned with dedicated permissions that will be used by Zenity for data collection.
- Create and set up a connected application that would allow Zenity to authenticate and act on-behalf-of this user.
Instructions:
Step 1: Create a Profile or a Permission set for Zenity scan
According to your organization procedures, you can either create a new profile or use an existing profile and create a new permission set.
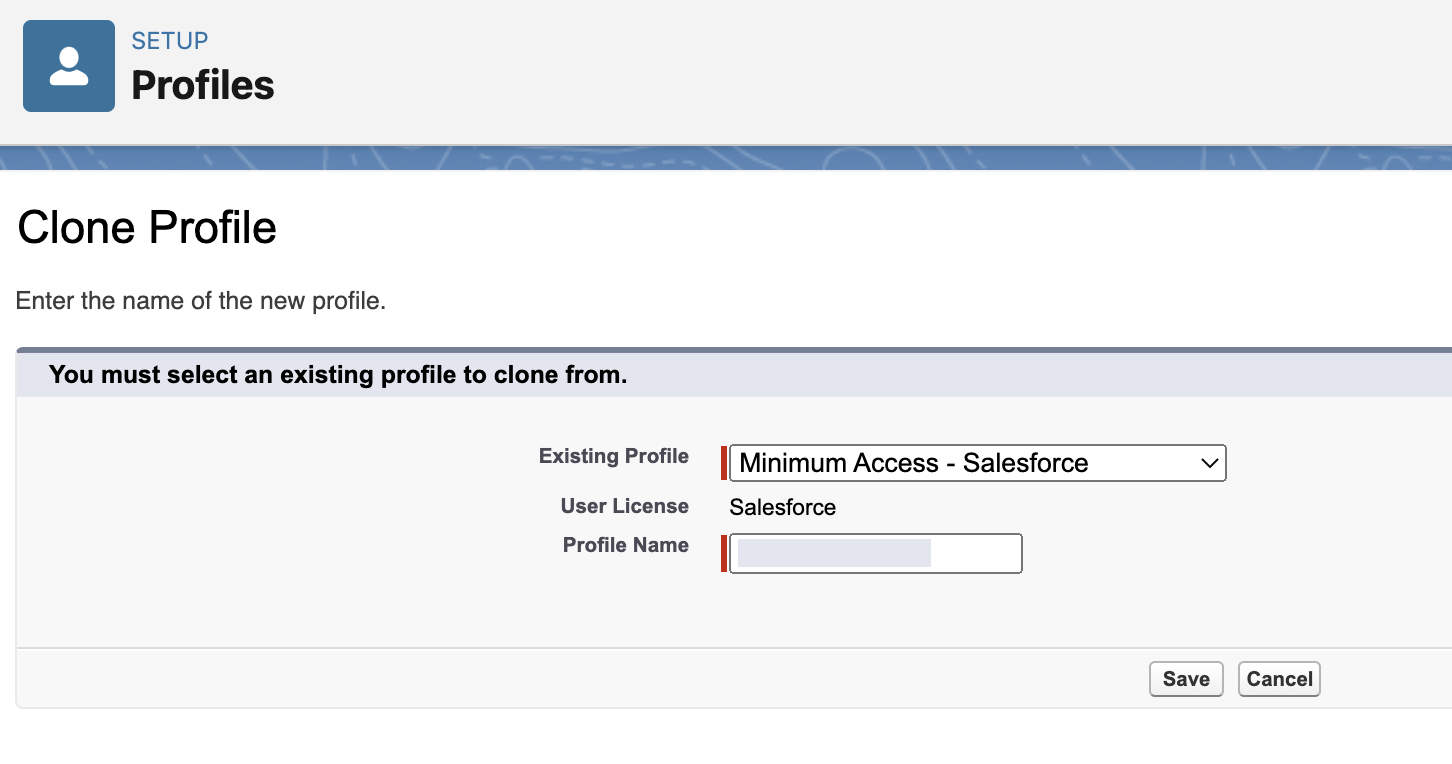
To create a new profile:
- Go to Salesforce organization setup > ADMINISTRATION > Users > Profiles
- Create New Profile
- In Existing Profile choose Minimum Access - Salesforce, name the profile and save
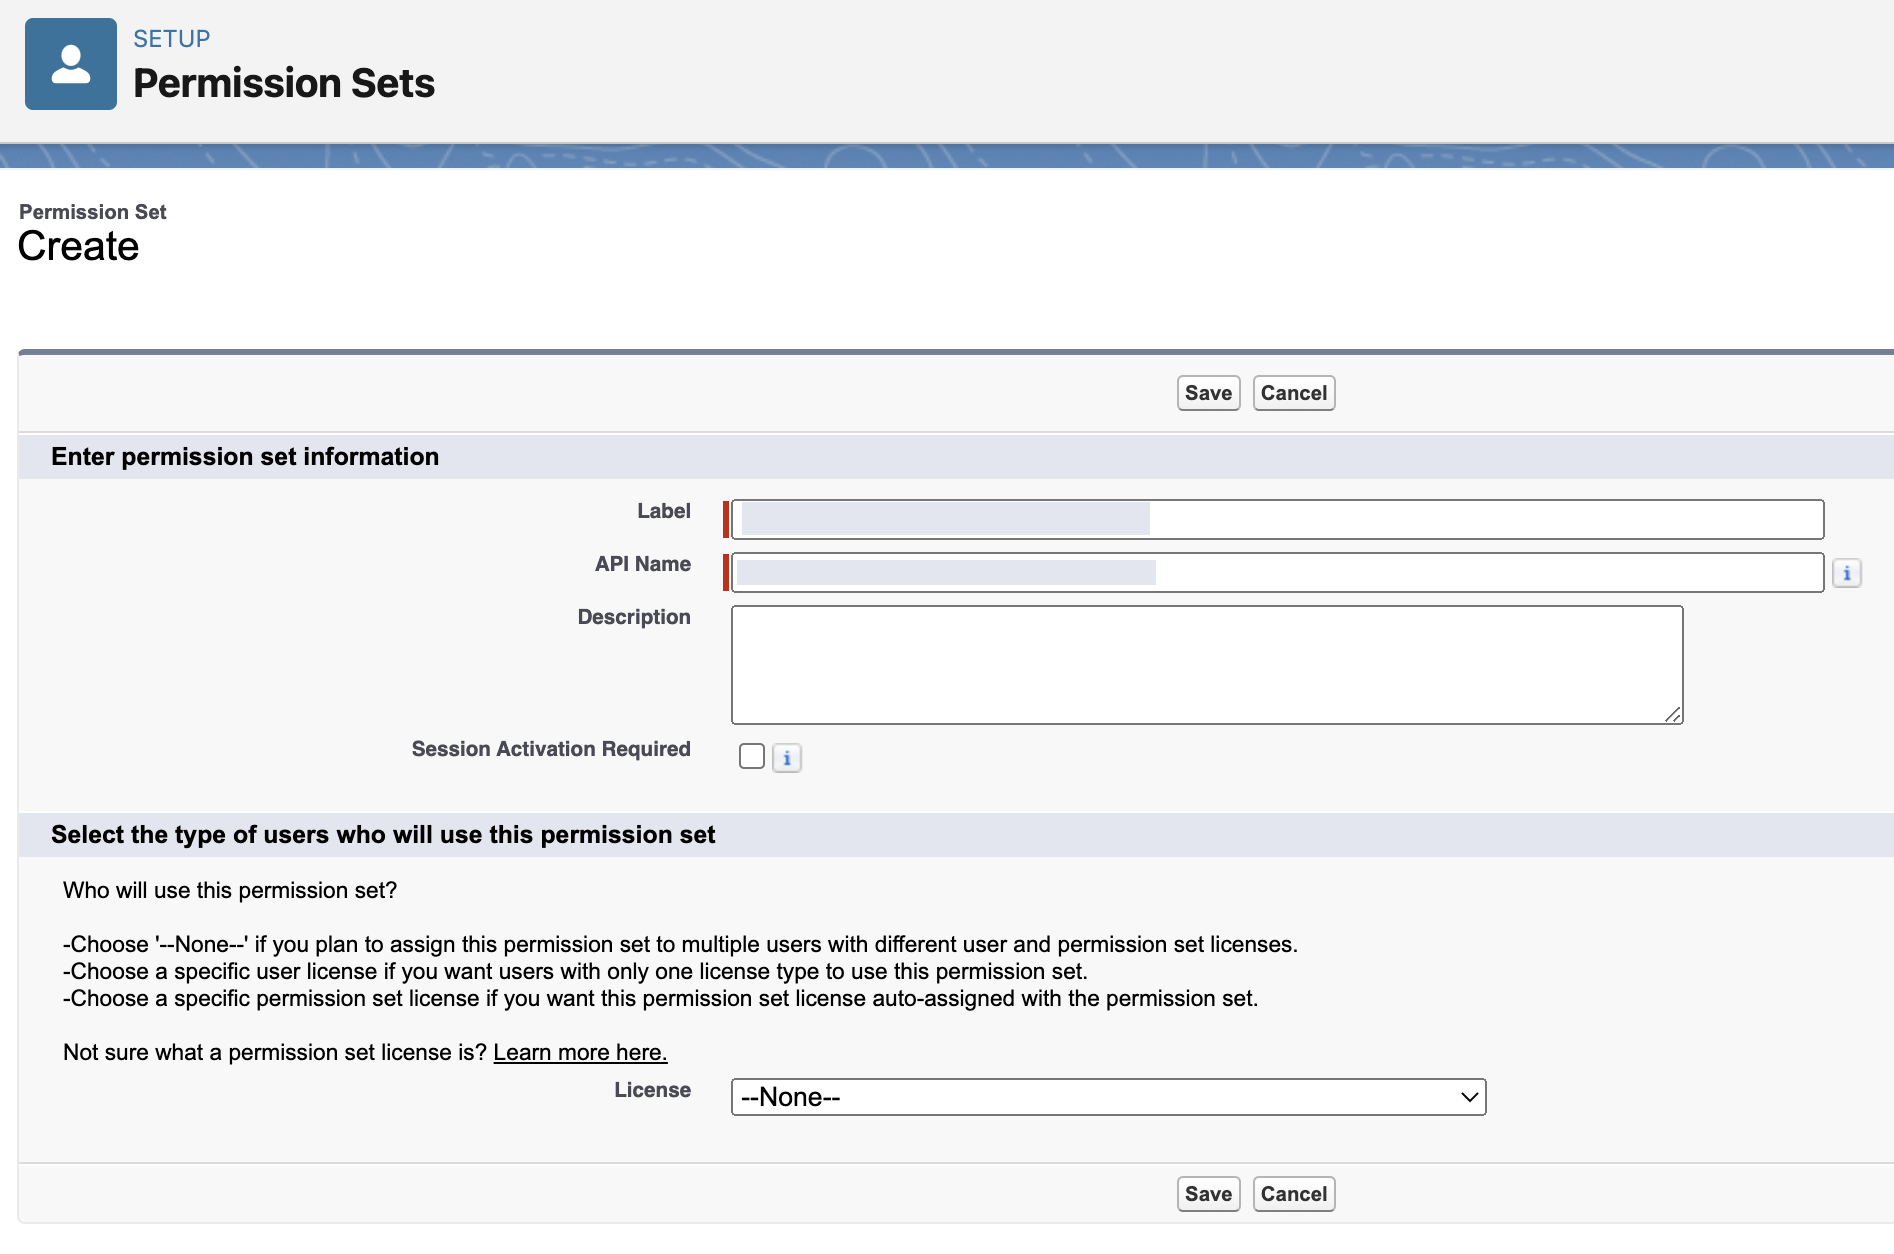
To create a new permission set:
- Go to Salesforce organization setup > ADMINISTRATION > Users > Permission Sets
- Create New
- Name and label the permissions set and save
Whether you created a new profile or a new permission set, go to it's overview page > System Permissions, click Edit and enable the following permissions:
| Permission Name | Mandatory/Optional |
|---|---|
| API Enabled | Mandatory |
| View Setup and Configuration | Mandatory |
| View Roles and Role Hierarchy | Mandatory |
| Modify Metadata Through Metadata API Functions | Mandatory |
| Create and Set Up Experiences | Mandatory |
| Manage Connected Apps | Mandatory |
| Customize Application | Mandatory |
| Manage Custom Permissions | Mandatory |
| Download AppExchange Packages | Optional |
We also recommend to enable the permission Api Only User for security purpose - it would disallow the user which is intended for background integration with Zenity to login into Salesforce UI
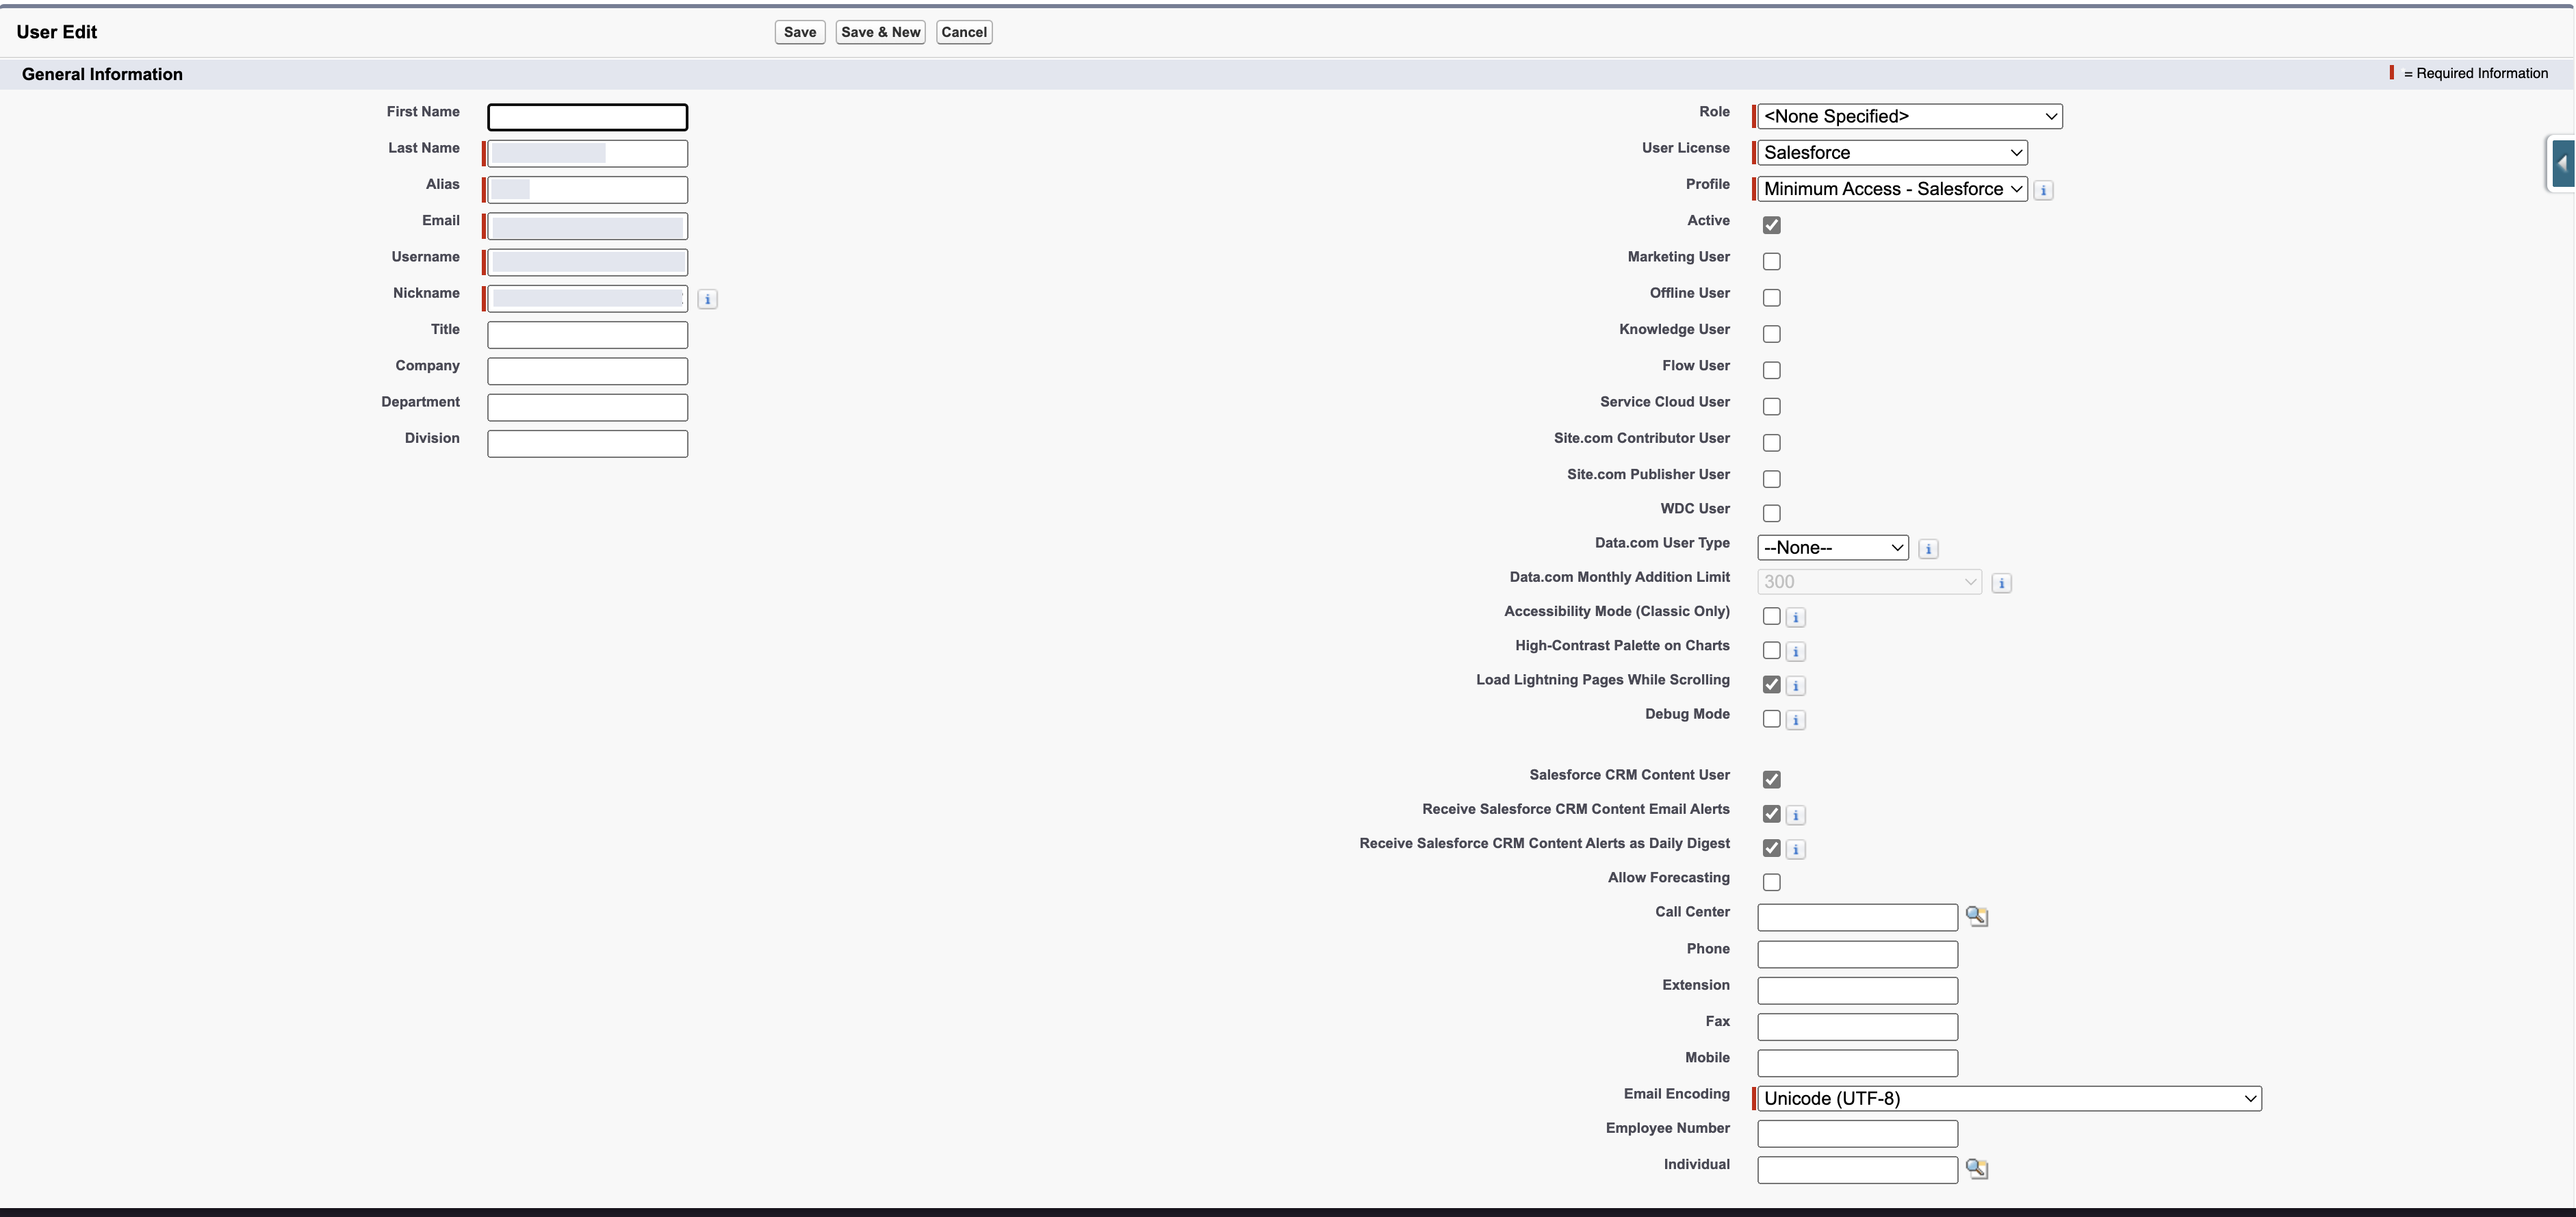
Step 2: Create a user for Zenity scan
- Go to Salesforce organization setup > ADMINISTRATION > Users > Users:
- Create New User
- Fill in required fields
- Assign Salesforce User License
- If you created a profile in step 1 assign it, otherwise assign Minimum Access - Salesforce Profile
- Save
- If you created a permission set in step 1, in the new user overview page go to Permissions Set Assignments > Edit Assignments and assign the permission set you created
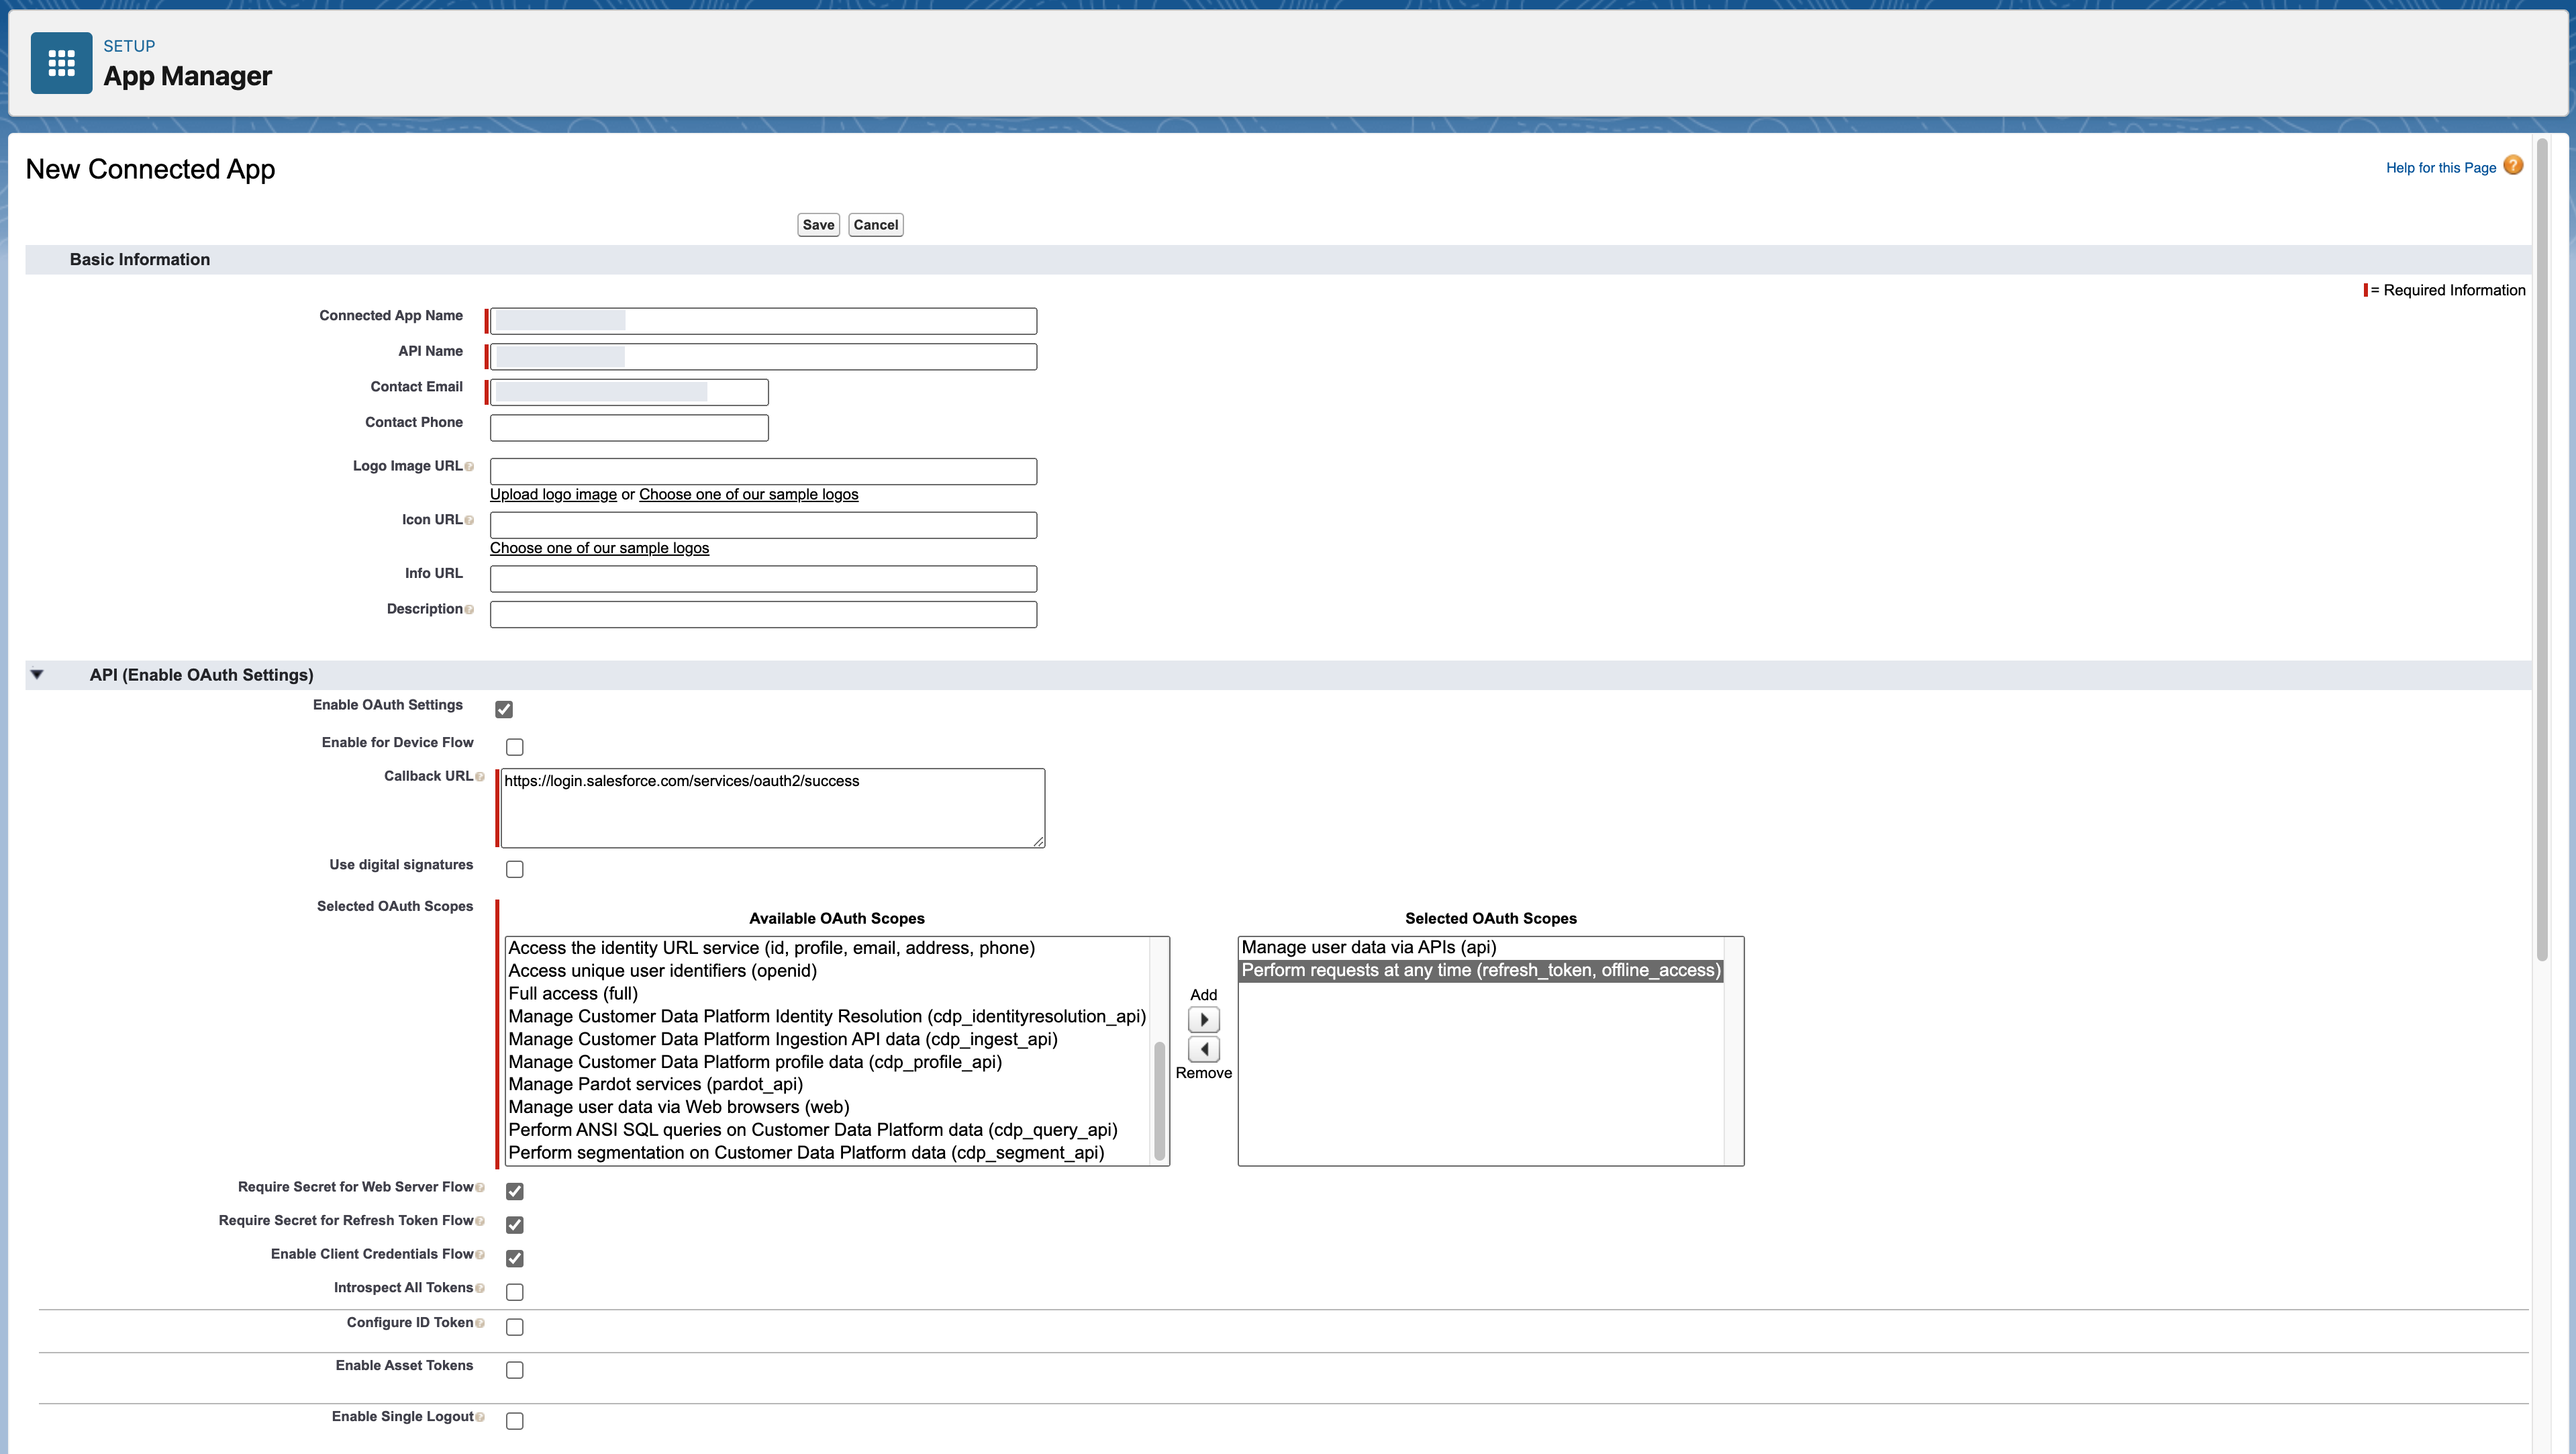
Step 3: Create and configure a Connected app for Zenity scan
- Go to Salesforce organization setup > PLATFORM TOOLS > Apps > App Manager > New Connected App
- Enter required fields in Basic Information
- Under API (Enable OAuth Settings) check the Enable OAuth Settings
- In the Callback URL put https://login.salesforce.com/services/oauth2/success (it is a required field but not used in Client Credentials flow, you can also set a dummy value)
- Check Enable Client Credentials Flow
- Move the following scopes from Available OAuth Scopes to Selected OAuth Scopes:
- Manage user data via APIs (api)
- Perform requests at any time (refresh_token, offlince_access)
- Click save
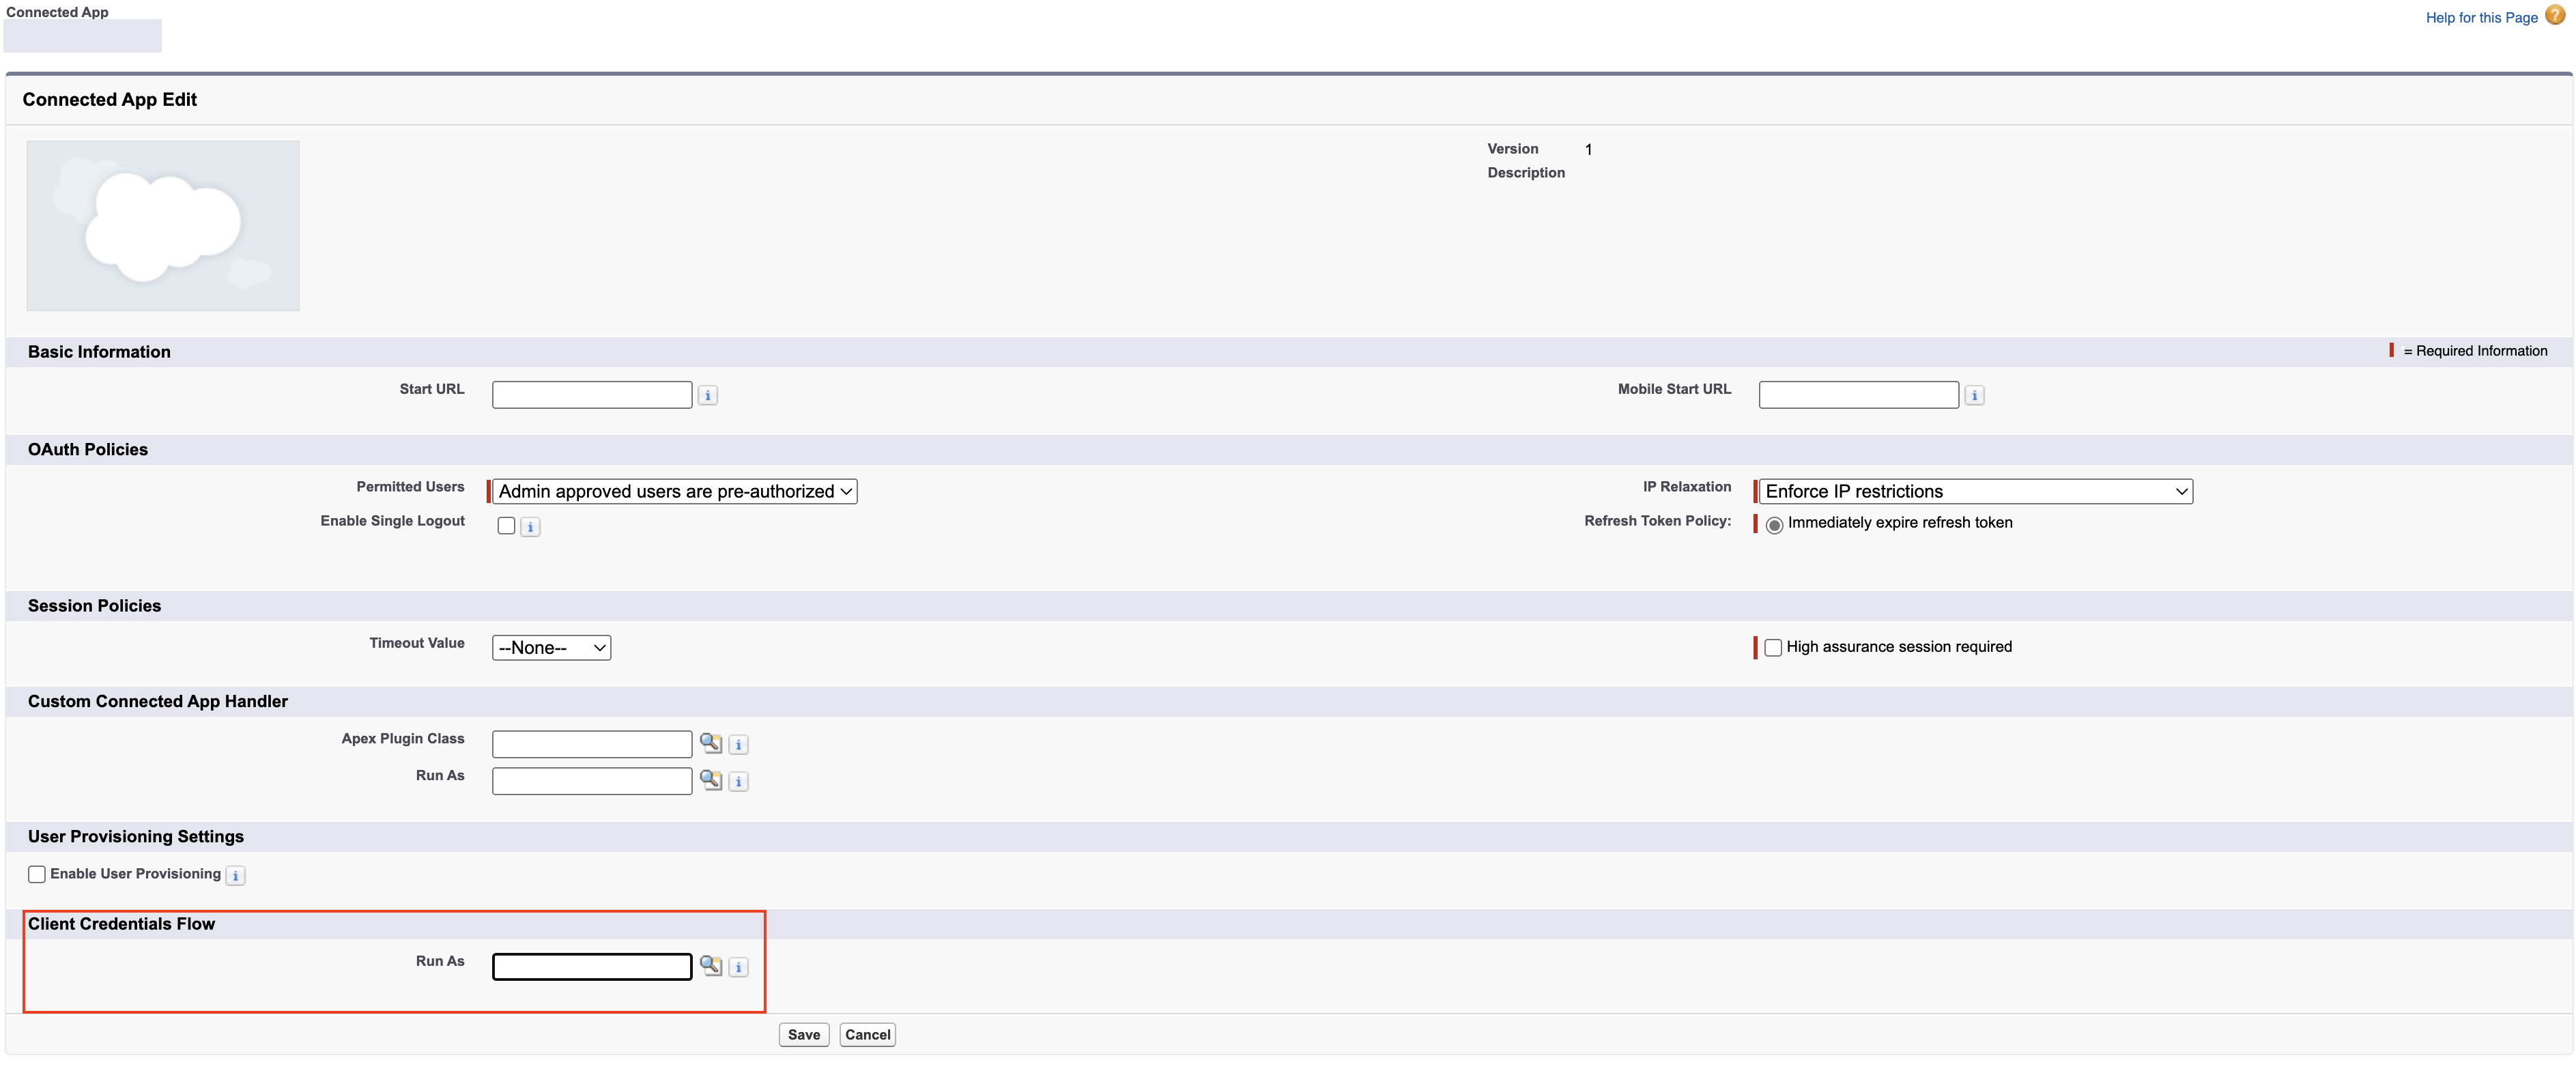
Step 4: Set the execution user of the Connected app
- Go to Salesforce organization setup > PLATFORM TOOLS > Apps > Connected Apps > Manage Connected Apps > The app you created in step 3
- Click Edit policies
- Under Client Credentials Flow section, locate and assign the user you have created in step 2 in the Run As field
- Click save
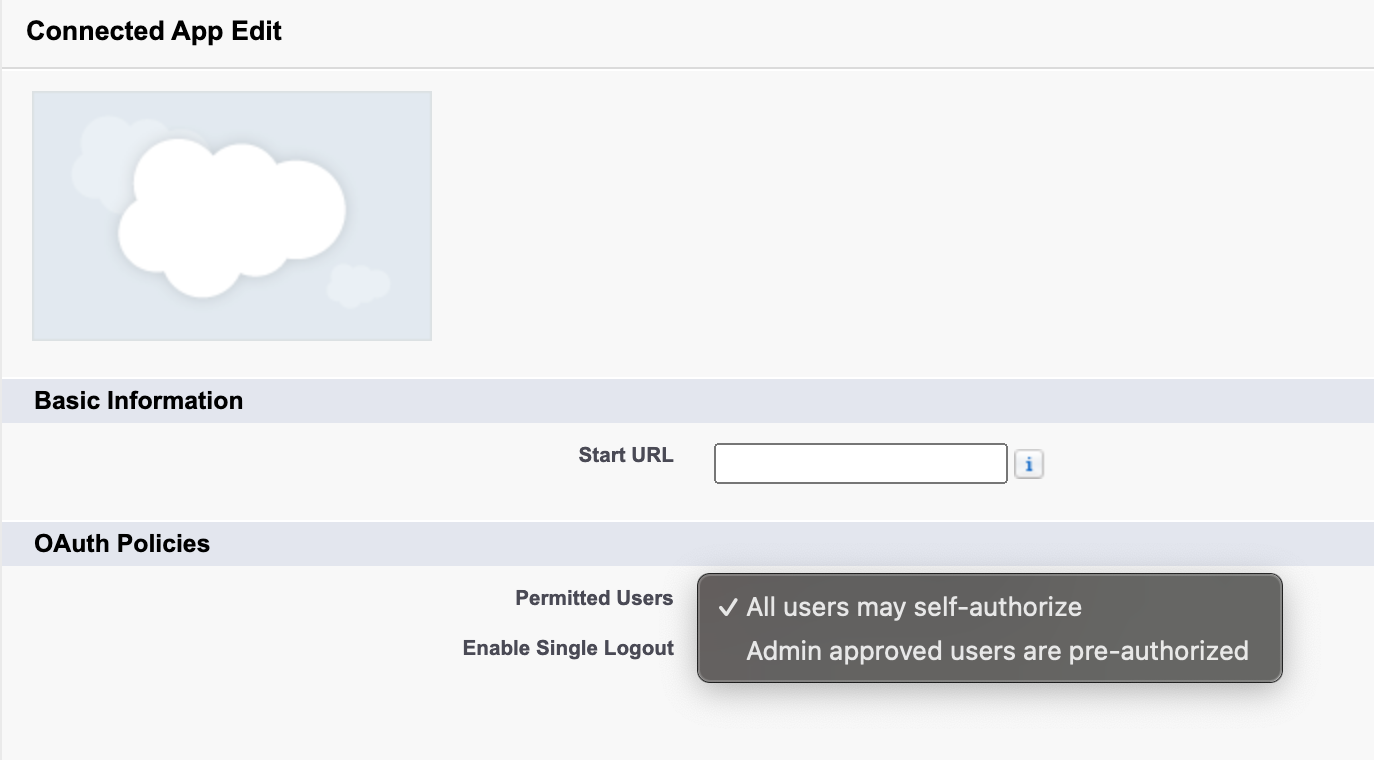
In some Salesforce orgs when choosing the "Permitted Users" option to be "Admin approved users are pre-authorized", you should also permit the configured user to use the connected app.
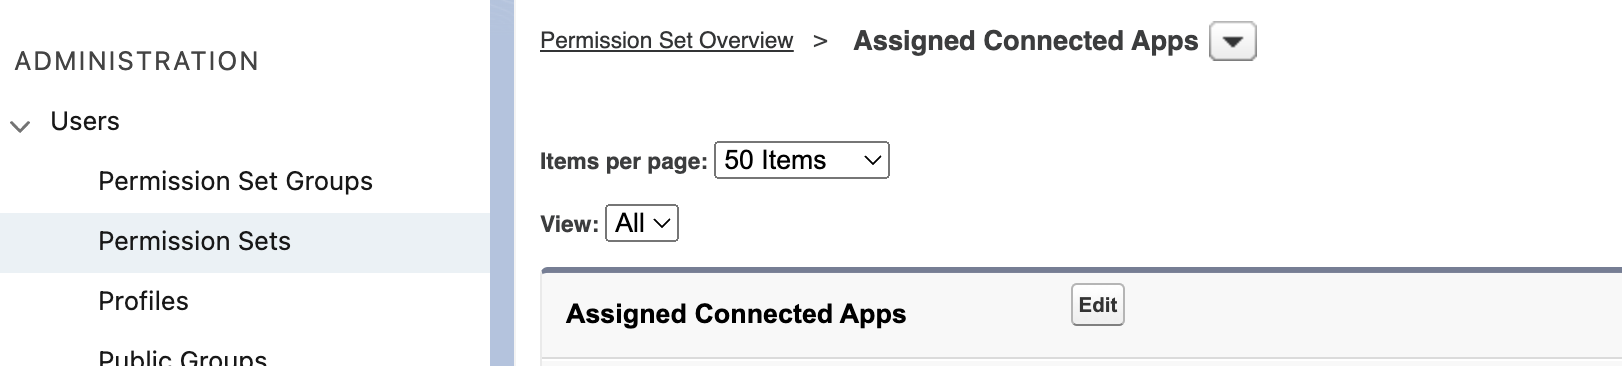
In order to do so, please update the profile or permissions set created in step 1, and add the connected app in the "Assigned Connected Apps"
Step 5: Create the integration in Zenity portal
- Sign into Zenity portal, go to Integrations page, click CREATE NEW and provide the following:
- The Salesforce instance url of your organization. Go to Salesforce organization setup > SETTINGS > Company Settings > My Domain and use the value of Current My Domain URL field under My Domain Details section in the following template: https://{mydomain-url}
- The Client id and Client Secret of the connected app you created on step 3 (also referred as Consumer Key and Consumer Secret). In order to find it:
- Go to Salesforce organization setup > PLATFORM TOOLS > Apps > App Manager > Click on the drop down in the row of the app you created in step 3
- Find it in Consumer Key and Secret Under the API (Enable OAuth Settings) section (you might be required to authenticate to Salesforce again in this step)
IPs Whitelisting Consideration
In our ongoing efforts to enhance the security and reliability of our software, we will be updating the public IP addresses used by our Services and APIs. If your company policy requires you to safelist IP Addresses for your inbound integrations then please make sure the below IPs are safelisted.
- 18.200.62.37
- 52.31.196.233
- 108.128.206.229
- 99.81.56.225
US (Ohio) Region
- 18.116.189.61
- 3.147.9.237
In addition, here are the service endpoints for the US region. * Zenity API endpoint: api.us1.zenity.io * Zenity portal endpoint: app.us1.zenity.io