Zenity Power BI Integration Using Managed Application Consent
This guide articulates the technical steps to set up an integration between Zenity and Power BI using Zenity managed application service principal for authentication.
Goal:
- Give an admin consent to Zenity managed application, this will create a service principal in your tenant.
- Create an Azure AD security group.
- Enable the Power BI service admin settings
- Create the integration in Zenity portal.
Step-by-step guide
Below are detailed instructions on how to set up your integration.
Please note: the first two steps should be performed by a Microsoft Entra(AAD) admin
Step 1: Give an admin consent to Zenity managed application
Zenity manages a secured Microsoft Entra application that should be consented by a Microsoft Entra(AAD) admin. The app requires the following Application permissions:
- Microsoft Graph: GroupMember.Read.All, User.Read.All, InformationProtectionPolicy.Read.All
To consent these permissions, a Microsoft Entra(AAD) admin should:
- Fill your tenant id in below URL and follow the link in a browser (preferably in private browsing) https://login.microsoftonline.com/{YOUR-TENANT-ID}/adminconsent?client_id=6c67120c-c471-49e5-803f-2cc83e976d45
- Fill in username and password
- Accept the requested permissions
- Upon a successful consent you should be redirected to Zenity app

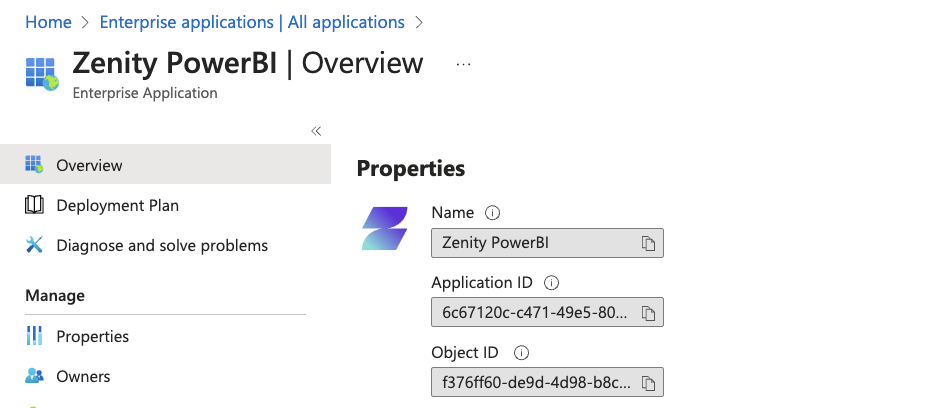
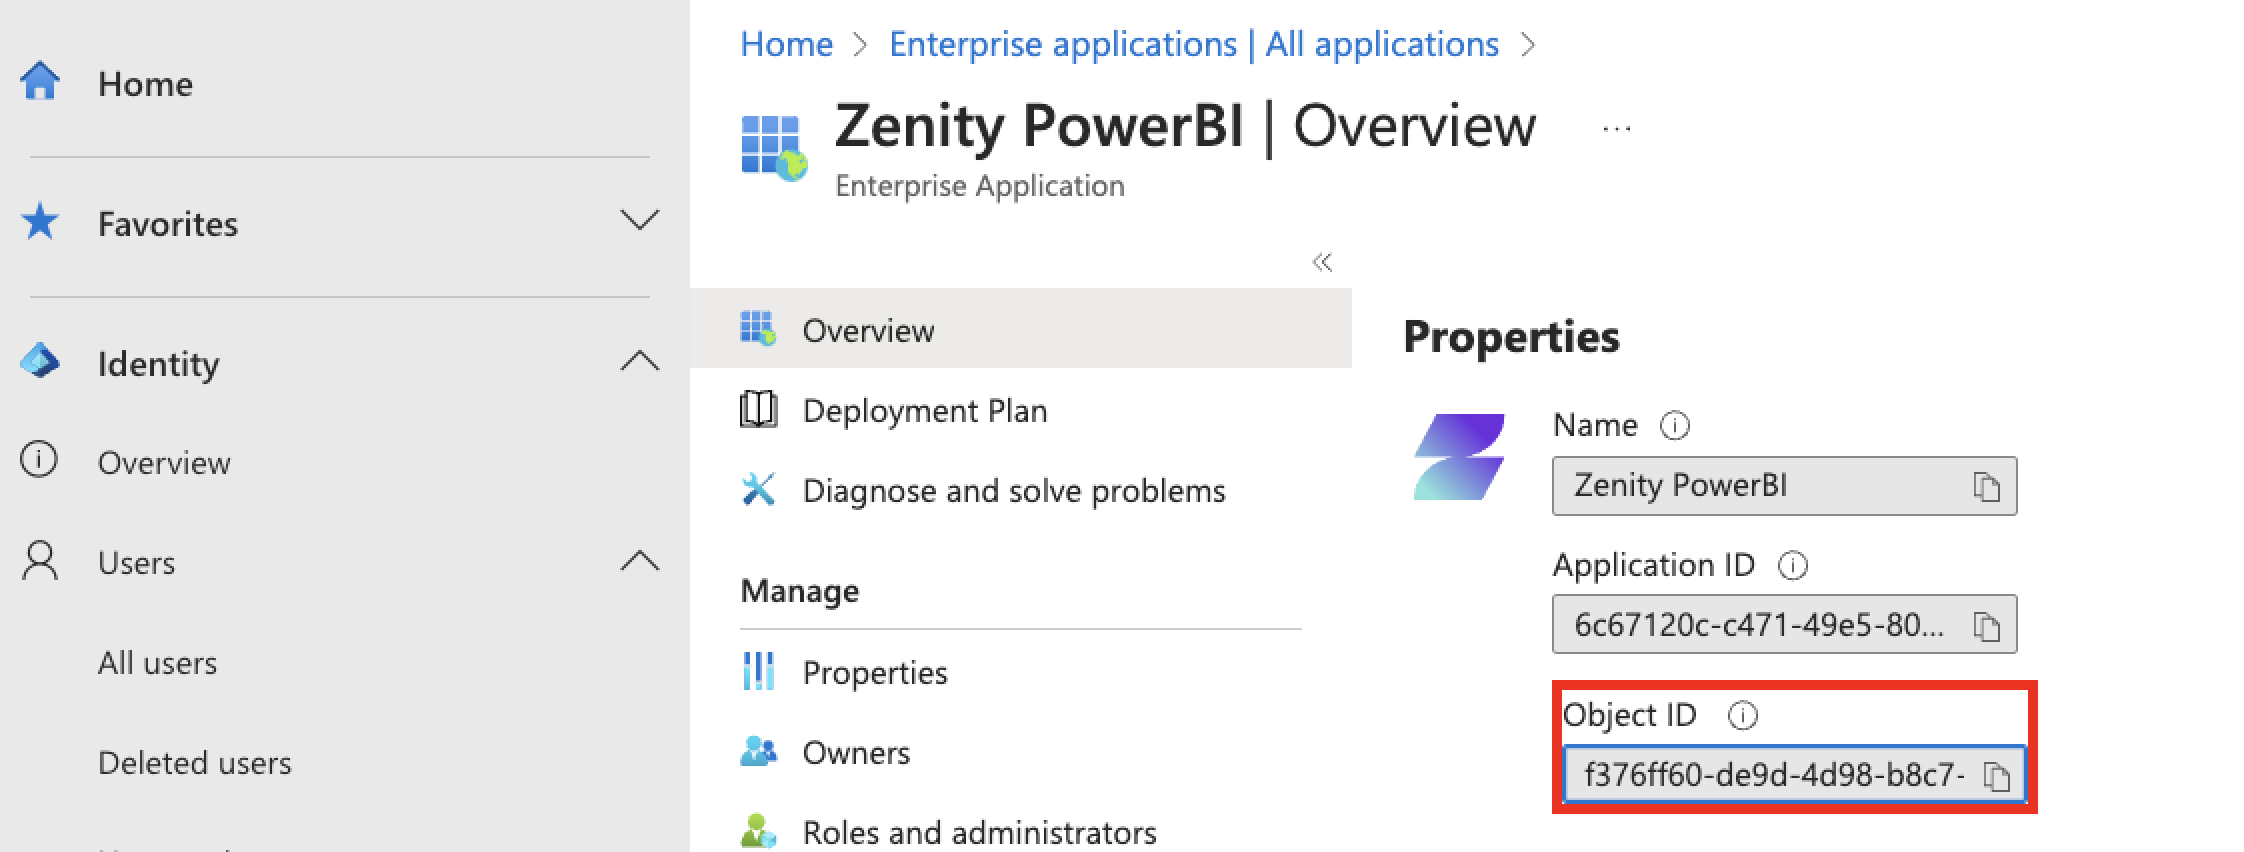
After the consent a Service Principal will be created in your tenant. Locate in Microsoft Entra(AAD) 'Enterprise applications' by searching 'Zenity PowerBI'. Notice there are two identifiers:
- Application ID - The ID of Zenity managed app.
- Object ID - The ID of the Service Principal in your tenant.
Step 2: Create an Azure AD security group
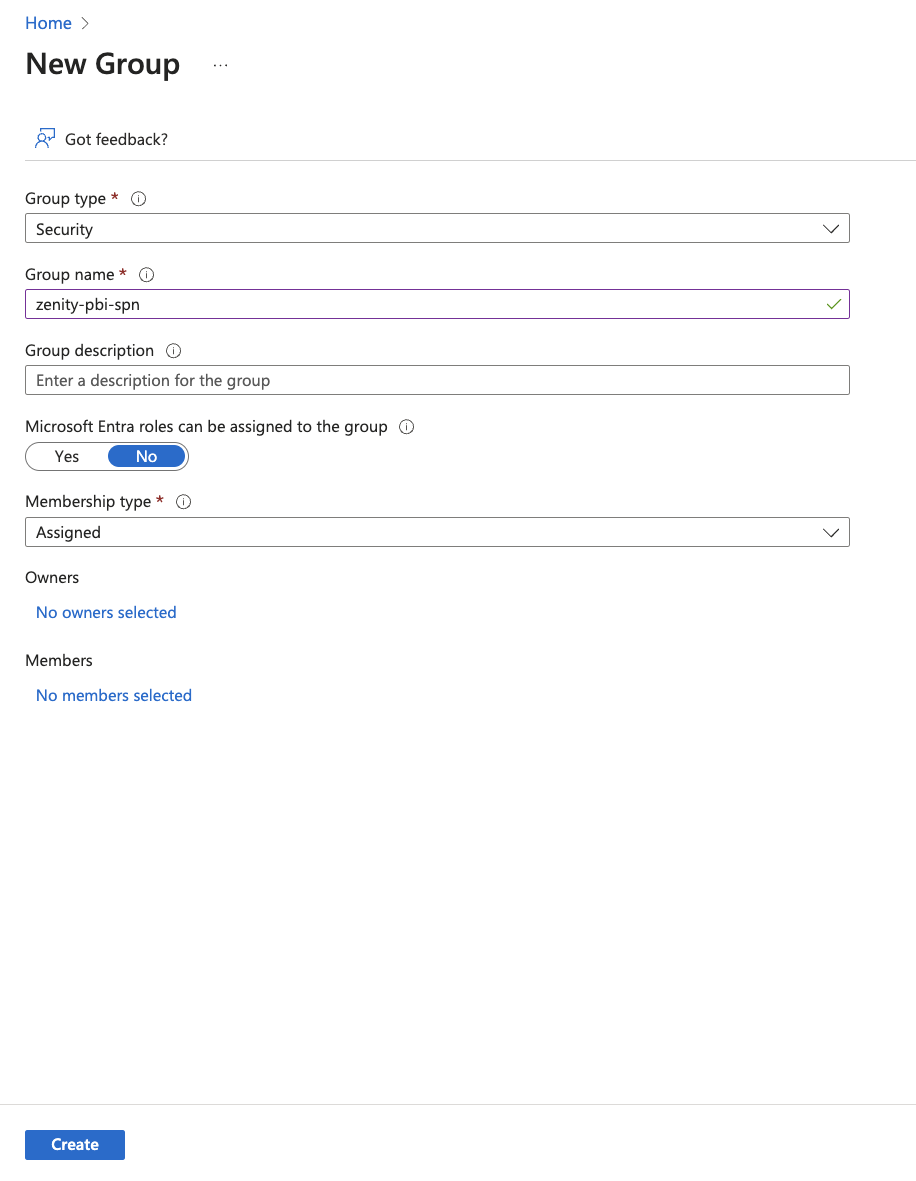
Zenity PowerBI service principal doesn't have access to any of your Power BI content and APIs. In order to provide the service principal application access to Power BI content and APIs, do the following:
* Create a security group in Microsoft Entra (AAD) with the following configuration:
- Group type: Security
- Group name: zenity-pbi-spn
- Microsoft Entra roles can be assigned to the group: No
- Membership type: Assigned
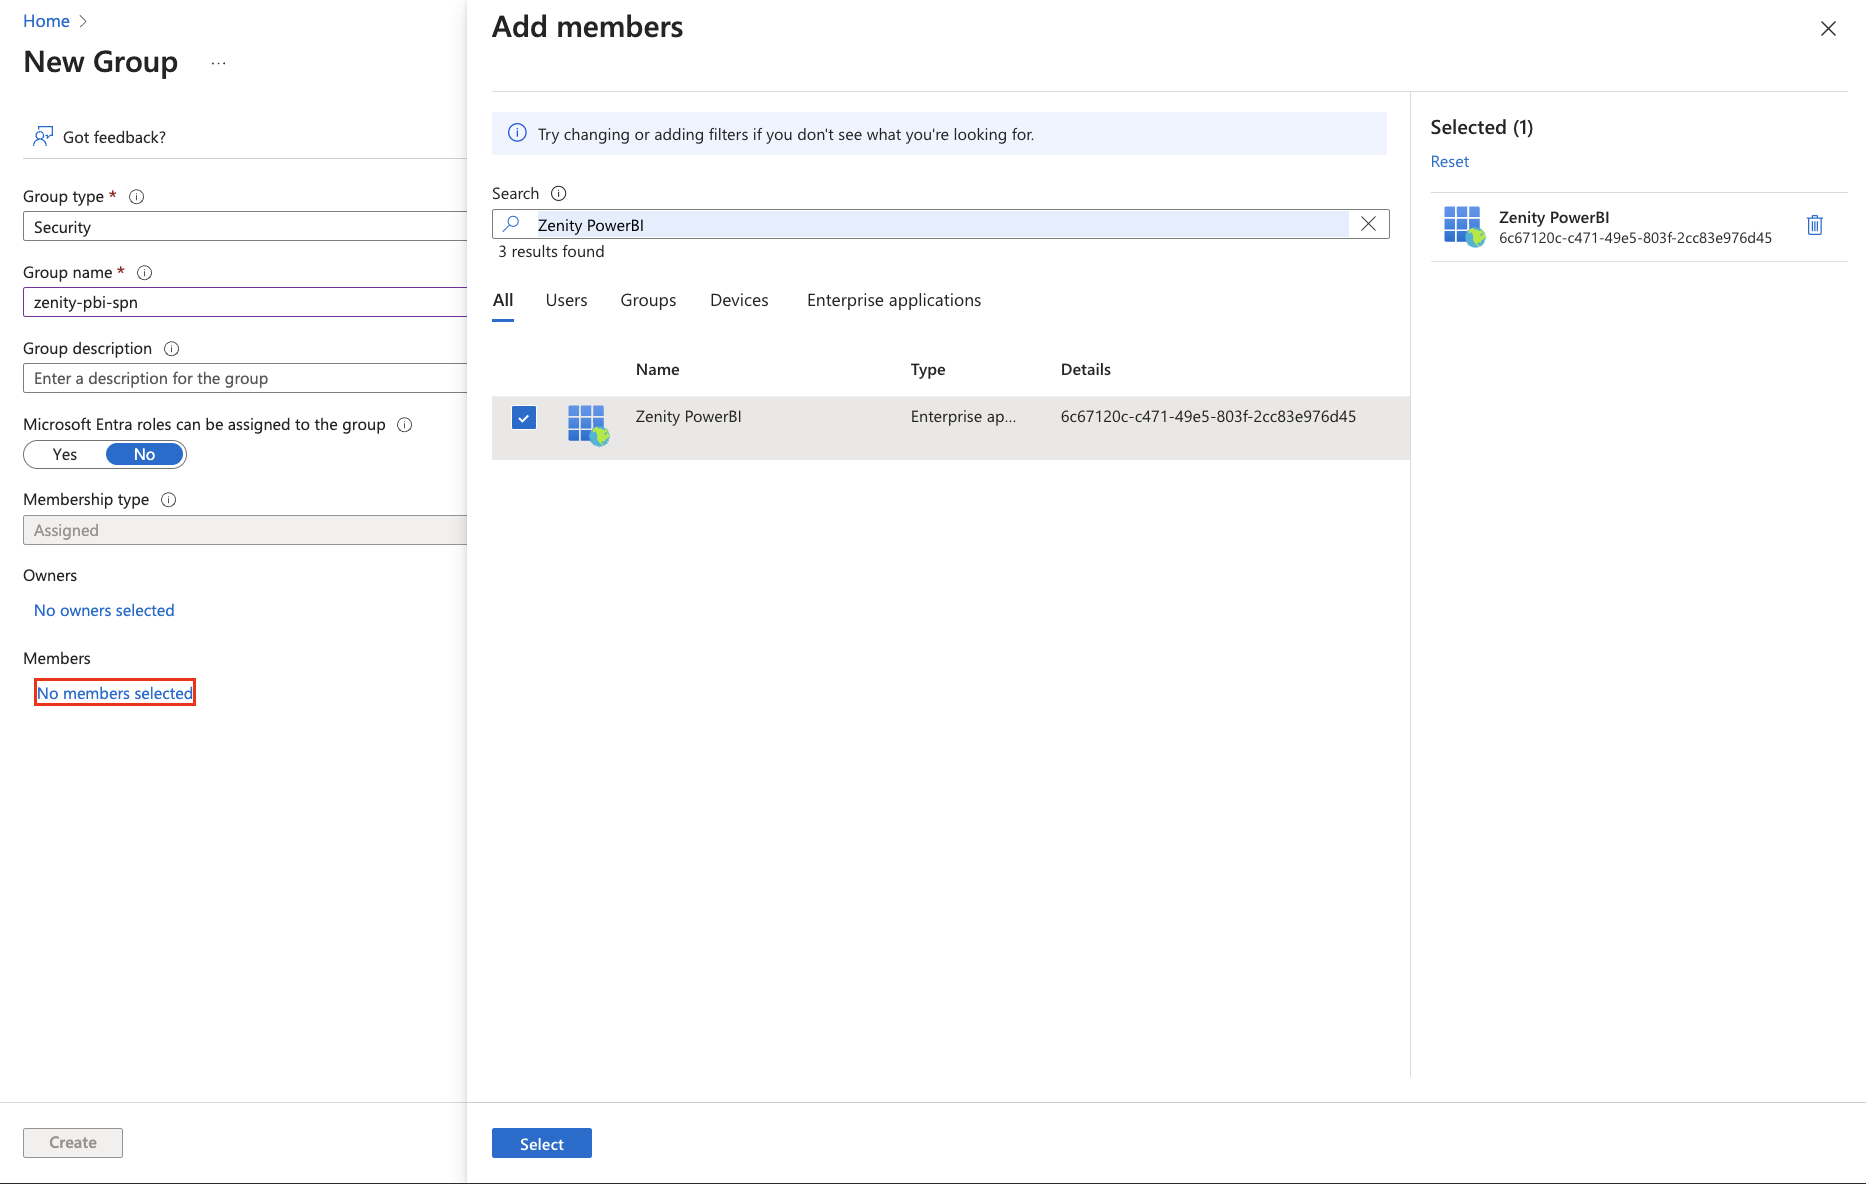
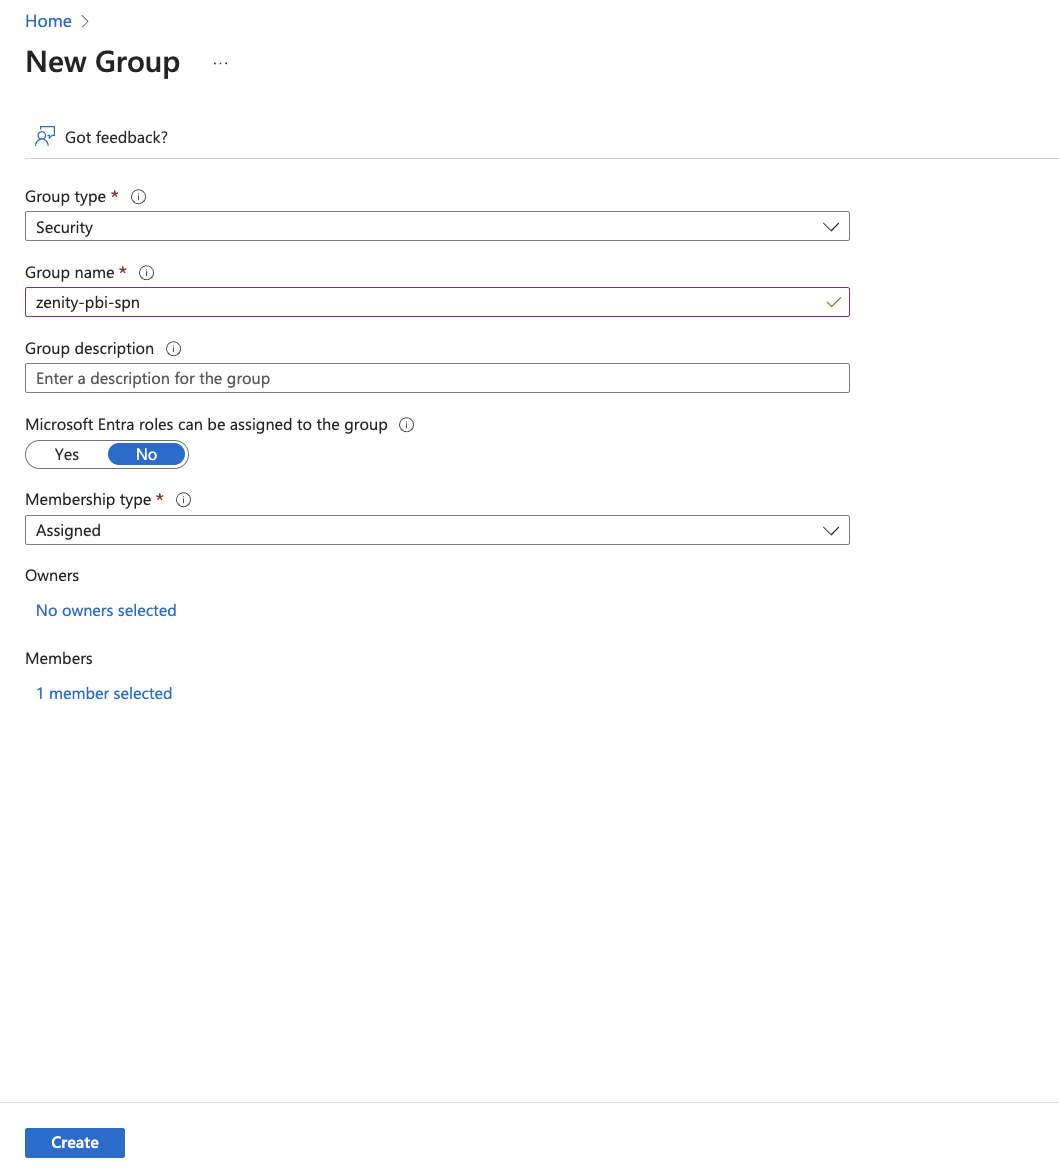
- Members: Select Zenity service principal
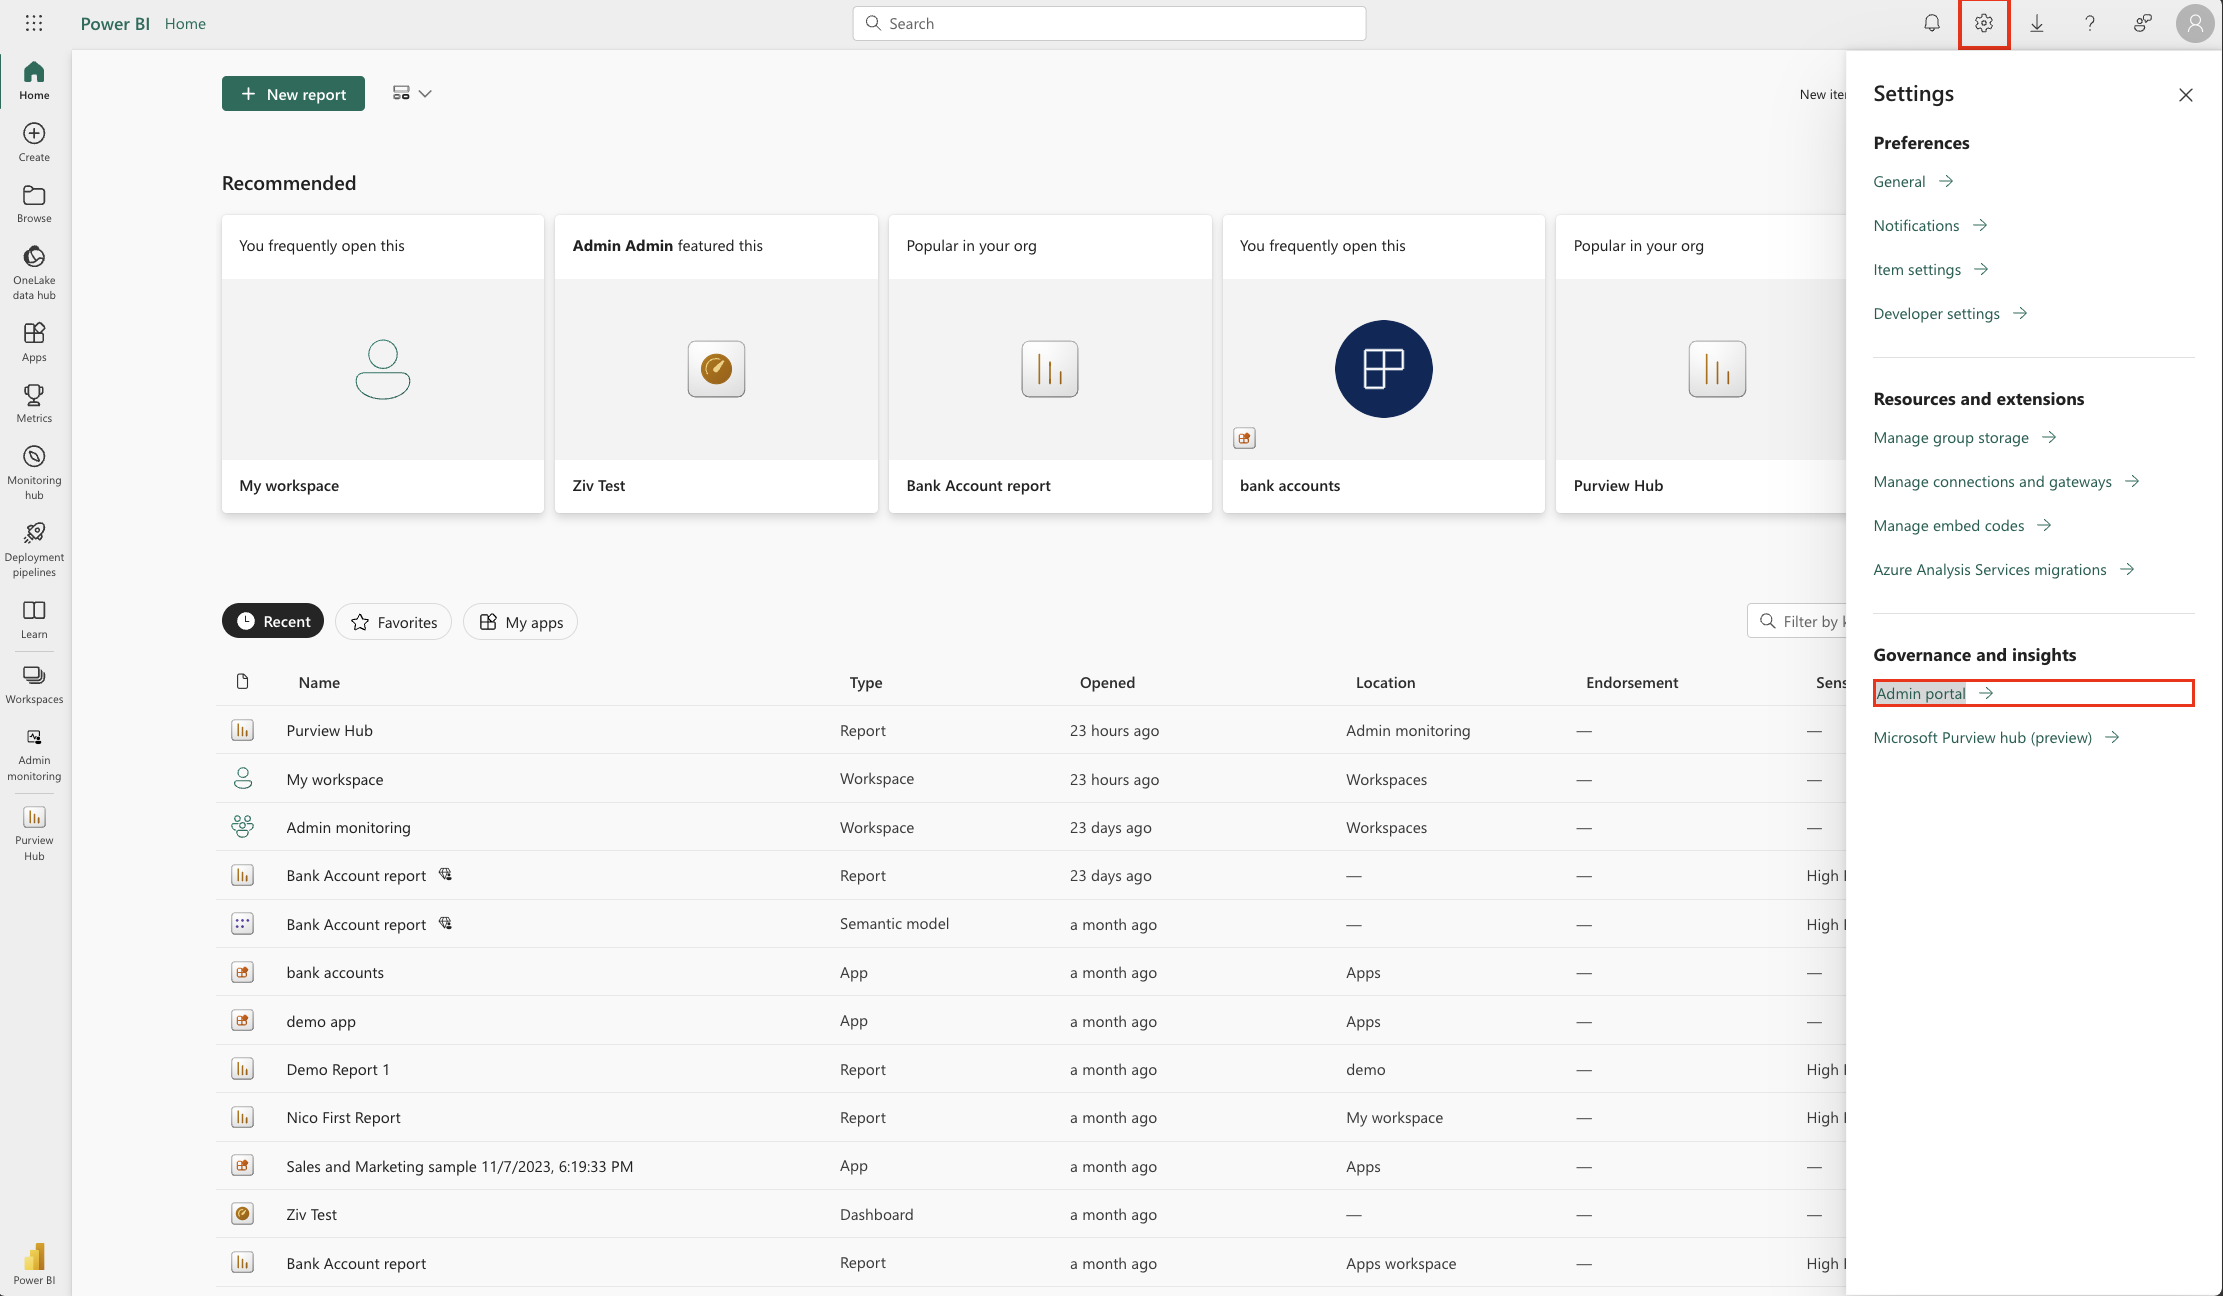
Step 3: Enable the Power BI service admin settings
For an Azure AD app to access the Power BI content and APIs, a Power BI admin needs to enable the following settings: * Allow Zenity service principal to use Power BI APIs
Enter Power Bi Admin portal
Admin Portal https://app.powerbi.com/admin-portal
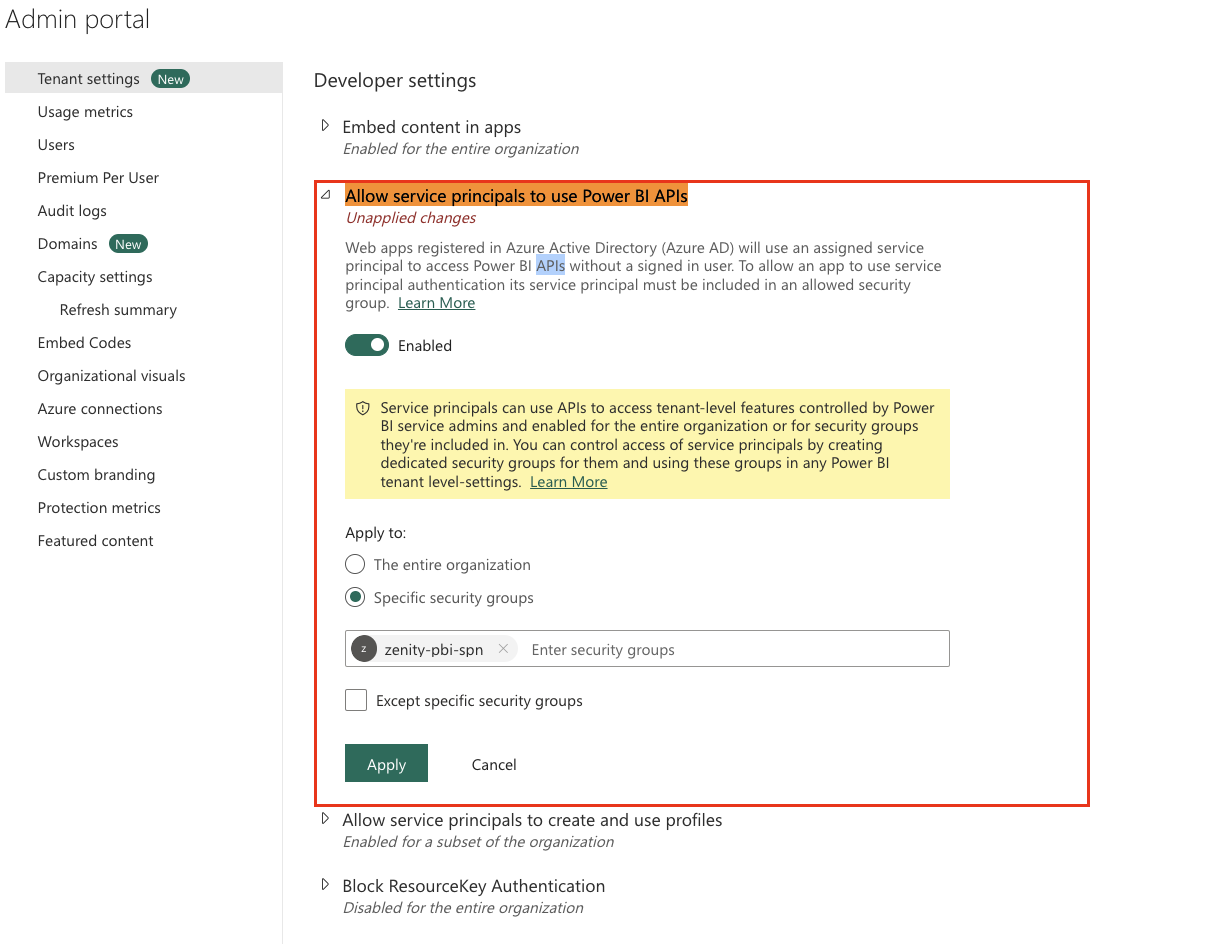
Allow service principals to use Power BI APIs
-
Enable "Allow service principals to use Power BI APIs" in apps for the specific security group you created in Azure AD.
-
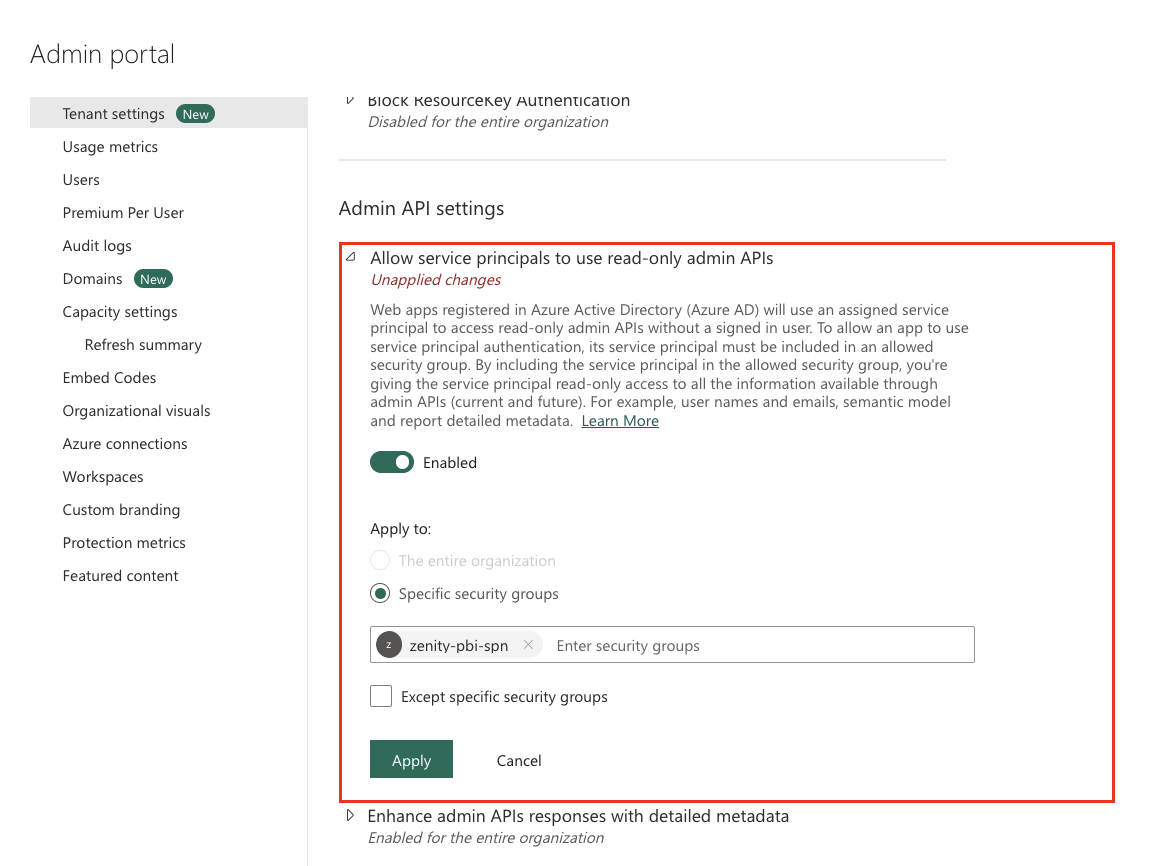
Enable "Allow service principals to use read-only admin APIs" in apps for the specific security group you created in Azure AD.
-
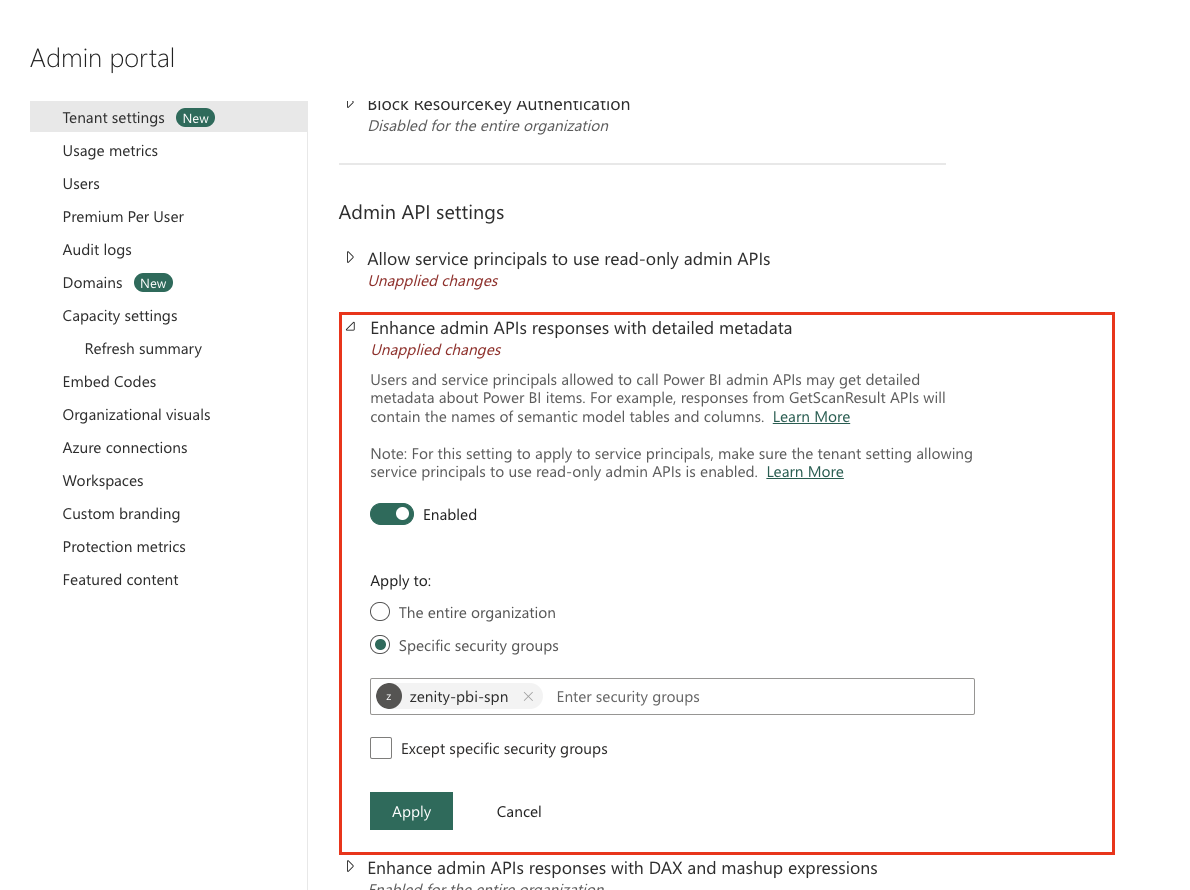
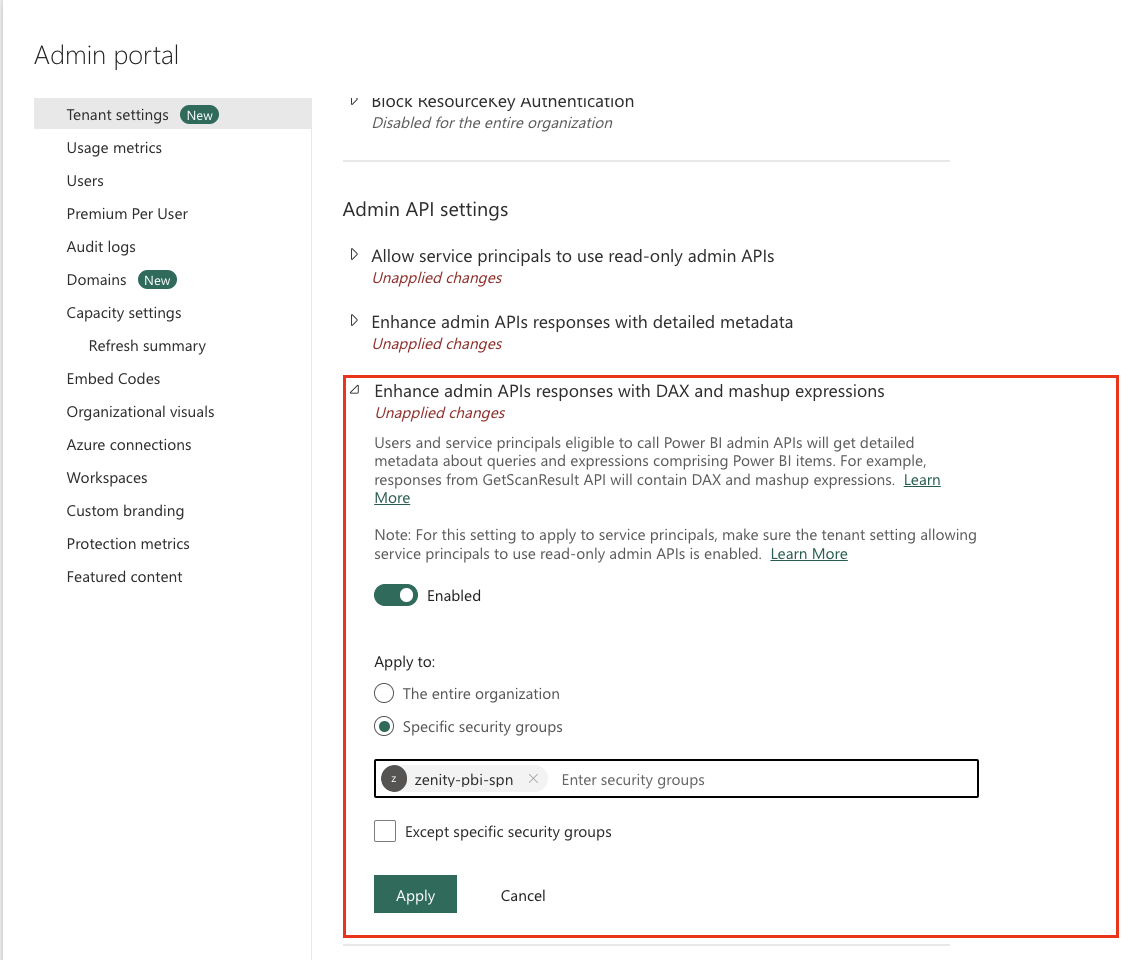
Enable "Enhance admin APIs responses with detailed metadata" in apps for the specific security group you created in Azure AD.
-
Enable "Enhance admin APIs responses with DAX and mashup expressions" in apps for the specific security group you created in Azure AD.
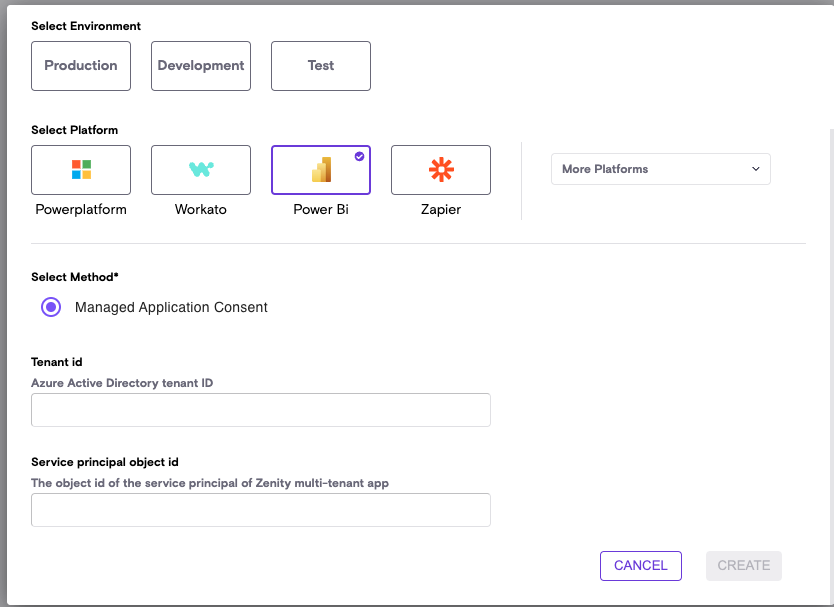
Step 3: Create the integration in Zenity portal
Retrieve the following details from your Azure Active Directory:
- Your AAD tenant id
- The Object ID of Zenity PowerBI service principal - Please do not confuse with the Application ID
Sign into Zenity portal, go to Integrations page, click CREATE NEW and provide the details:
IPs Whitelisting Consideration
In our ongoing efforts to enhance the security and reliability of our software, we will be updating the public IP addresses used by our Services and APIs. If your company policy requires you to safelist IP Addresses for your inbound integrations then please make sure the below IPs are safelisted.
EU (Ireland) Region
- 18.200.62.37
- 52.31.196.233
- 108.128.206.229
- 99.81.56.225
US (Ohio) Region
- 18.116.189.61
- 3.147.9.237
In addition, here are the service endpoints for the US region. * Zenity API endpoint: api.us1.zenity.io * Zenity portal endpoint: app.us1.zenity.io