Microsoft Tenant Integration via Service Account
This guide articulates the technical prerequisites to set up an integration between Zenity and Power Platform using a Service Account for authentication.
This authentication type is based on user-delegated access which requires creating both an application and a dedicated user account.
Goals:
- Create and set up an application that would allow Zenity to authenticate and act on-behalf-of the dedicated user account. The application will only be used to authenticate the aforementioned user.
- Create a dedicated user account that will be used by Zenity for data collection.
In this document, you will find both a quick guide and a step-by-step guide.
Quick guide
A short summary of the steps required to set up your integration.
Step 1: Create an Azure AD application
- Create a single-tenant Azure AD application
- Enable Allow public client flows under Authentication
- Enable the following delegated permissions under API permissions
- Flow: Activity.Read.All, Flows.Read.All, User
- Microsoft Graph: User.Read, User.Read.All, Group.Read.All, ExternalConnection.Read.All, TeamsAppInstallation.ReadForUser.All
- Dynamics CRM: user_impersonation
- PowerApps Service: User
- PowerBI Service: Tenant.Read.All
- Grant admin consent for your organization
Step 2: Create a dedicated user account
- Create a dedicated user account
- Set up a long and complex password, ideally one that is randomly generated
- Make sure the password has no expiry date
- Make sure the user does not have MFA on, as it would prevent application authentication
- Make sure the user can log in to Azure AD from IP addresses 18.200.62.37 , 52.31.196.233, 108.128.206.229 , 99.81.56.225 used by Zenity services (consider Conditional Access policies)
- Grant the Power platform administrator or Power BI Administrator (If you have been granted restricted access to certain environments only) permission under Assigned roles
- Assign a Power Apps, Power Automate and Power BI license under Licenses. Any license for each of these services will do including the free ones.
Step-by-step guide
Detailed instructions on how to set up your integration.
Step 1: Create an Azure AD application
Open Azure AD portal
- Create an Azure AD application
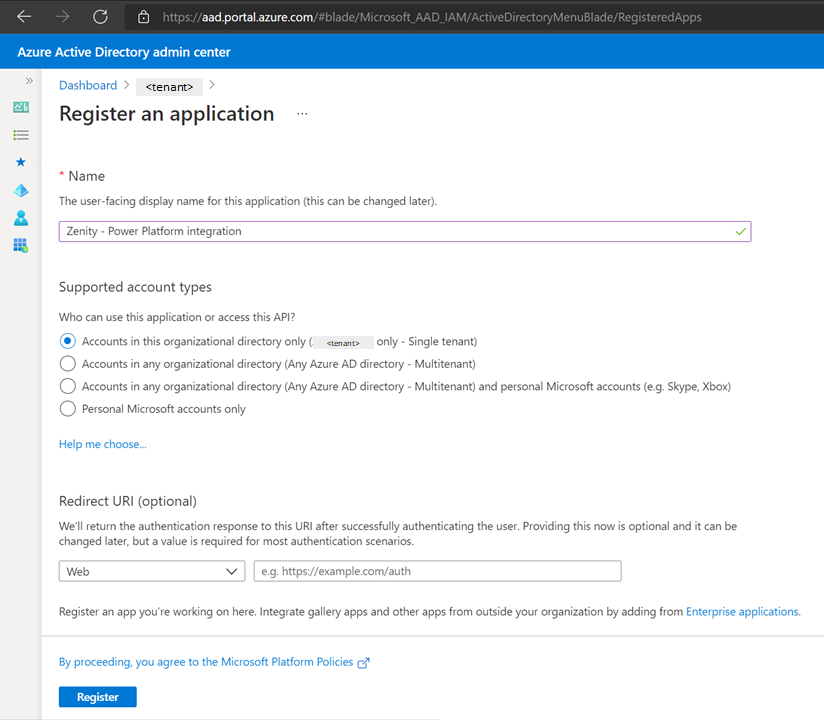
- Select App registration
- Click New registration
- Select a display name
- Under Supported account types choose Accounts in this organizational directory only (\<tenant> only - Single tenant)
- Click Register to complete
 2. Set up authentication
1. Open the application page in Azure AD
2. Select Authentication
3. Under Advanced settings, make sure Allow public client flows is set to
2. Set up authentication
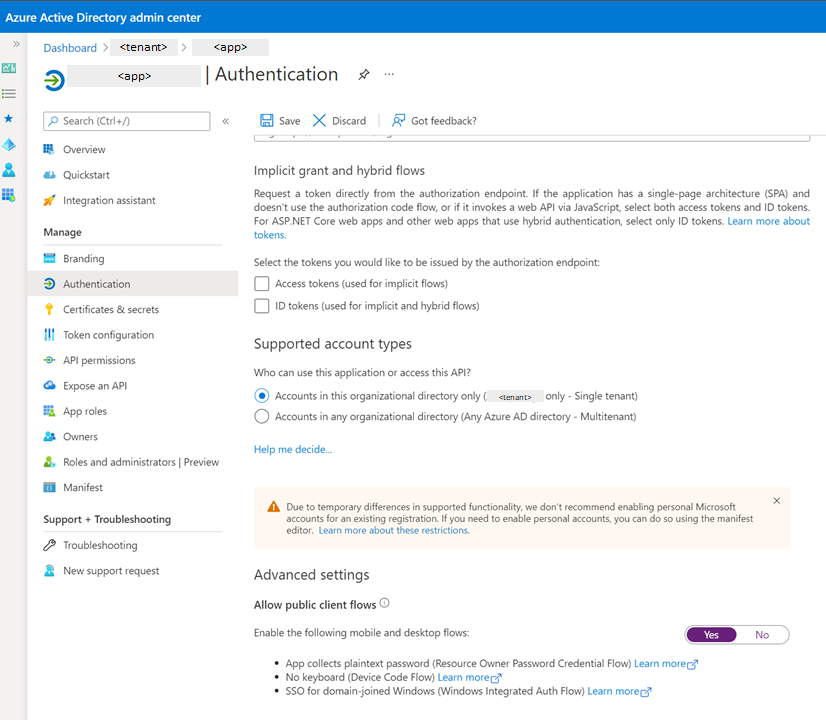
1. Open the application page in Azure AD
2. Select Authentication
3. Under Advanced settings, make sure Allow public client flows is set to Yes
4. Click Save to complete
 3. Set up permissions
1. Open the application page in Azure AD
2. Select API permissions
3. Click Add a permission and enable the following permissions:
3. Set up permissions
1. Open the application page in Azure AD
2. Select API permissions
3. Click Add a permission and enable the following permissions:
- Under Flow Service, Delegated permissions, choose Activity.Read.All, Flows.Read.All, and User
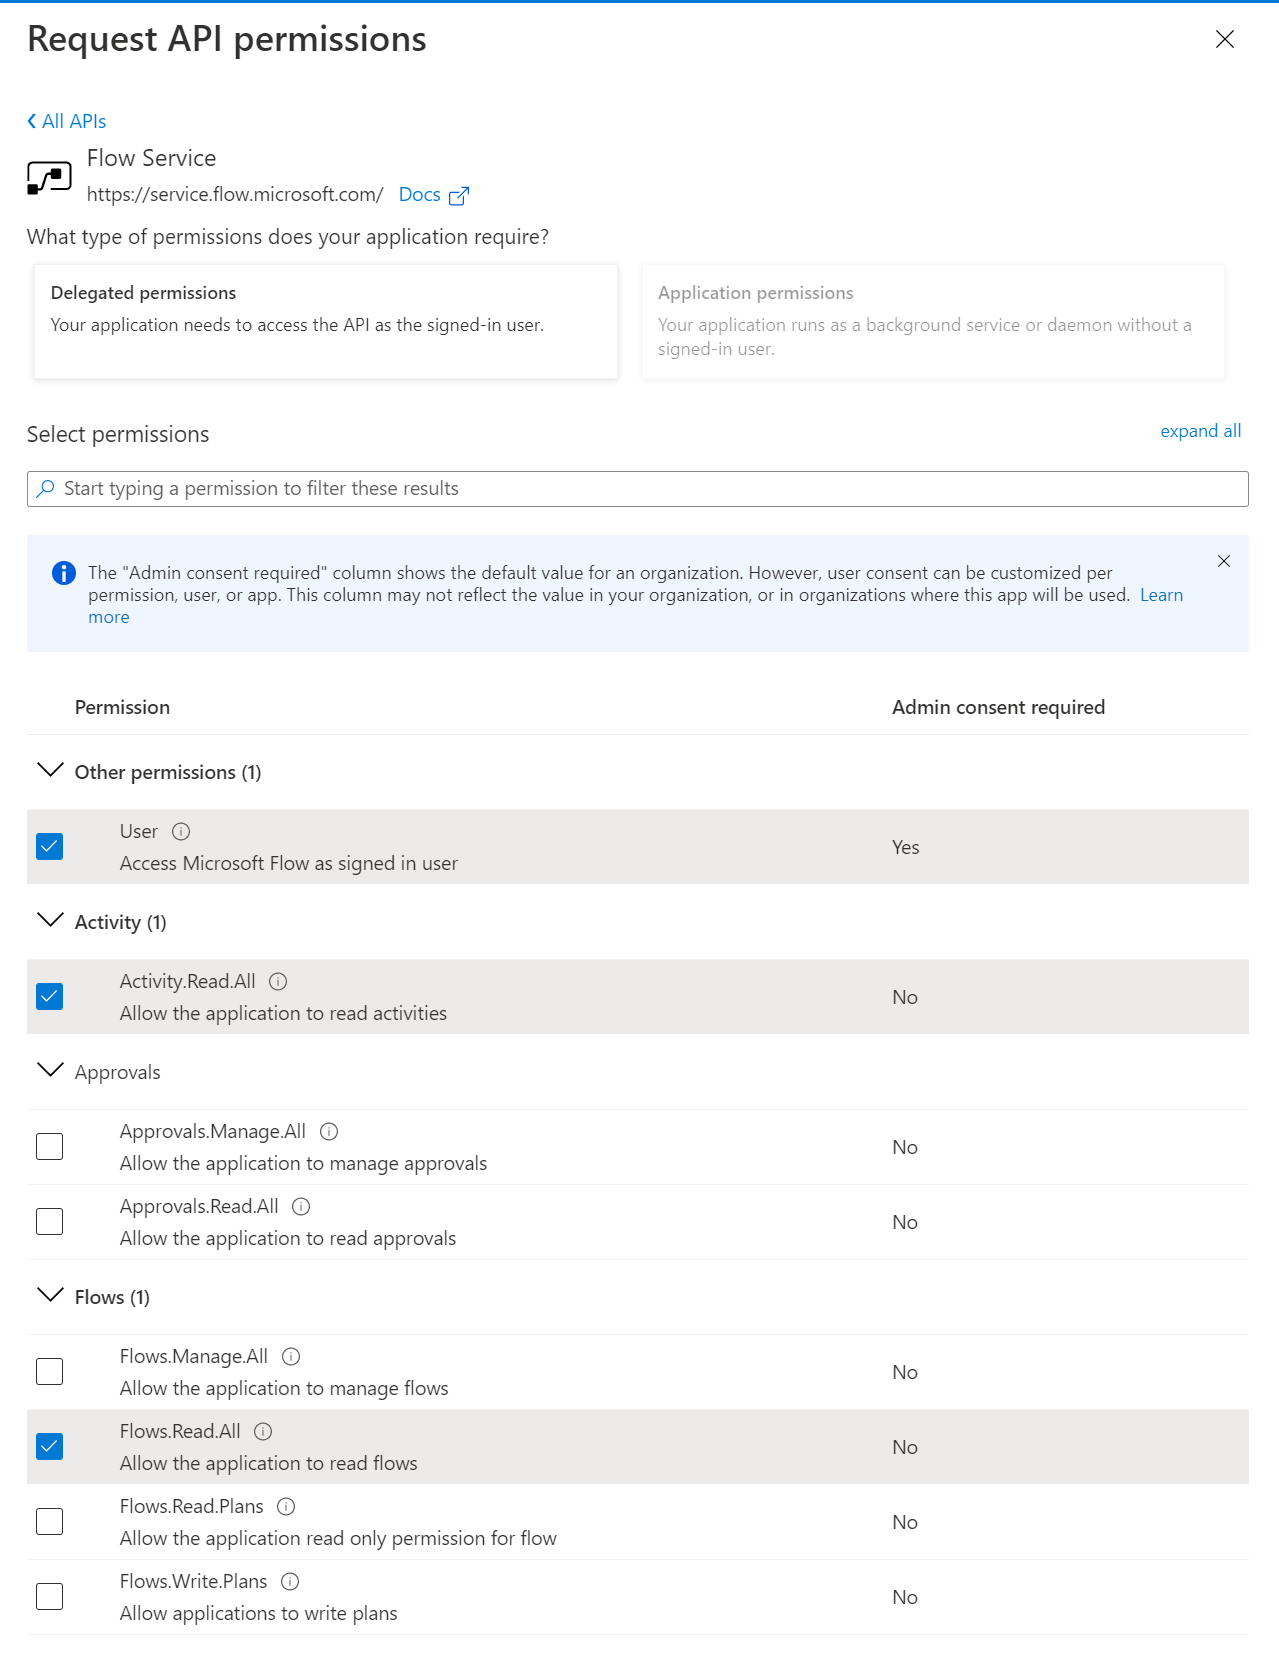
- Under Microsoft Graph, Delegated permissions, choose User.Read, User.Read.All, Group.Read.All
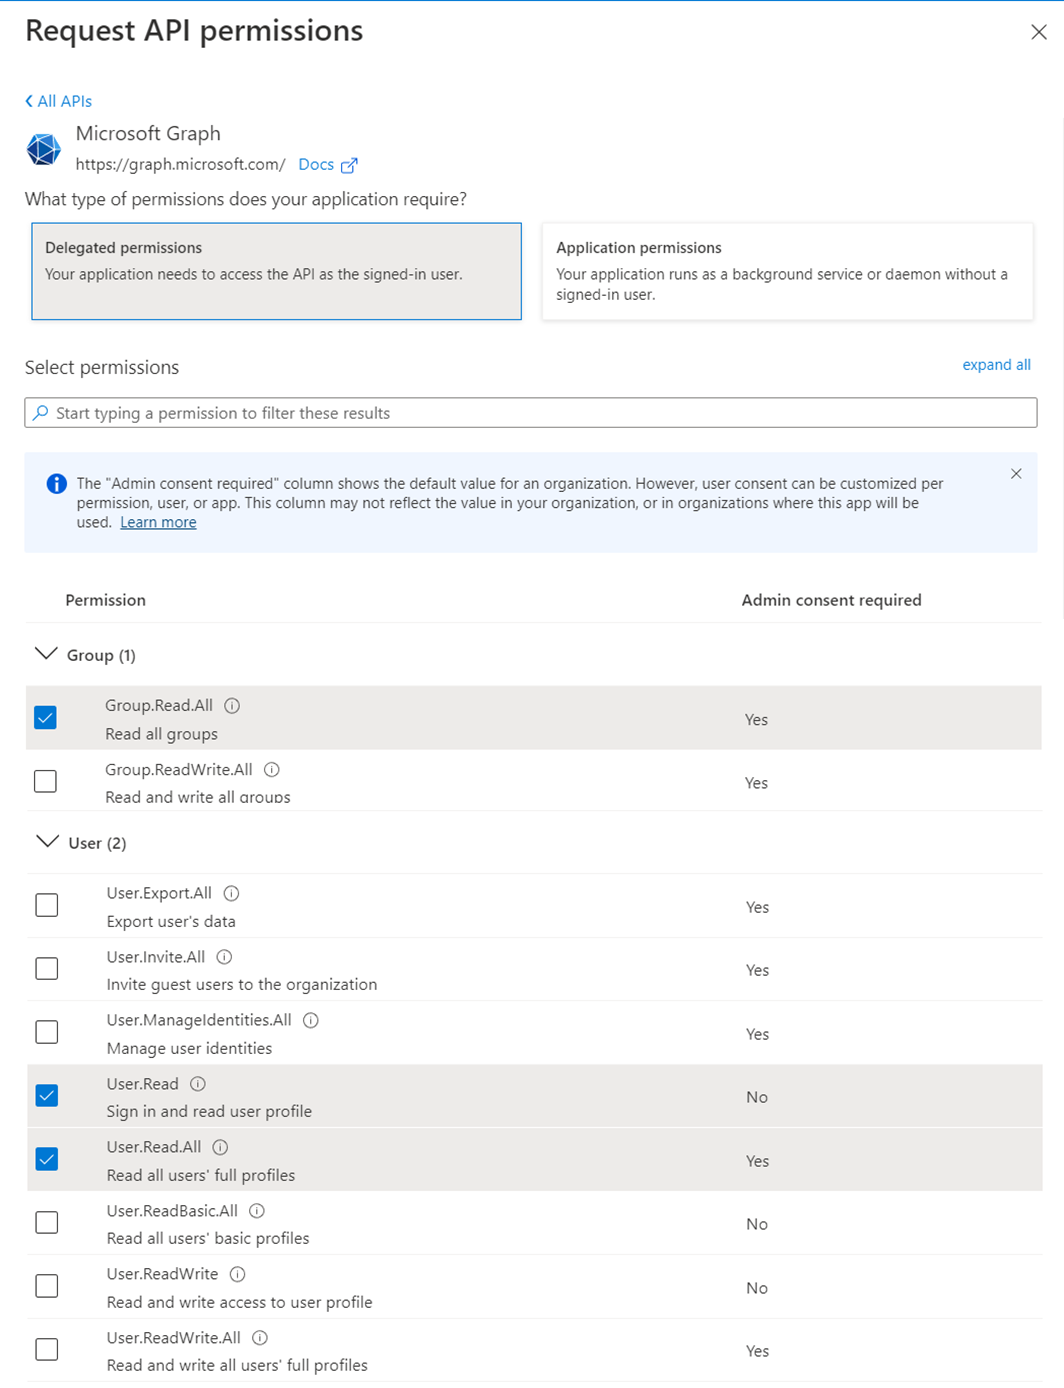
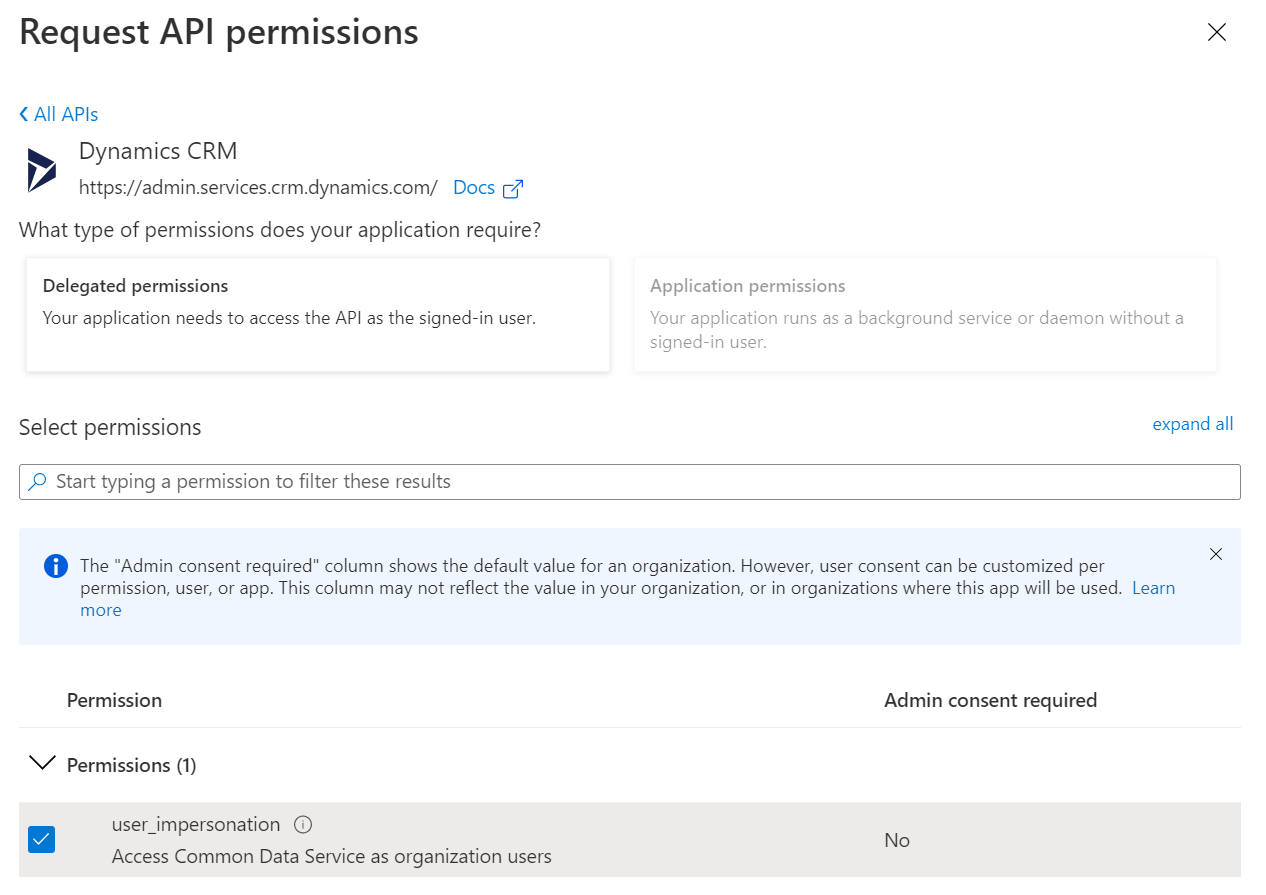
- Under Dynamics CRM, Delegated permissions, choose user_impersonation
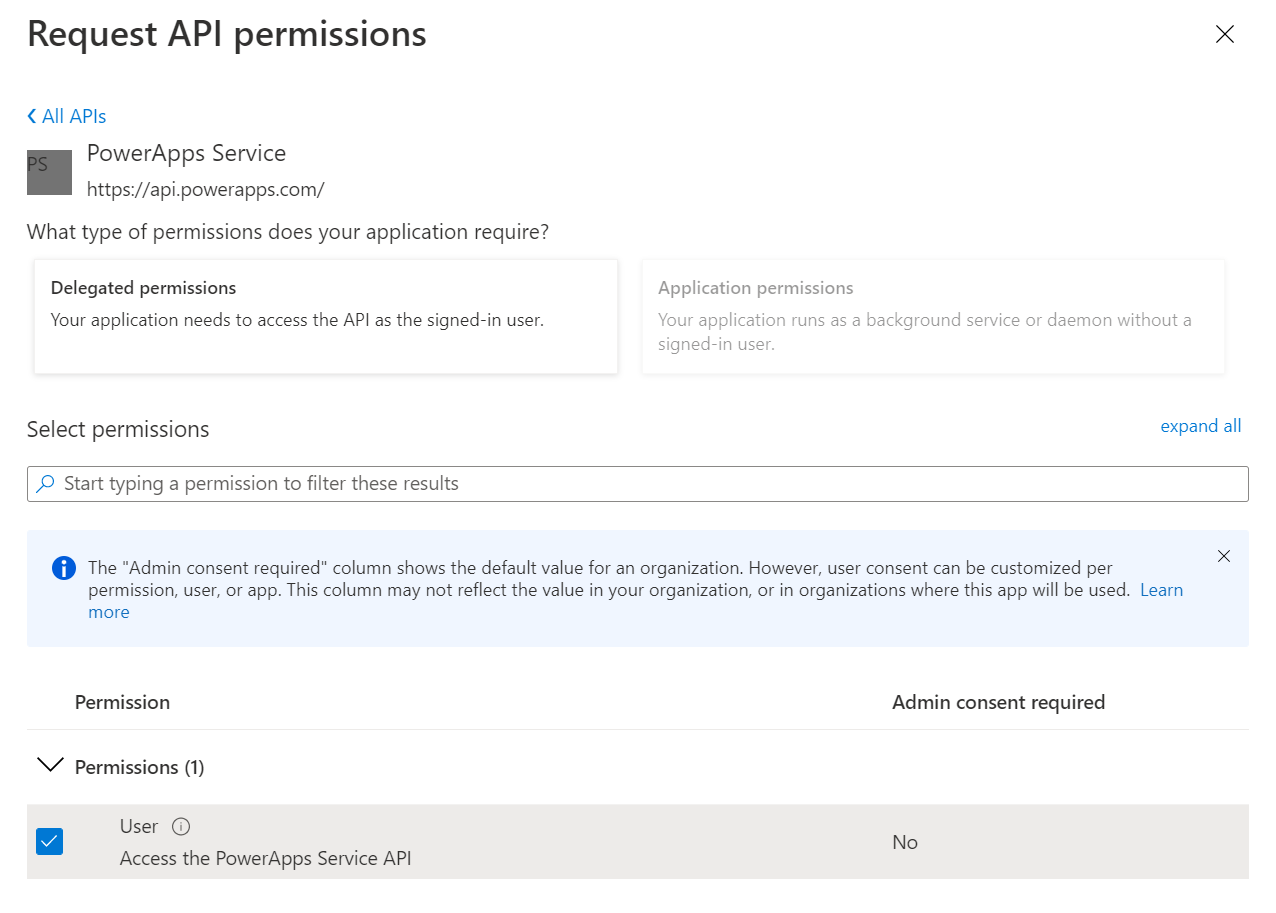
- Locate PowerApps Service under APIs my organization uses. Note, this is a different API than the"PowerApps Runtime Service"_, which we do not require access to.

-
Under Delegated permissions, choose User.
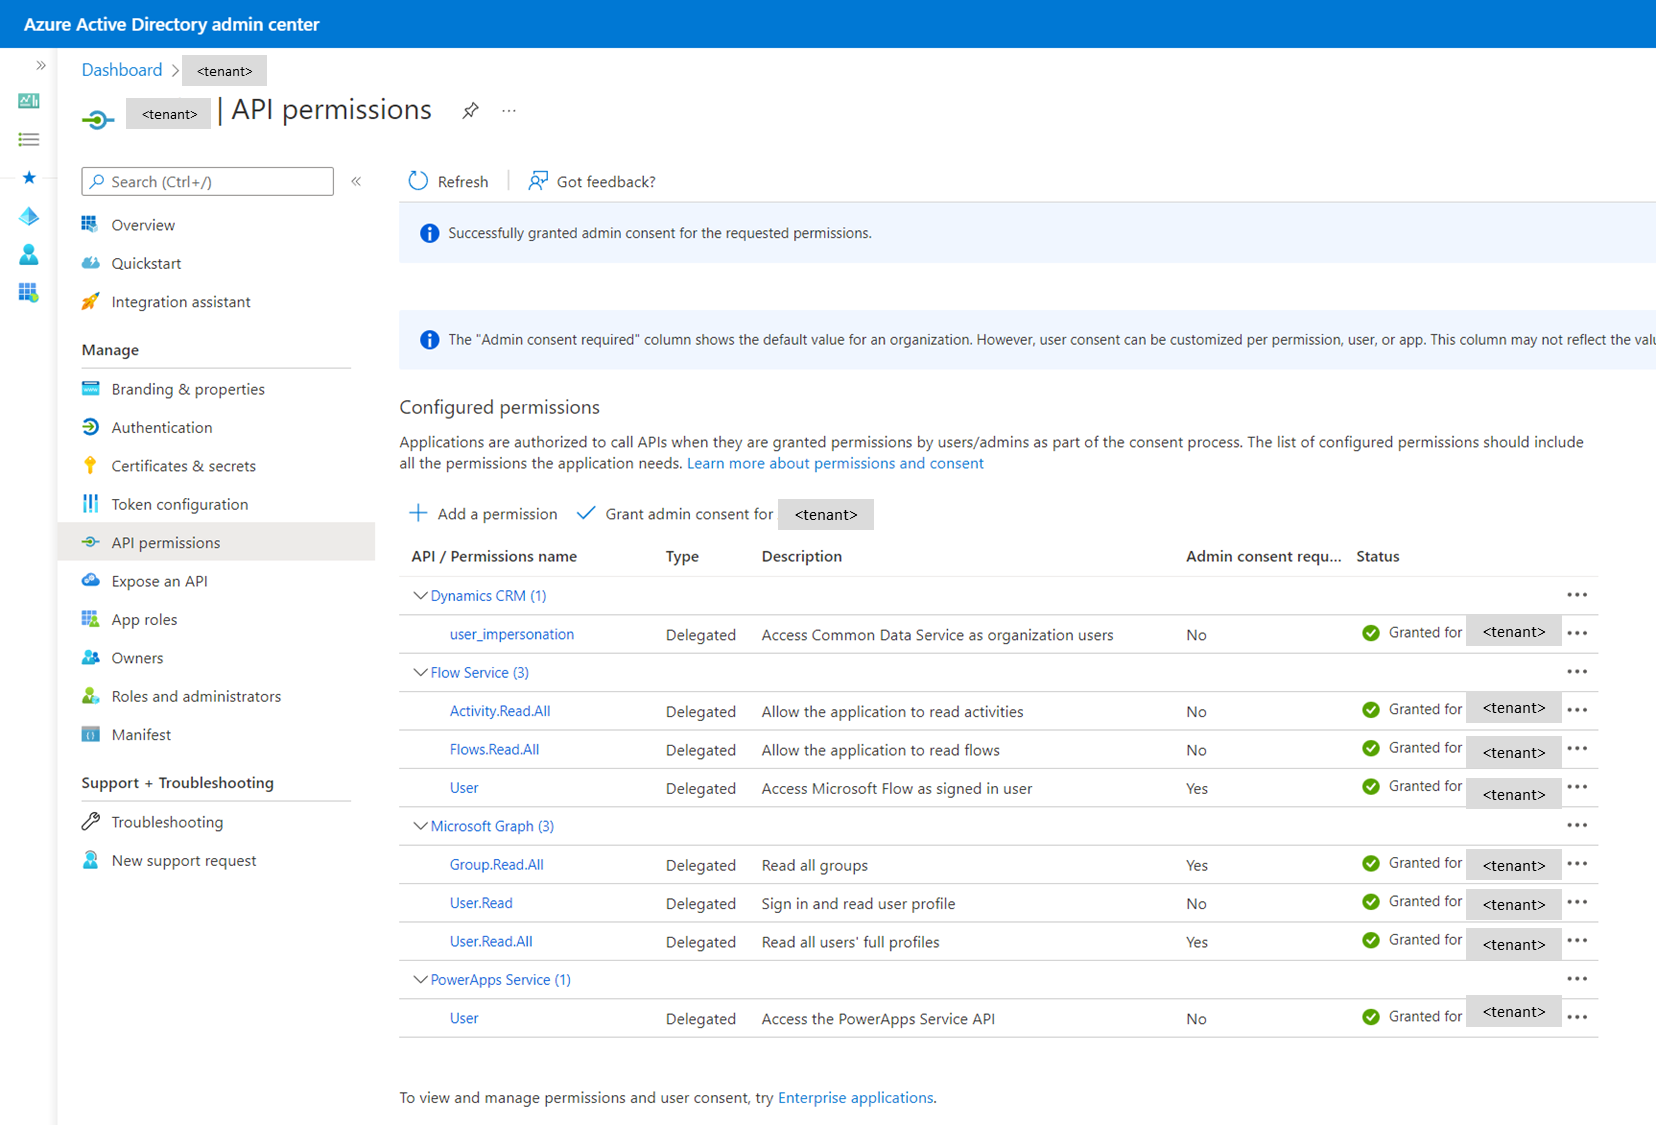
-
Under API permissions, Verify that the assigned permission are similar to those on the image below, and click Grant admin consent for \<tenant>
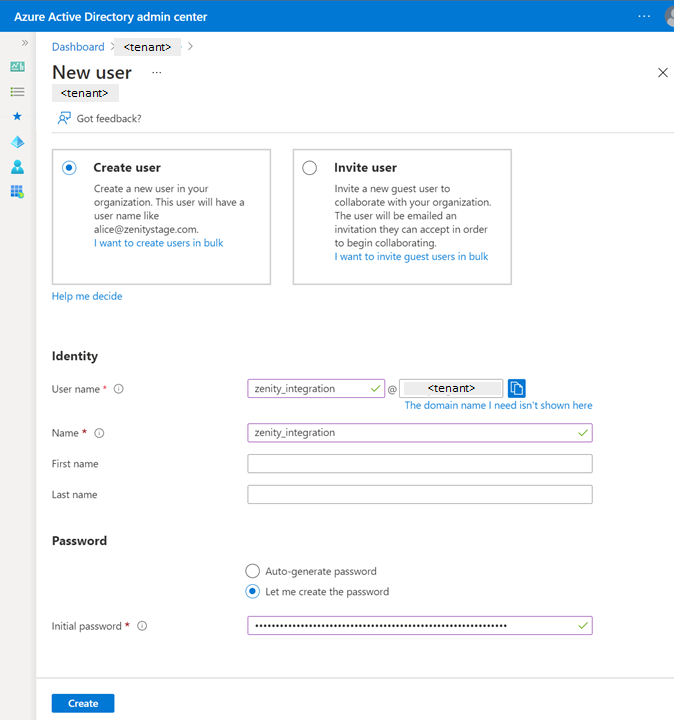
Step 2: Create a dedicated user account
Open Azure AD portal
- Create a new user account
- Set up a long and complex password, ideally one that is randomly generated
- Make sure the user does not have MFA on, as it would prevent application authentication
- Make sure the user can log in to Azure AD from IP addresses 18.200.62.37 and 52.31.196.233, used by Zenity services (consider Conditional Access policies)
 2. Grant the Power platform administrator permission under Assigned roles
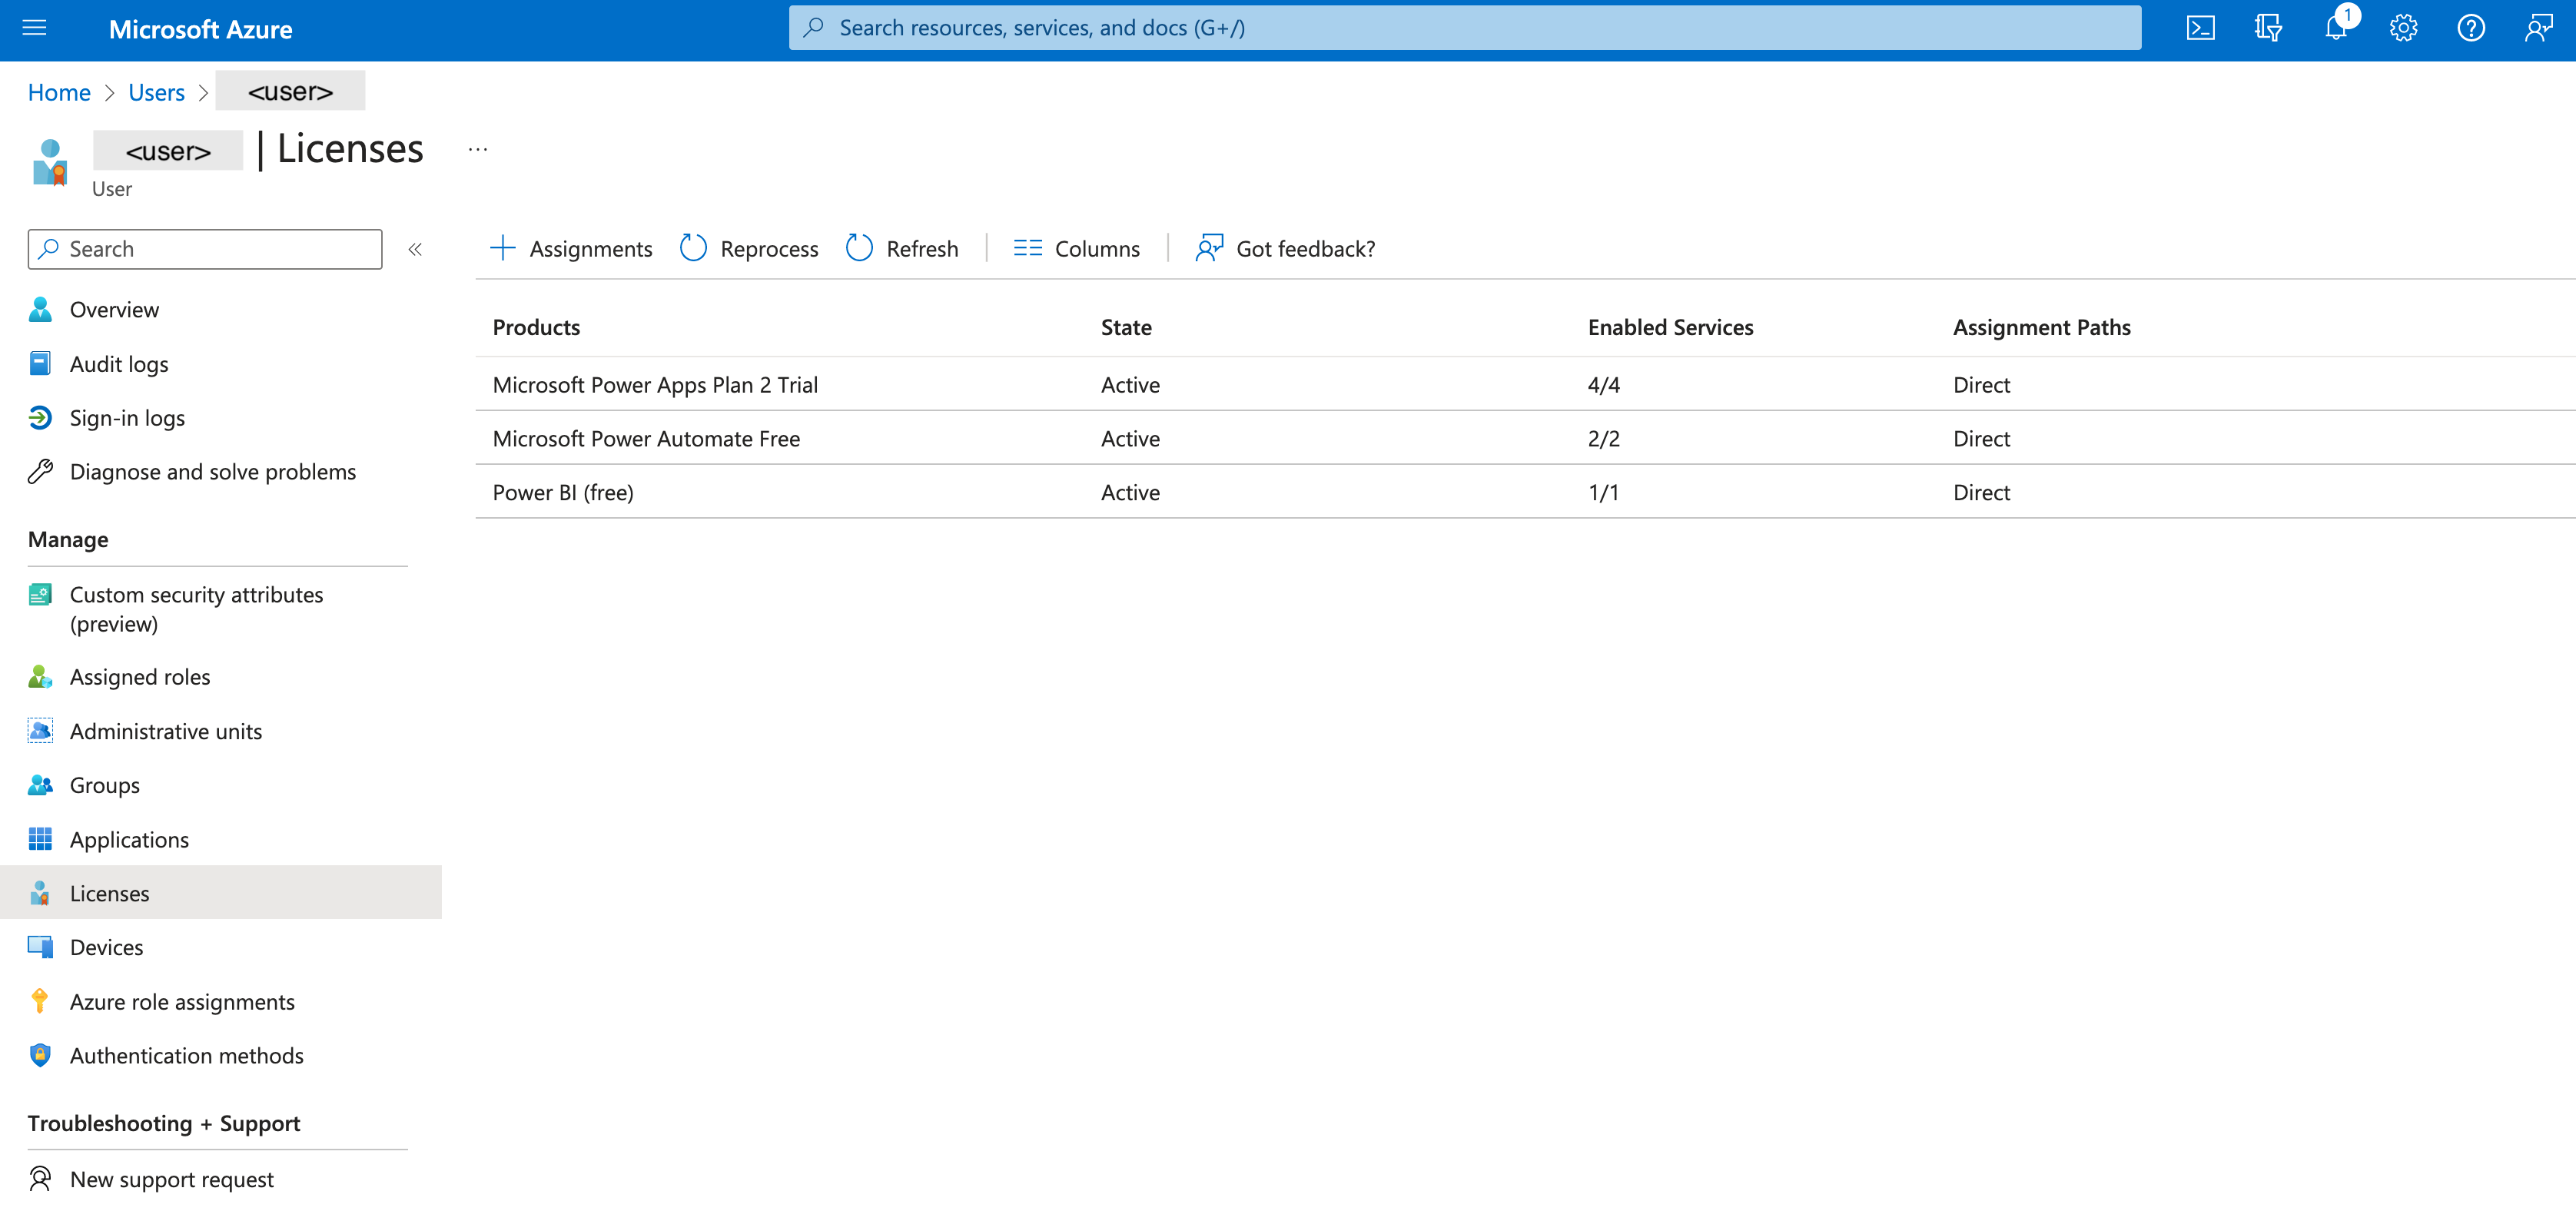
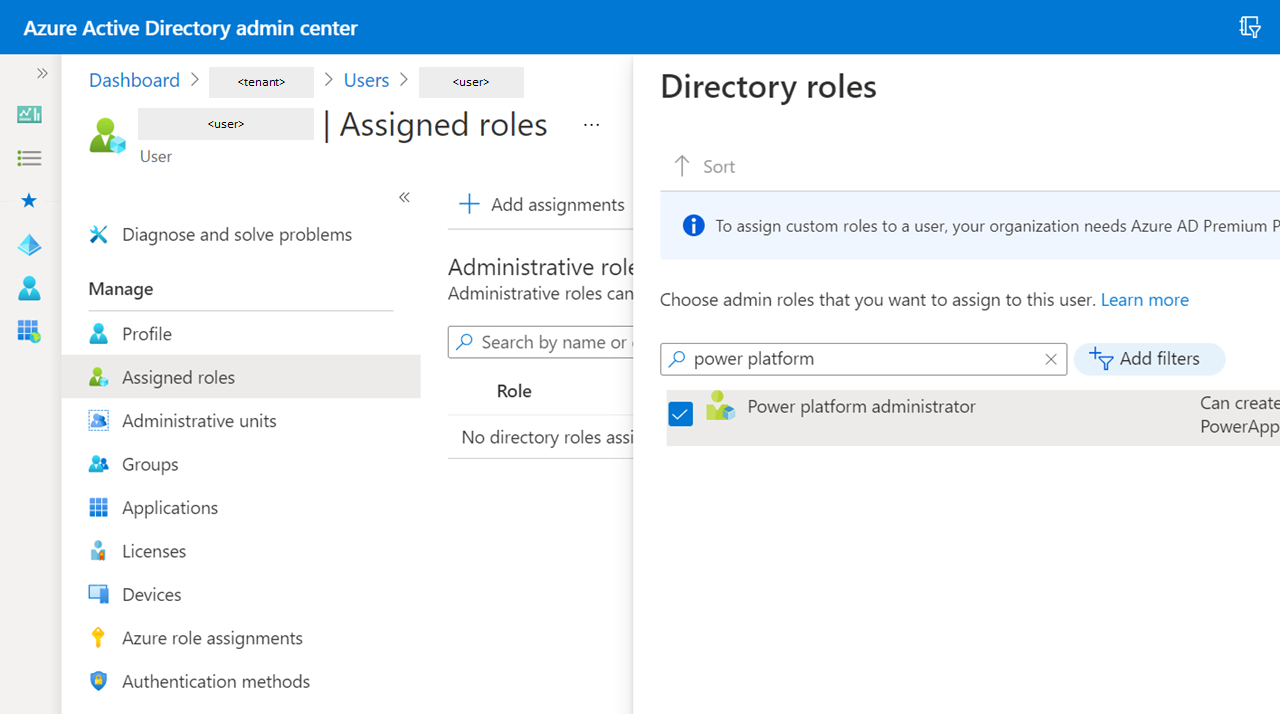 3. Assign a Power Apps, Power Automate and Power BI license under Licenses. Any license for each of these services will do including the free ones.