Google Vertex AI using Service Account
Google Vertex AI agents are supported by Zenity AI Detection & Response. Below are the technical steps required to set up permissions for Zenity into your organization Vertex AI resources.
Prerequisites
- Each GCP project to cover should have both billing enabled, and Vertex AI API enabled. More details in GCP documentation.
- list.projects api and Cloud Resource Manager API should be enabled on the project containing the service account created in step 1 below.
Step-by-step guide
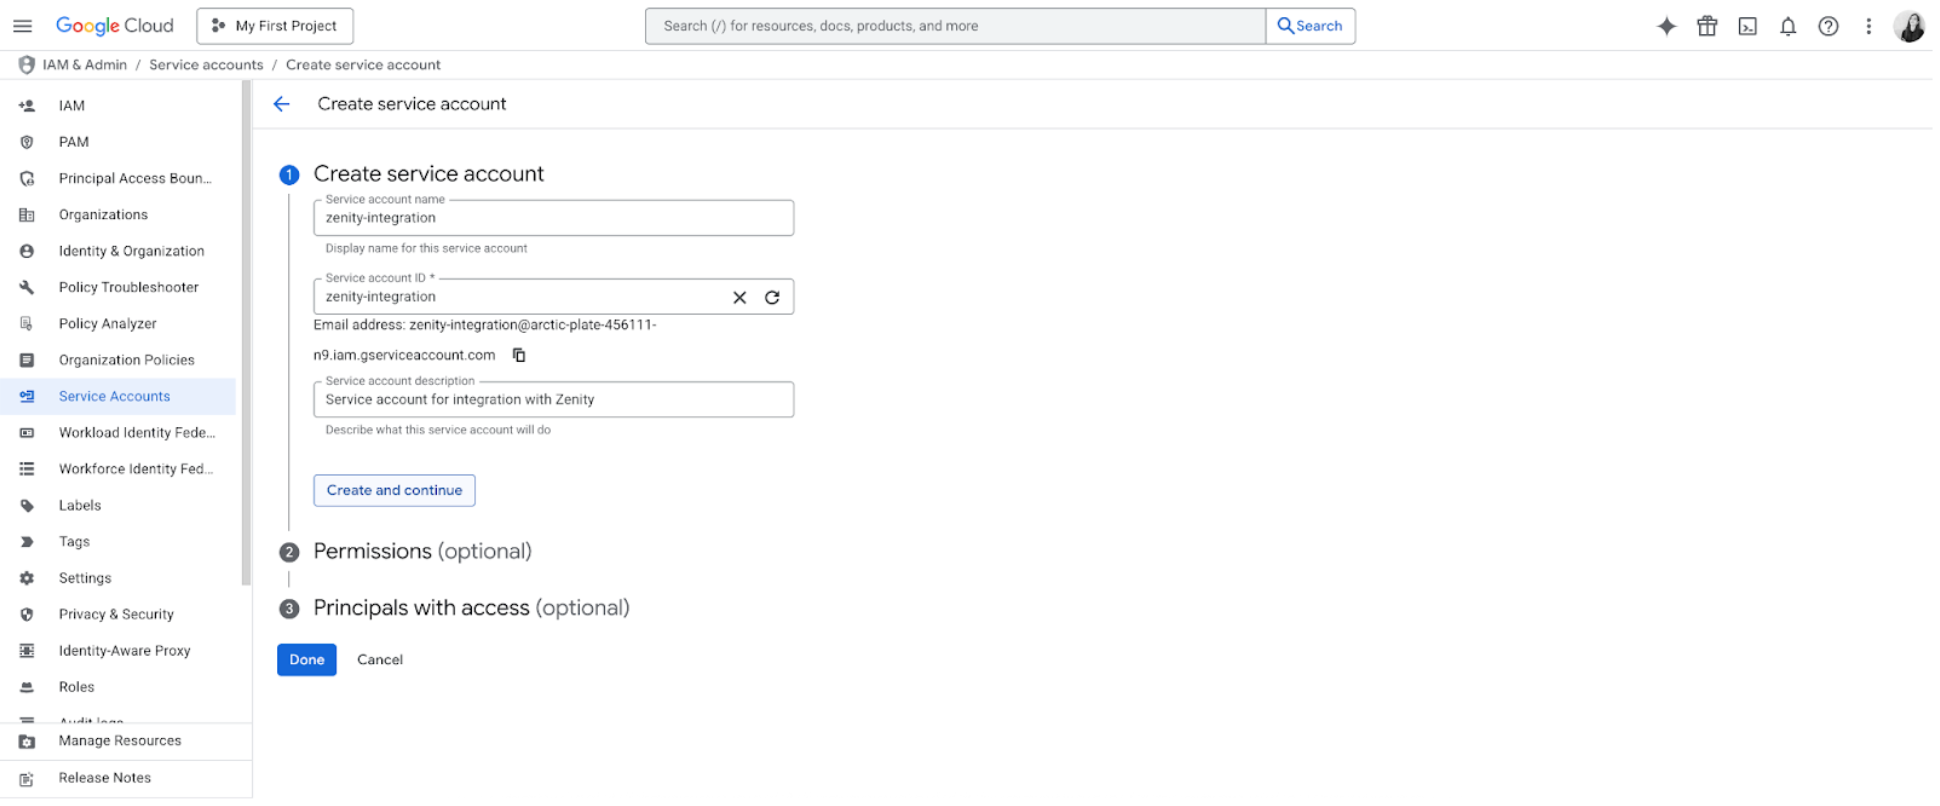
Step 1: Create A service account
- Go to service accounts https://console.cloud.google.com/iam-admin/serviceaccounts
- Select a management project if it exists, or else the project you wish to manage SAs in.
- Click “Create service account”
- Name you SA and click “Done” at the bottom.
- Click the newly created SA > choose the “keys” tab > click “Add key” > “Create new key”.
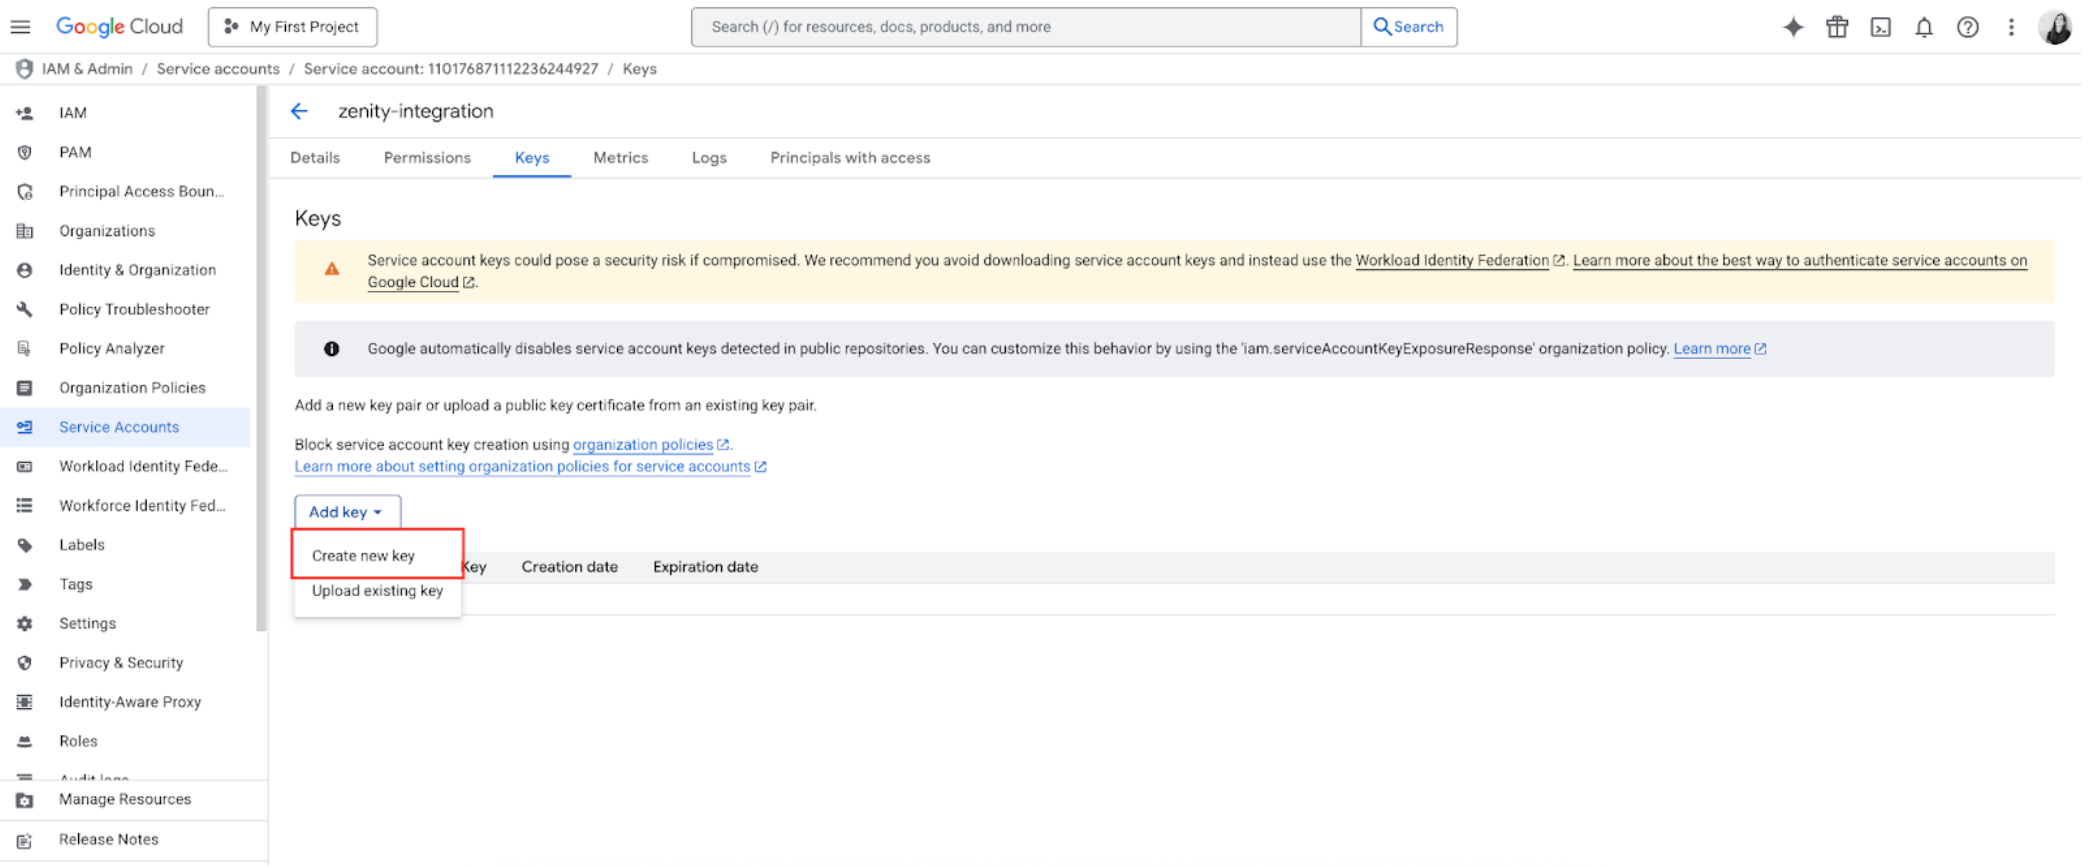
- Choose JSON and click “create”. This will download a JSON file containing the private key details for the service account as received from Google Cloud Platform, to be used in step 4 below.
- Choose the “Details” tab and copy the Email field of the SA to be used in Step 3.
Step 2: Create an organization level IAM role
- Go to IAM roles https://console.cloud.google.com/iam-admin/roles.
- Choose the organization level in the project selection as The IAM role should be created on the organization level in order to be able to access all projects using Vertex AI.
- Click “Create role”
- Name your role and add the following permissions one by one by clicking “Add permissions”
| Permission | Purpose |
|---|---|
| Resourcemanager.projects.list Resourcemanager.projects.get | To be able to identify all projects in the GCP organization. |
| Aiplatform.locations.list aiplatform.sessions.list Aiplatform.sessions.get Aiplatform.reasoningEngines.list Aiplatform.sessionEvents.list | Fetch runtime interaction data from AI Foundry agents such as threads, runs, messages etc. |
- Click “Create”.
Step 3: connect the newly created role with the service account
This step grants the service account the permissions defined in the IAM role over the scope of the entire organization.
- Go to https://console.cloud.google.com/iam-admin/iam
- Choose the project where the SA created in step 1 resides.
- Click “Grant Access”
- Search and select the service account and the role. Click Save.

Step 4: integrate the service account to Zenity
- Sign into Zenity portal, go to Integrations page, click Create new and select Google platform.
- Insert the Google organization ID and upload the JSON file created in step 1 above.
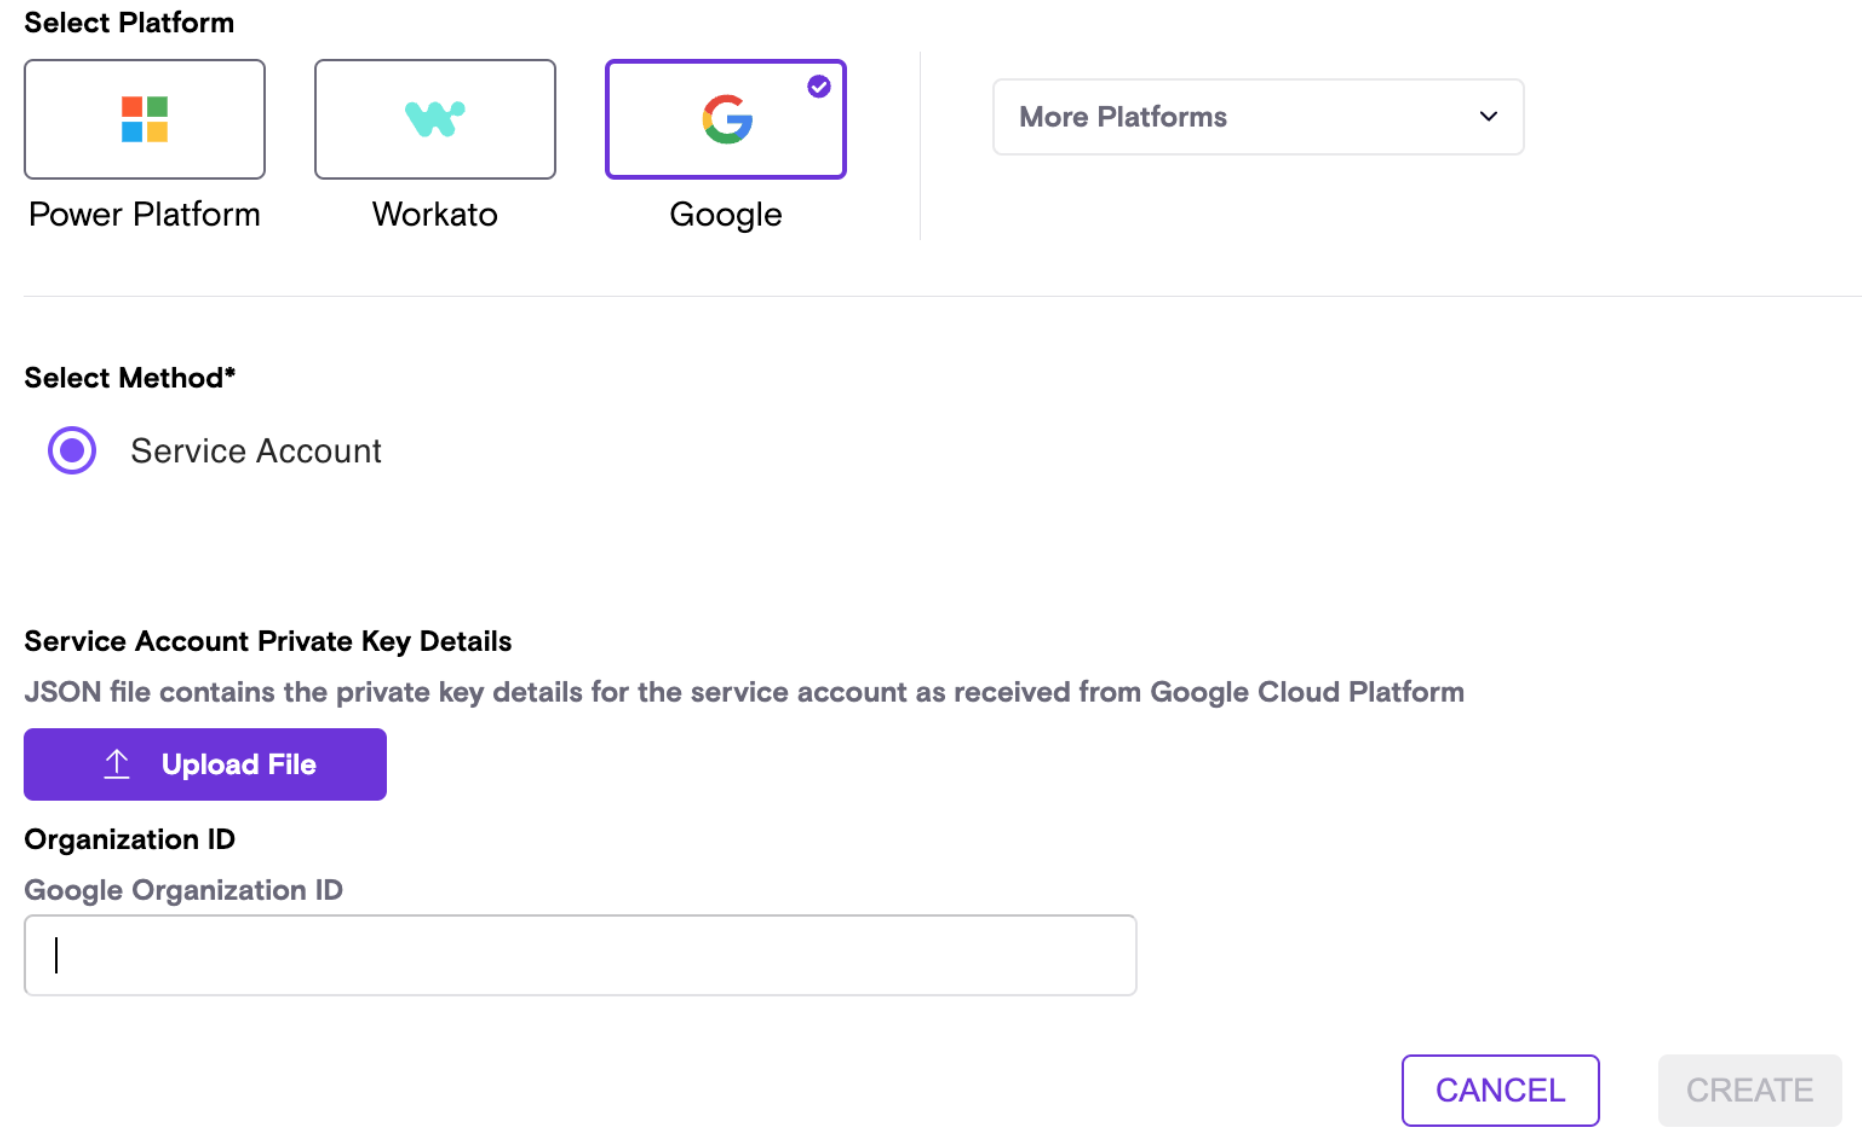
- Click Create.
Notes:
- Projects not having billing enabled, or vertex AI API enabled are skipped by Zenity when applying its event streaming.